Games
Century: A New World – Clarification of Some Rules
Introduction
Century: A New World is the third game in the Century series, following Century: Spice Road. As we already own and frequently play Spice Road, John thought we might be interested in trying A New World.
This is not a review of the game, but rather a few notes on rules issues we encountered.
The core mechanics of the two games are similar — collect yellow, red, green and brown cubes (they have thematic names, but the colours are what matter) and trade them to obtain enough cubes to purchase point cards. The trading mechanisms differ significantly between the two games. Spice Road is card-driven: players acquire trading cards that allow cube conversion in order to buy point cards. A New World is board-based: trading is initiated by placing settlers on action spaces.
The system is further complicated by the addition of artefacts and various symbols that influence trading efficiency and end-game scoring.
(updated: 3 March 2026)
Exploration Tiles and Compass Cards
In a two-player game, the first thing that struck me was that almost half the board — 10 of the 23 action squares — is covered by Exploration tiles from the outset.
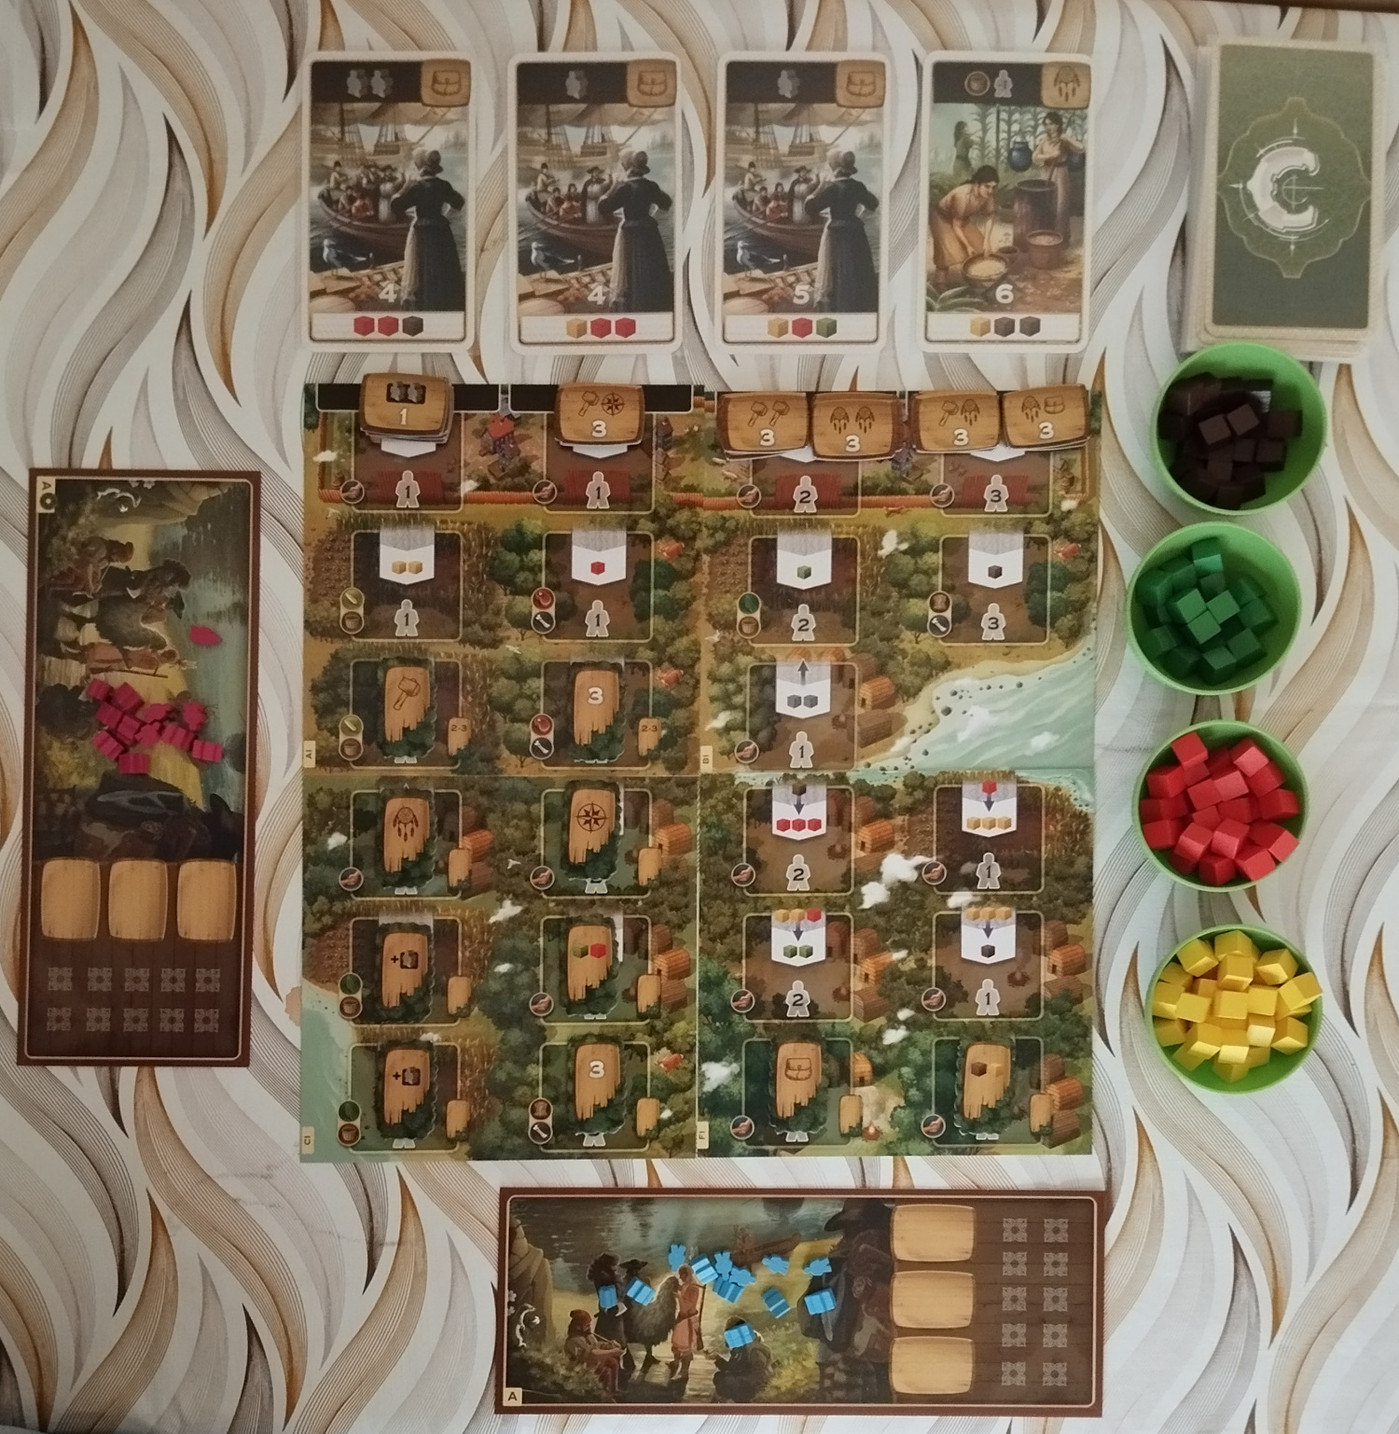
The layout of the board
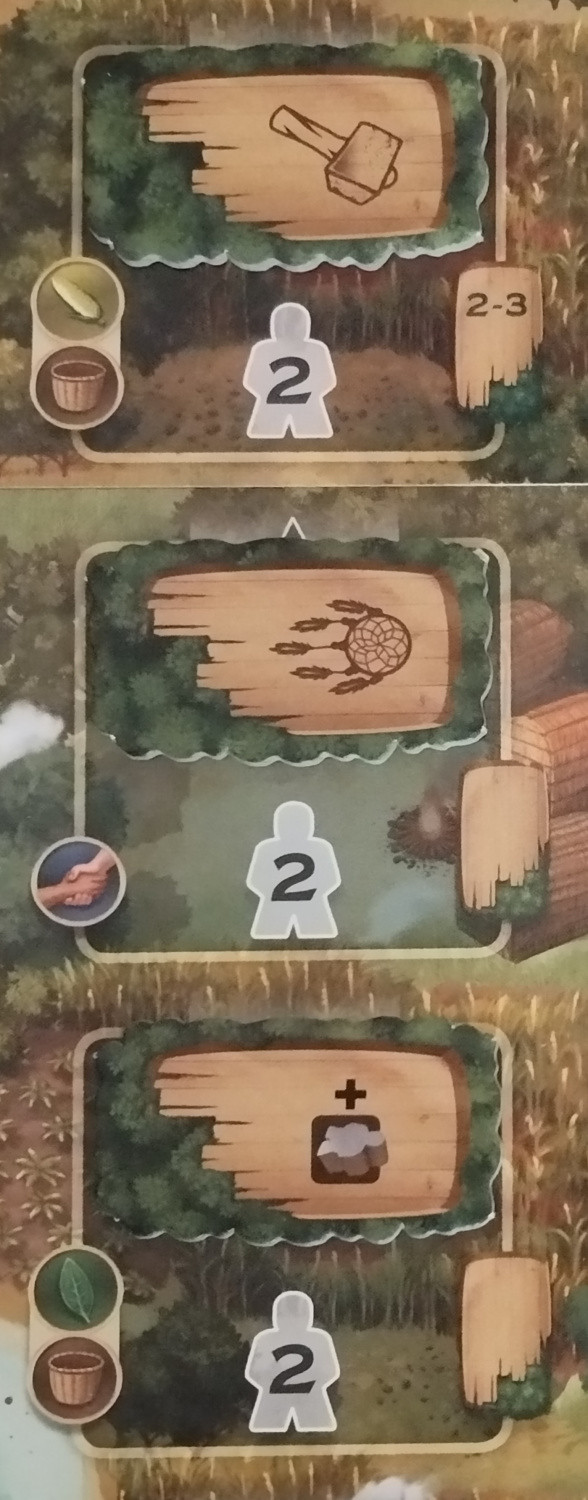
A close up of Exploration tiles
The rules are surprisingly vague about how these tiles are removed. This matters, because several useful trading squares are hidden beneath them. The only meaningful reference appears on the Overview sheet, under what is almost an unrecognisable crop of a points card:
Exploration cards have the following immediate benefit: when claiming the card, take one Exploration tile from the game board and place it in front of you. If it shows an immediate bonus, gain that bonus now. By removing the Exploration tile, you have uncovered a new location which can be used by all players from now on.
This single paragraph is effectively the entire rule governing the removal of Exploration tiles.
The wording could have been clearer with a minor adjustment, for example:
Exploration (Compass) cards allow you to immediately take one Exploration tile from the game board...
As only four Compass cards are available in the two player game, a minimum of six spaces (26%) will remain inaccessible even if every Compass card is purchased. This is a significant structural feature of the board, yet it receives minimal explanation in the rules.
A Compass point card
One possible house-rule solution would be to turn an Exploration tile sideways so that the trade beneath remains hidden, but the cost is visible. A player could then use the required number of settlers to acquire the Exploration tile directly (at the cost shown), gaining its bonus and revealing the trade square.
Exploration tiles turned sideways
Apart from revealing additional trading squares, purchasing an Exploration tile can also influence the end game. A 3-point tile or a symbol tile that completes a pair may prove decisive in a closely contested game.
(updated: 5 March 2026)
Native Help
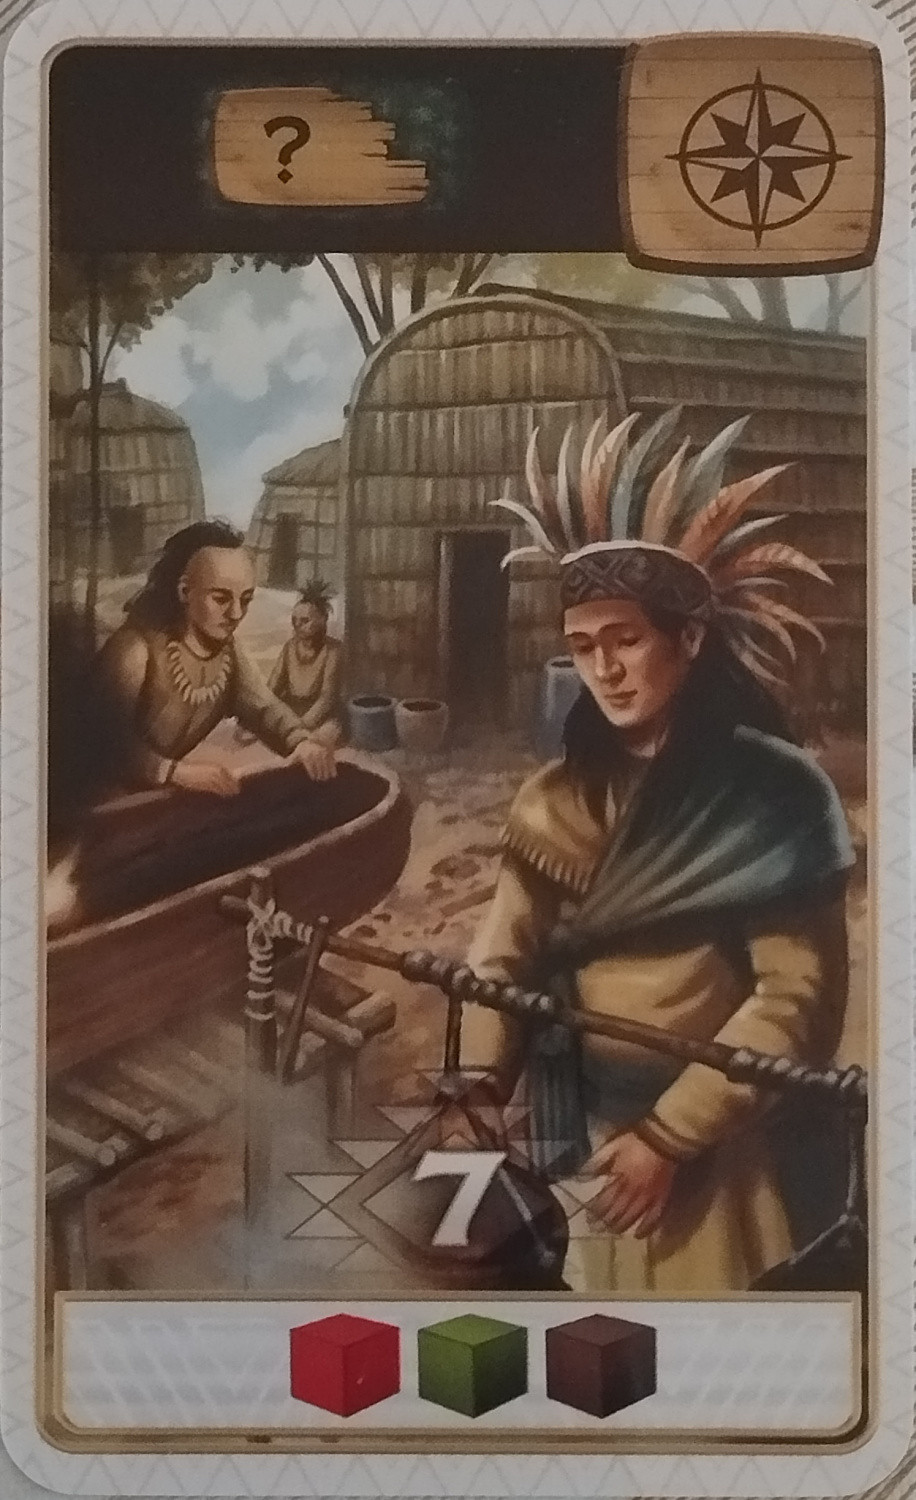
Native Help is another mechanism that is effectively explained only on the Overview sheet, illustrated by a small and not especially legible crop of a points card.
The Native Help bonus appears on certain points cards, indicated by a dreamcatcher symbol in the top-right corner. When activating a matching square on the board, this bonus allows a player to use one less settler than normally required.
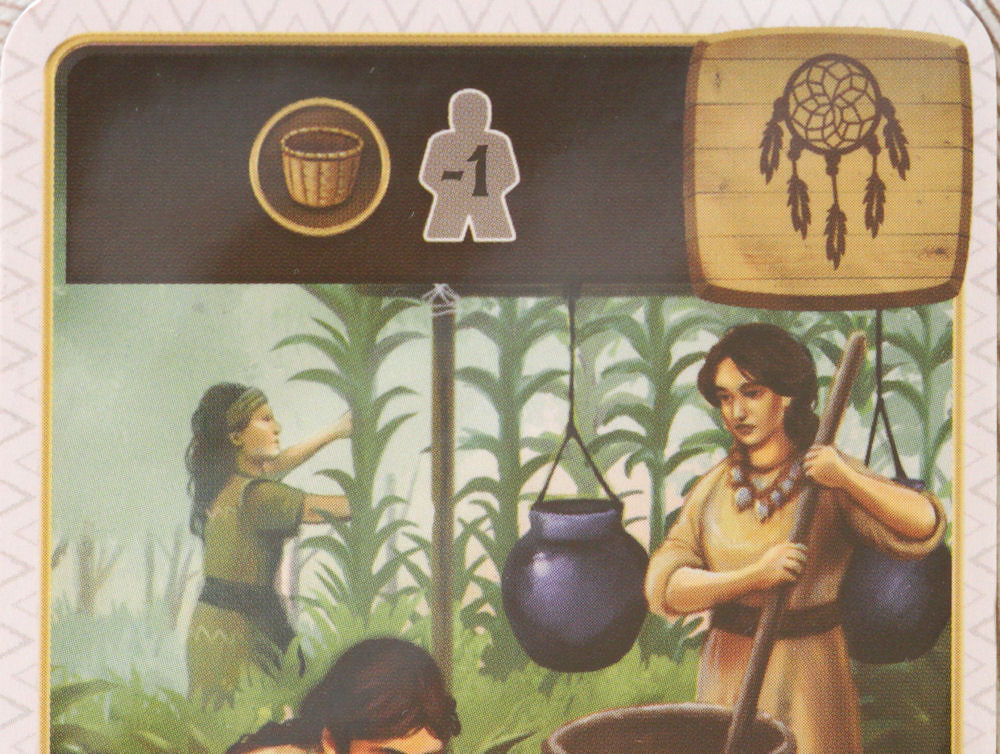
The top of a dreamcatcher card
The match is determined by the secondary symbol printed beside the dreamcatcher. If that symbol appears on the square being activated, the settler reduction applies. For example, in the card shown above, the bonus would apply only to a square displaying the basket symbol.
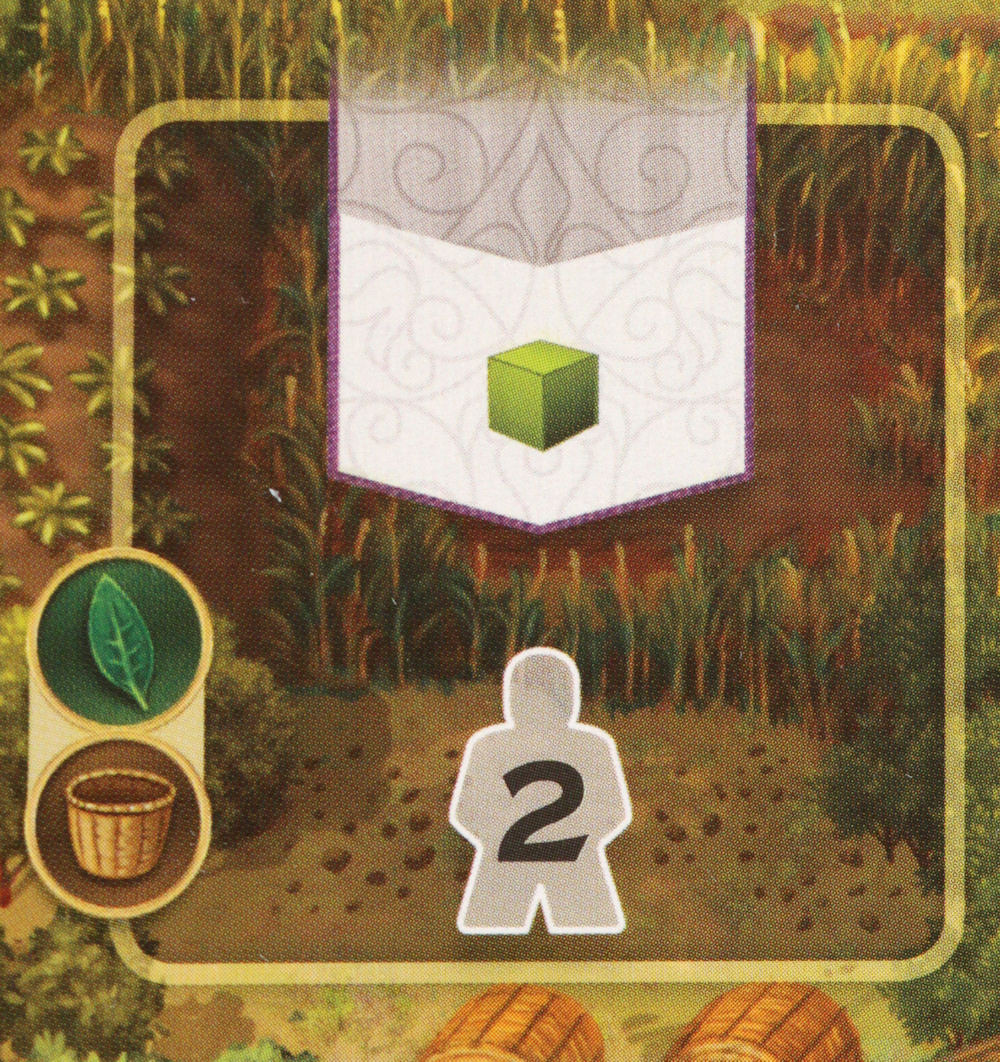
A square displaying a basket symbol
The effect of this bonus is cumulative. If a player holds multiple points cards with the same dreamcatcher/symbol combination, the reduction stacks accordingly. However, a square can never be activated without placing at least one settler.
Although not stated explicitly in the rules, the Native Help reduction also applies when displacing another player from a square. The reduced cost is calculated first, and the displacement is then resolved normally. This means it is possible to displace another player using fewer settlers than they have committed to that square.
This inference arises because several squares display secondary symbols while requiring only one settler. Such symbols could only come into play when one player displaces another, leaving more than one settler on the square. Otherwise, there would be no reason to depict the symbol on those squares.
Because displacement depends on the number of settlers currently on the square, using Native Help can make a square easier for another player to take. For example, if a square normally requires three settlers but is occupied using Native Help for one settler, another player can displace that settler by placing two.
(updated: 6 March 2026)
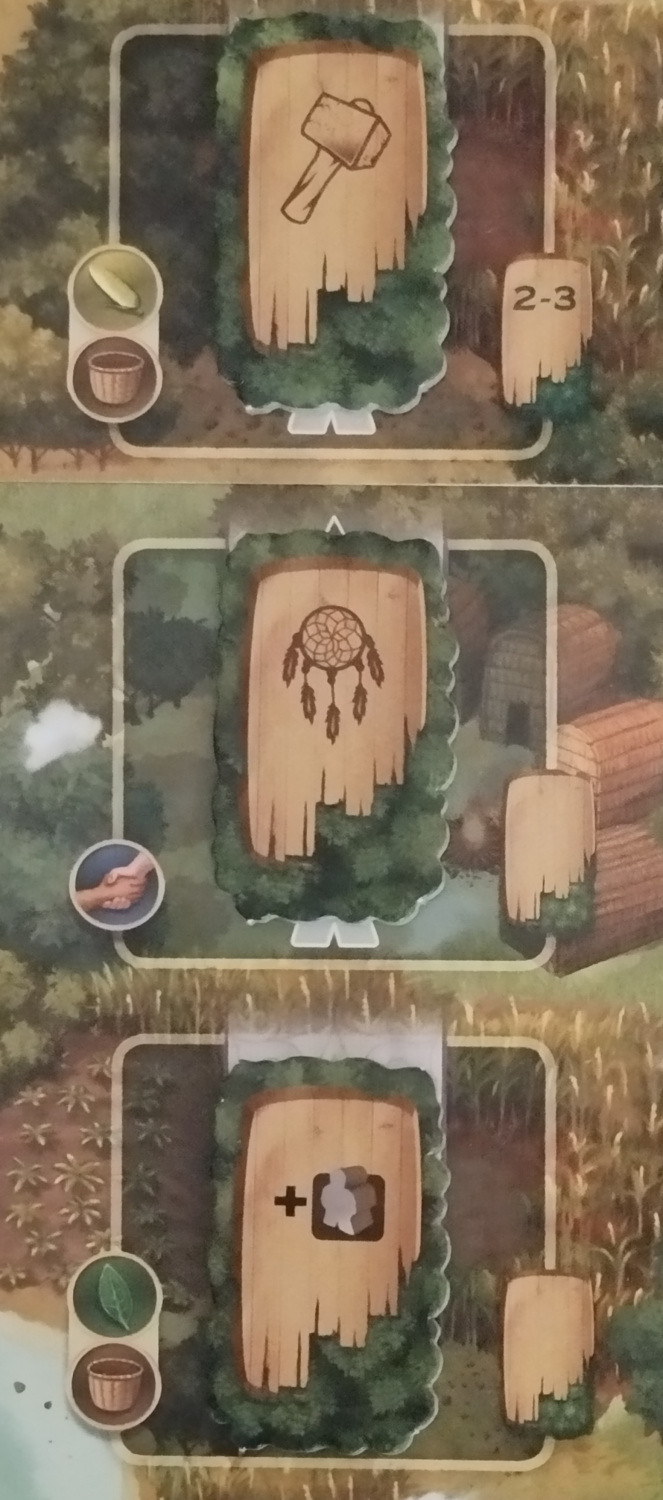
Grey Upgrades
There are two squares with Grey Upgrades: a two-cube upgrade and a three-cube upgrade (the latter is hidden under an Exploration tile on the C1 board).
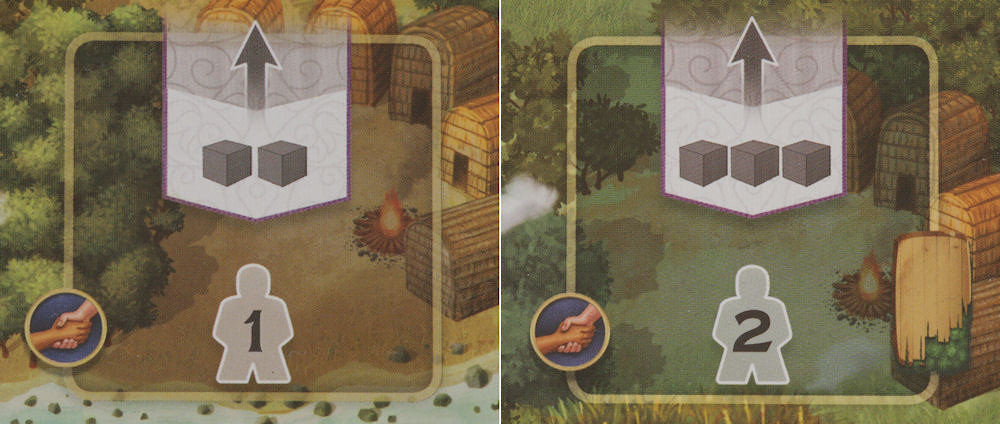
The two-cube upgrade square on the left and the three-cube upgrade square on the right
The rule for the using the two-cube Upgrade square is:
For each grey cube depicted in the center of the location you may upgrade one cube from your storage to the next level by returning it to the supply and taking a cube of the next level in exchange. You may upgrade the same cube multiple times.
In Spice Road, we have been playing the two-cube upgrade as:
- upgrading one cube by two levels; or
- upgrade two cubes of the same colour by one level.
A similar interpretation was applied to the three-cube upgrade (one cube by three levels or three cubes, of the same colour, by one level).
While watching clips of the game being played, I noticed cubes of different colours being upgraded and initially assumed this was incorrect. However, the rule quoted above, does not specify that the cubes being upgraded must be the same colour.
With the two-cube upgrade, this distinction is only significant when upgrading a yellow and a green cube. With the three-cube upgrade, however, the possible combinations can make a substantial difference — including upgrading one cube by two levels and another by one.
A house rule I am considering would allow a player to upgrade one cube by one level and forfeit the second opportunity (two-cube upgrade), or upgrade two cubes by one level and forfeit the third (three-cube upgrade).
The following rule from Spice Road reinforces that my house rule is fully within the spirit of the game:
When playing a 'Upgrade 2', you MAY upgrade a cube on your caravan 1 level and then upgrade a cube 1 level again. It is not mandatory to upgrade all cubes from an upgrade card. For example, you may upgrade a yellow cube to a red cube and then upgrade another yellow cube to a red cube, or you can upgrade a yellow cube to a red cube and then upgrade that red cube to a green cube.
Notice that the rule explicitly allows skipping upgrades or splitting them between different cubes, exactly as my house rule proposes.
(updated: 5 March 2026)
Face-up or Face-down?
The rules state that the point cards deck must be placed face-up, and the accompanying illustration clearly shows the deck arranged in this manner.
... Afterwards, shuffle the Point cards and place one at random above each Fort location at the top of the game board face up.Place the remaining cards as face-up draw deck (D) close by.
It is not immediately obvious why this visibility is required, as knowing which cards remain in the deck does not materially change the mechanics of acquisition or scoring. For this reason, I prefer placing the deck face-down (see first pic), which preserves a degree of uncertainty about what is still to come. Interestingly, in all of the video clips I have watched of the game being played, the deck is also placed face-down.
As the orientation of the deck does not alter gameplay, this is one rule that can reasonably be adapted to personal preference.
(updated: 6 March 2026)
Concluding remarks
These interpretations of the rules have made the game easier for us to play. Whether using the rules as written, or with these enhancements, a game can comfortably be completed in well under an hour.
(updated: 6 March 2026)
