Photography
Using a camera to take a "screenshot"
Introduction
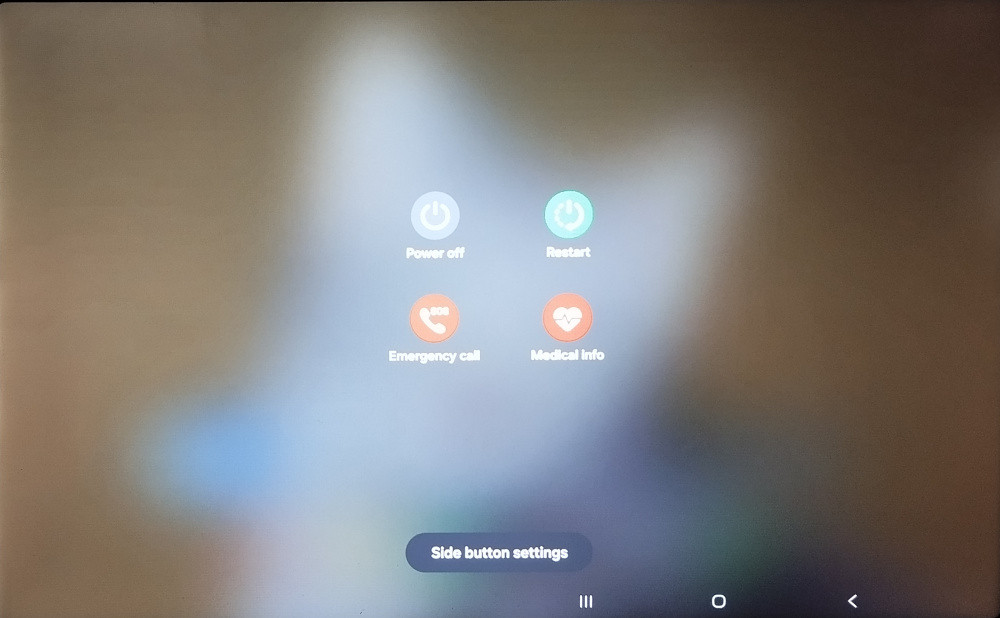
While working on a note about the behaviour of the power button on a Samsung tablet, I needed a set of screenshots to illustrate what was happening. Under normal circumstances this would be trivial. In this case, however, the usual screenshot methods were not available, so the only practical option was to photograph the screen externally.
That sounds straightforward — point camera, press shutter button — but photographing a modern display introduces a set of technical problems that do not arise in ordinary photography. Reflections, refresh cycles, moiré patterns and geometric alignment all enter the picture. What follows is a record of the issues encountered, and the solutions that proved workable.
Setup
The first requirement was a controlled setup. You do not need a studio, but you do need an environment that behaves the same way every time you press the shutter button.
Photographing a glossy surface such as a tablet screen immediately raises the problem of reflections: me, the camera, the tripod, and anything else lurking behind it. Side lighting — whether from a window or an overhead light fitting — can introduce uneven illumination and gradients across the display. These issues were largely controlled by working in a darkened room with a plain, unadorned wall behind the camera. Although not strictly necessary, I also used a remote release so that I was not standing directly behind the camera, removing one more potential reflection from the scene.
The screen itself is not static. The Samsung Tab A9+, by default, refreshes at 60 Hz, which means the shutter speed must be chosen carefully. At the wrong speed, banding appears as the shutter samples only part of a refresh cycle. In this case, a relatively slow shutter speed, combined with an aperture of around f/8, allowed the sensor to integrate across refresh cycles and avoid visible banding.
Finally, geometry matters. The optical axis of the lens must be as close to perpendicular to the tablet surface as possible. Even slight deviations introduce keystone distortion, which complicates later correction and reduces usable resolution.
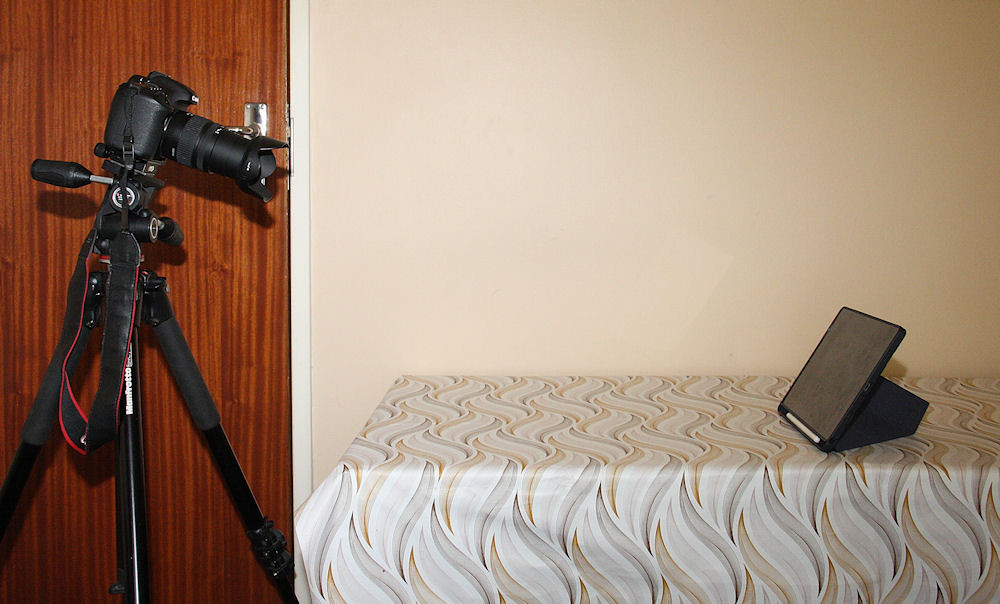
Canon 7D with a Sigma 18-125 mm lens and the tablet
I used the Sigma 18-125 mm lens for these screen photos, primarily because it has a reliable and precise manual focus mechanism.
(updated: 12 February 2026)
First attempt: the Canon 7D
I took several shots using the setup shown above in order to refine the lighting and exposure settings. The chosen exposure avoided visible banding, but another problem quickly became apparent: pronounced moiré interference patterns across the upper right quadrant of every frame.
Moiré patterns in the Canon 7D images
The Canon 7D has a relatively high pixel density for an APS-C sensor. When photographing another regular grid — such as the pixel structure of an LCD panel — the two can interact and produce aliasing artefacts in the form of moiré patterns. In this case, the interaction between the sensor and the tablet’s display was sufficient to generate clearly visible interference across part of the frame.
Minor adjustments to focus, aperture, and even slight changes to the alignment of the camera relative to the screen did not eliminate the effect. The pattern would shift or change character, but it did not disappear.
Some pincushion distortion is visible in the images, particularly toward the edges of the frame. This is a known characteristic of the Sigma 18-125 mm lens at this focal length. I chose not to correct it in post-processing, as the purpose of the exercise was to examine sensor–display interaction rather than to produce a geometrically perfect reproduction.
(updated: 14 February 2026)
Second attempt: a phone camera
I then tried a phone camera. I had previously read that modern phone image processing can suppress aliasing artefacts, so it seemed worth testing.
The phone was mounted on a Joby Gorillapod using a suitable holder for stability. As a remote trigger, I used my smartwatch.
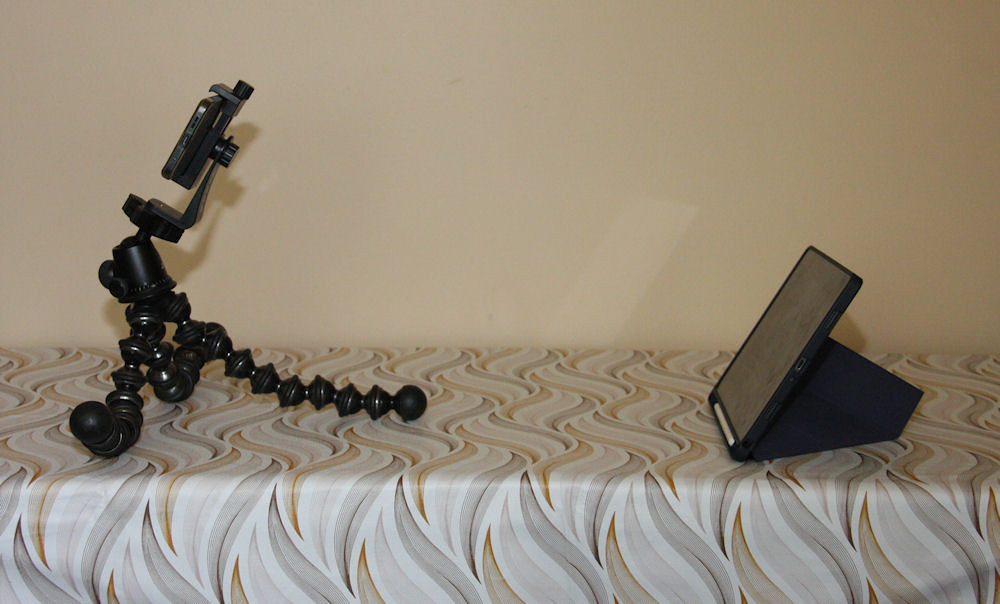
Phone mounted on a Joby Gorillapod
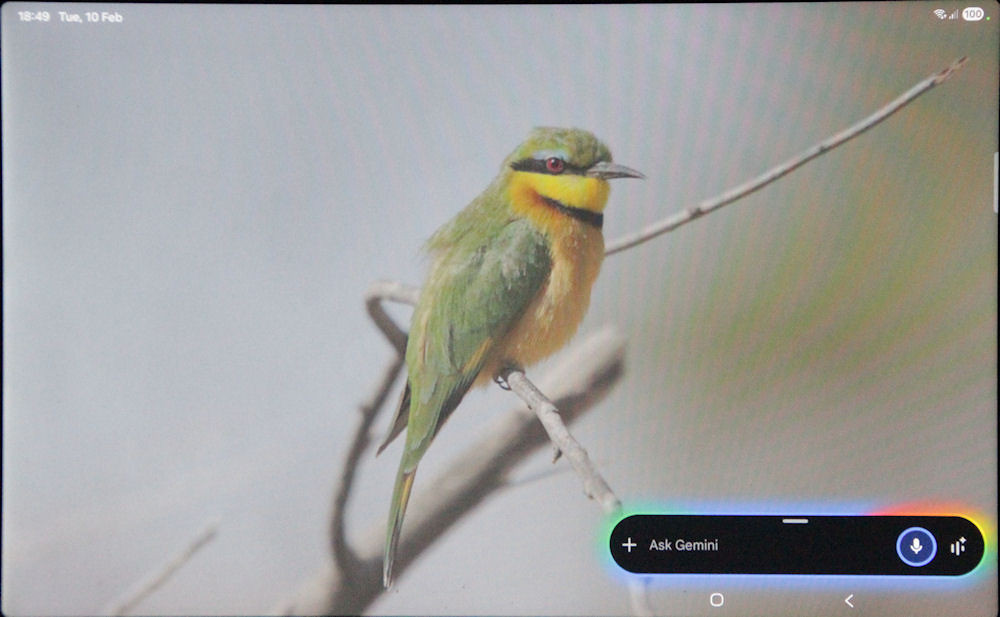
The resulting images did not show the pronounced moiré patterns seen with the 7D. However, I was unable to obtain text rendering that was as crisp and well-defined as with the DSLR.
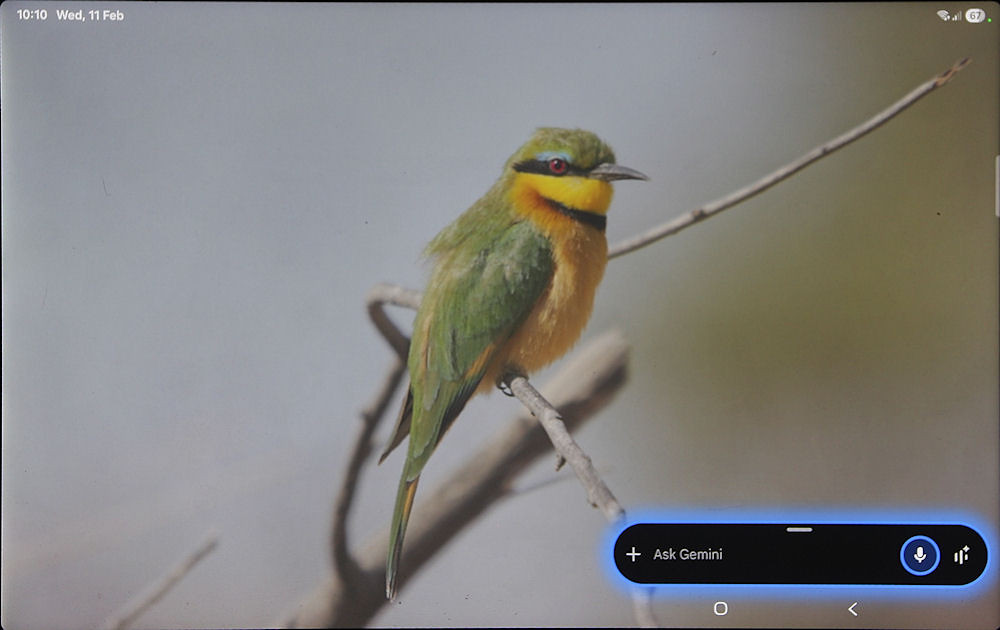
Screen photograph taken with a phone
(updated: 12 February 2026)
Third attempt: Canon 40D
The next option was the Canon 40D, using the same controlled setup as the 7D. The 40D had not been used in years, which introduced its own set of issues (see footnote).
Success at last
Shot details:
- ISO 100
- f/8
- t = 1/3 s
Unlike the 7D, the 40D did not produce visible moiré patterns under the same conditions. With its lower pixel density and larger photosites, the interaction between the sensor and the tablet’s display grid was evidently less problematic, resulting in a clean and stable image.
Footnote
The first issue encountered with the 40D was power. Both batteries were flat, and even after charging indicated only about 20% capacity remaining. If this camera was to be used, the pictures would have to be taken quickly.
The second issue was more subtle. There were images on the CF card in the camera, and these could be reviewed without difficulty. However, after taking several screen photographs, the image files could not be accessed when the card was connected to a computer. Of the three cards of this brand and model (SanDisk Ultra 50 MB/s, 8 GB) in my possession, only one was working.
The images were ultimately captured using a much older 1 GB SanDisk Ultra II card, without any issues.
(updated: 14 February 2026)
Concluding remarks
This exercise reinforced two practical points. First, photographing a display is not the same as capturing a digital screenshot; the interaction between sensor and screen can introduce artefacts that are entirely absent in an on-device software capture. Second, older hardware is not necessarily a disadvantage. In this case, the lower pixel density of the 40D's sensor proved beneficial.
The use of a relatively slow shutter speed also played an important role in eliminating refresh banding. At 60 Hz, the display is cycling through refresh intervals rapidly. A fast shutter speed risks sampling only part of that cycle, which can produce visible horizontal banding. By using a longer exposure, the sensor integrates light across multiple refresh cycles, effectively averaging out those fluctuations and producing a uniform result.
In short, the problem was not solved by a single setting, but by a combination of controlled lighting, careful alignment, appropriate exposure, and choosing the camera whose sampling characteristics were best suited to the task.
(updated: 14 February 2026)
Back to Photography
