Android Apps

eWeLink
Introduction
I recently bought a Sonoff Basic smart switch. Like a lot of things one purchases these days, there was no documentation with the device. This means one has to rely Google for help. From Google, I found that eWeLink is probably the only app that can be used to control Sonoff devices. Following the instructions on the eWeLink site makes setting up the app, and the switch, "fairly" straight forward. One thing to be aware of though, is that the Sonoff Basic switch can only connect to a router broadcasting on 2.4GHz, and not 5GHz.
Once you have created an account on the eWeLink site, you can connect your mobile device and the Sonoff switch to each other. You will have to create a name for the device, and place it in a "location" in your house recognised by the app. To start with, I used one of eWeLink's default locations, Other. As the device was going to be used to control a heating belt on a fermenter, I called it Brewery.
More locations can be added from the overflow menu (...) on the right side of the location bar (see Fig 1 below).
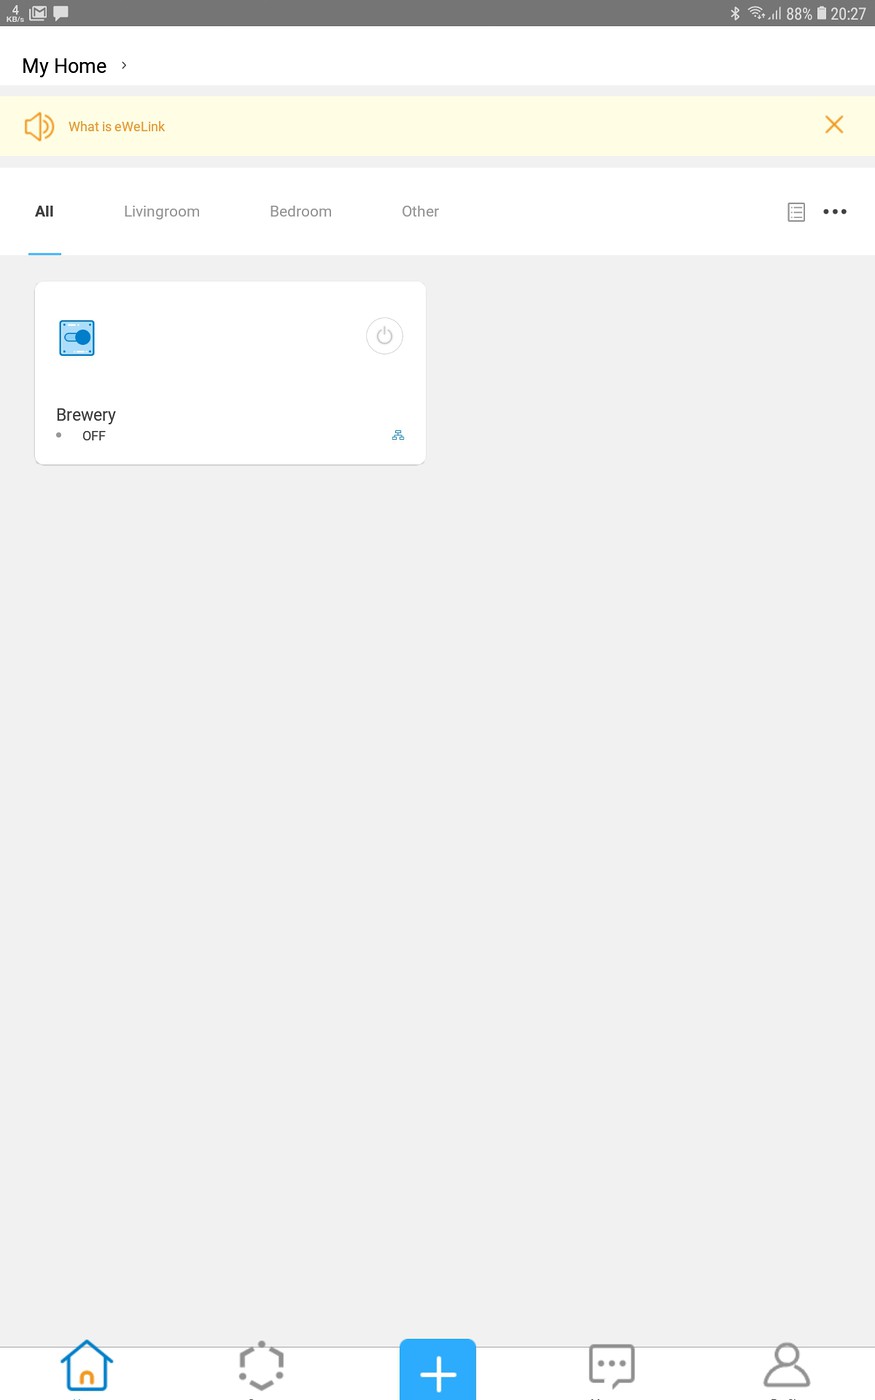
Fig 1. The eWeLink device screen
Devices can be added from the + button on the bottom of the eWeLink home screen. This can be a bit tricky, but if you follow the instructions, it is not too difficult. Once you have added your device, it appears in a block, like the one marked Brewery in Fig 1. The device can be switched on and off from the "power button" on the top right of the block (this is unfortunately not clearly visible due to poor choice of colour with a low contrast to the background).
The words on or off on the bottom left of the block will show the state of the switch (the colour of the on/off switch also changes).
Tapping in the block will take you into a screen such as the one of those shown in Fig 2.
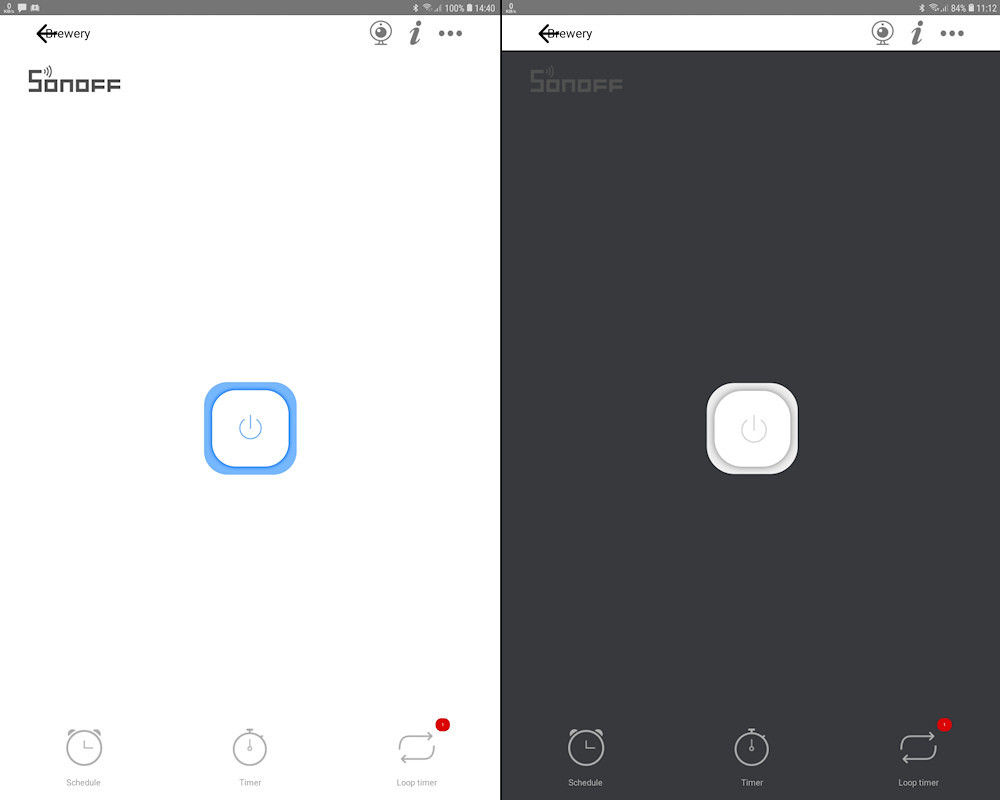
Fig 2. The left pic shows the device is on, the right off
The device can be switched on and off by tapping on the button in the middle of the screen.
In Fig 2, the important feature to note is the row of options at the bottom of the screen. These options allow you to program the device. The red notification mark on the Loop Timer shows that a program is active.
In the sections below, I will show my attempts at trying to control the heating belt on my fermenter. My plan was to have the belt on for an hour then off for three, at specific times of the day.
Programming the device
The eWeLink help pages are mostly sufficient to program the device. Programming the device requires setting timers to switch the device on and off when necessary. I will discuss some areas where I had problems with this seemingly trivial task.
The first thing that stumped me is that I didn't realise that throughout this app, spinners are used to set the timers.
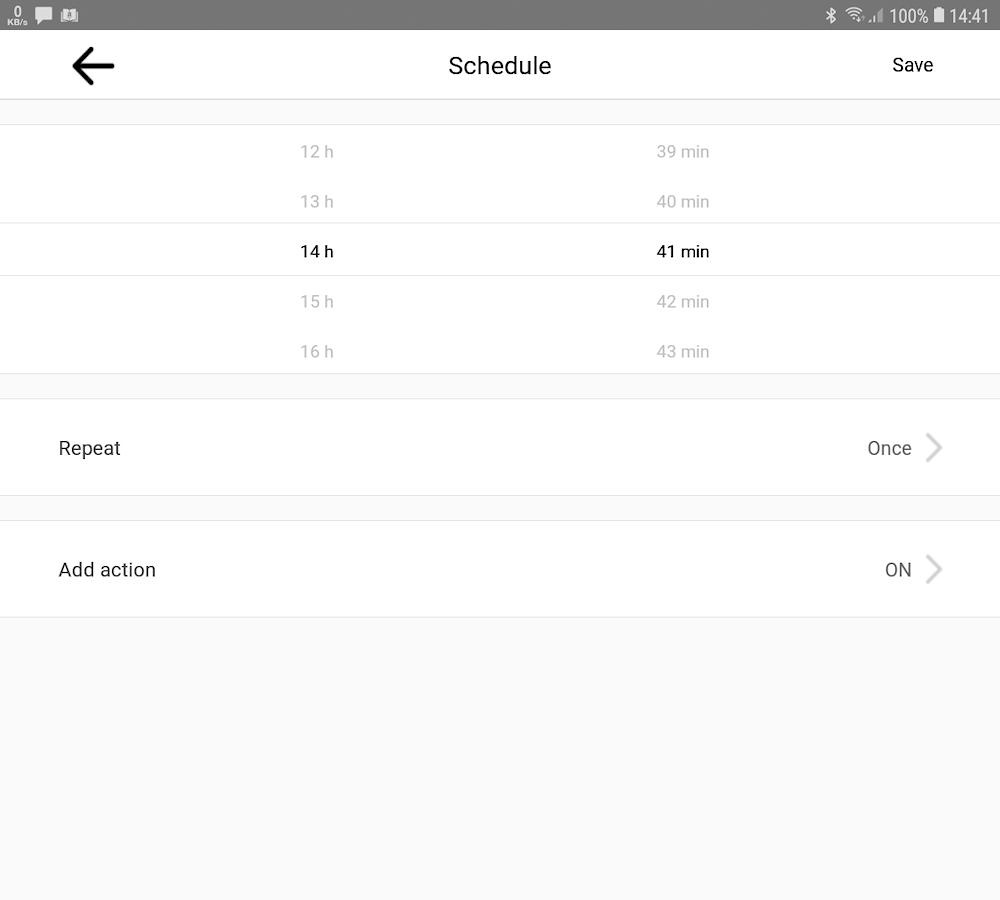
Fig 3. One of the screens requiring time as an input
On opening one of the screens to program the device, one is presented with a screen such as Fig 3, with the timer set to the current time (in this case 14:41). The spinners range from 0 to 24 on the hour side, and 0 to 59 on the hour side. These do not wrap around, so you will have to spin up or down to reach the required value.
Using the Schedule option
The first thing I tried to was to Schedule the device to switch on and off when I wanted it to. This was as simple as adding on and off events to the Schedule screen shown in Fig 4.
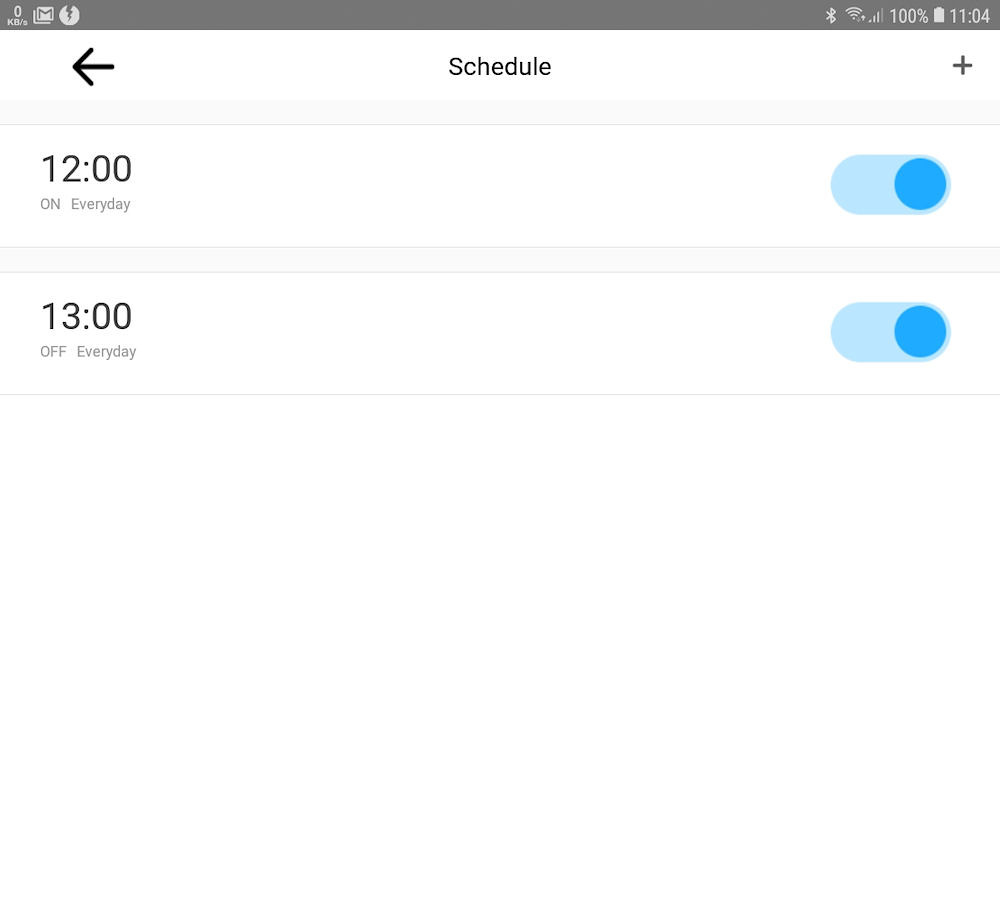
Fig 4. Scheduling a series of events
Unfortunately, there is quite a rigmarole to go through in order to actually get to the stage shown in Fig 4.
In order to start setting up an event, press the + shown on the top right of Fig 4. This takes you to a screen such as that shown in Fig 4a.

Fig 4a. Scheduling a series of events
You first need to select the time you want the event to occur. You then need to select how often you want it to occur, by selecting Repeat.
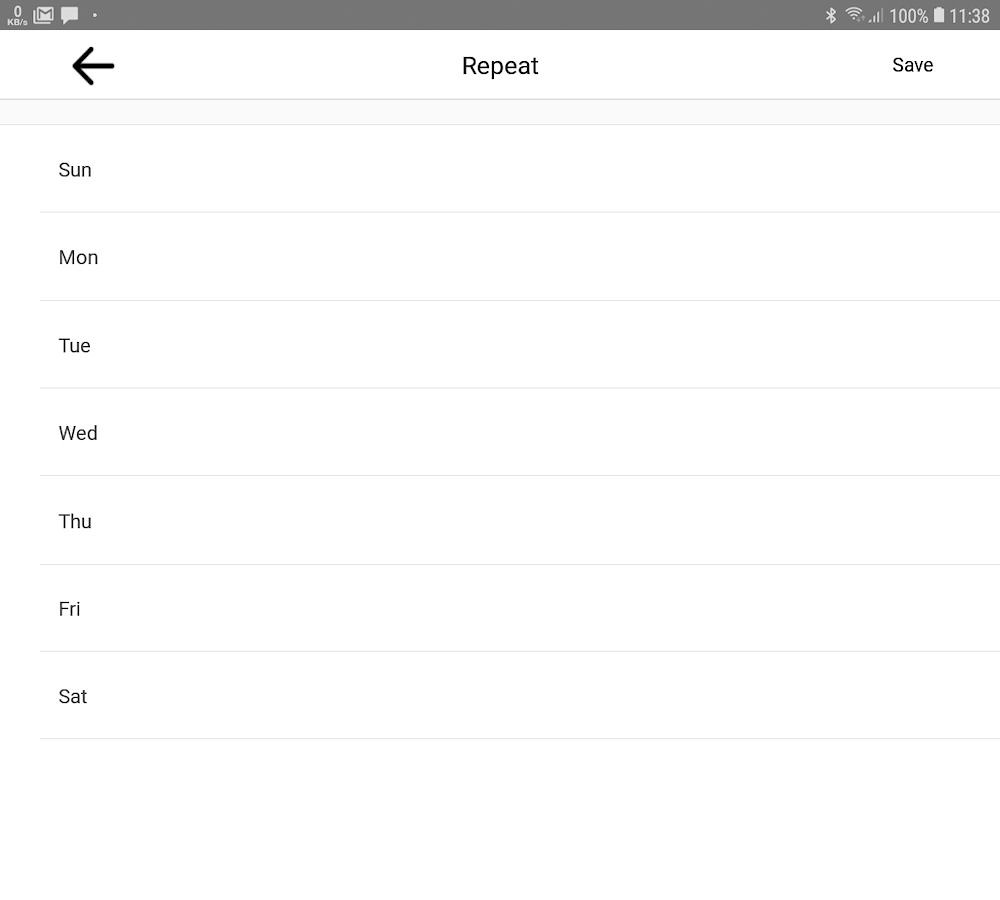
Fig 4b. Scheduling a series of events: selecting the periodicity
Here is the first irritation: there is no way to select every day manually, you have to select each day individually. Then the second irritation: you have to press Save (top right) each and every time you change anything. In this case, you get taken back to the screen shown in Fig 4a.
From Fig 4a, you now choose what kind of event you want to occur (On or Off) by selecting Add action. Again you have to select Save to get back to Fig 4a.
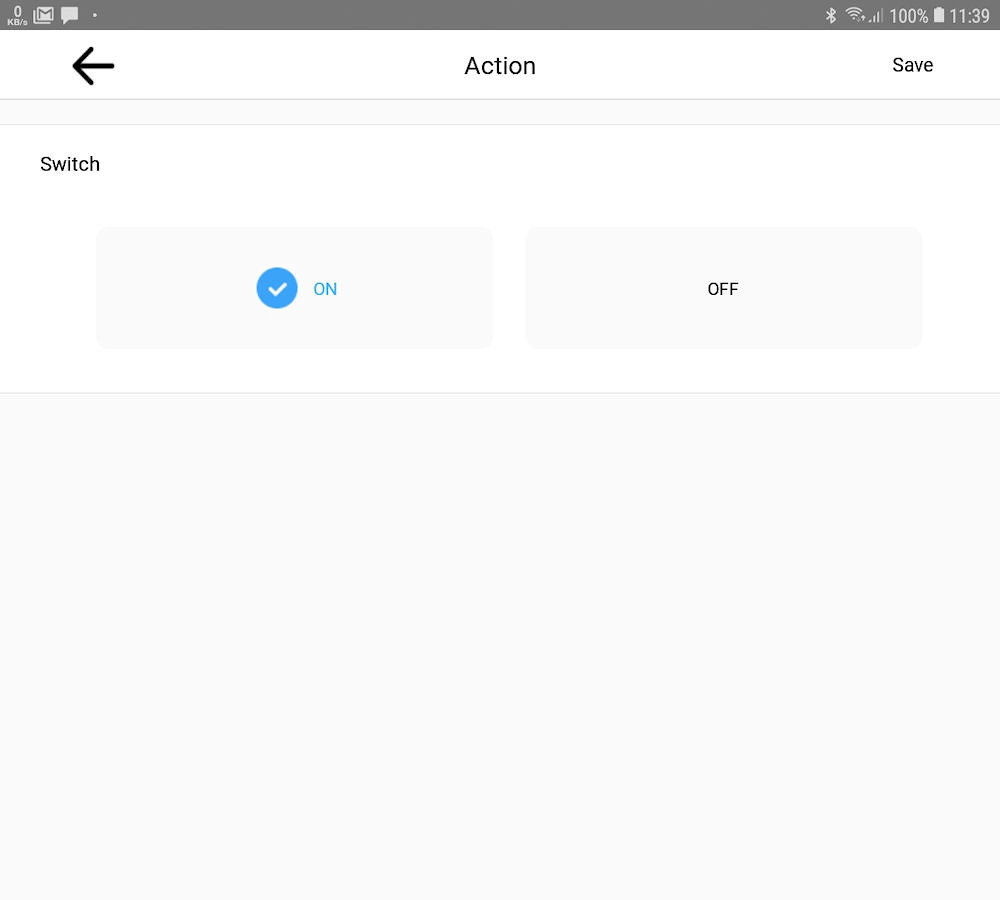
Fig 4c. Scheduling a series of events: selecting the action
This process is repeated until you have added all your events.
Unfortunately, I found during my testing that the Sonoff Basic can only handle eight events. This made the Schedule option unusable for me. I wanted a four hour cycle, with one on and one off event in cycle. In a twenty four hours, that would mean 12 events (six on and six off).
This meant I had to find an alternative method for programming the device. One of these options was to use the Loop Timer on the bottom right of Fig 2.
Using the Loop Timer
There are two loop timers available: Repeat and the Alternate timer. The Repeat timer is pretty straightforward, it allows you to switch the device on once a day for a period and the device will switch off at the end of that period. Programming is simple enough if you follow the instructions on the eWeLink website (link given above).
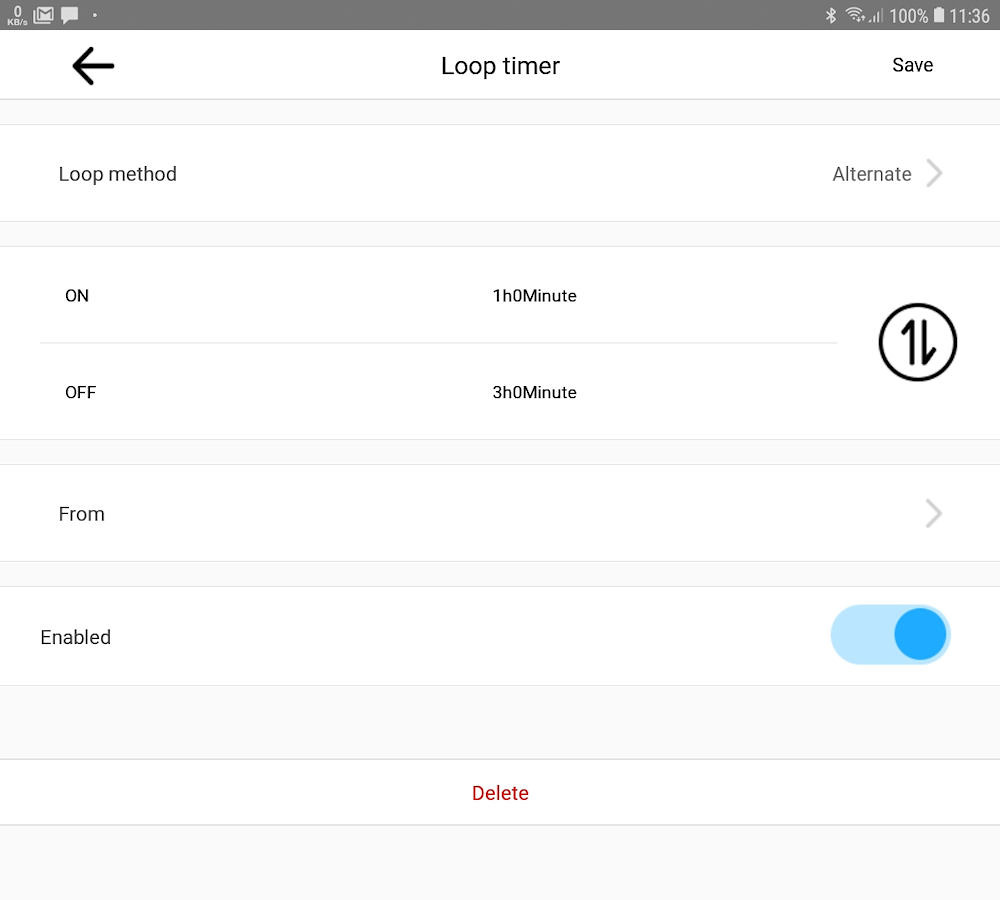
Fig 5 The Loop timer start screen (here with a Loop Alternate timer set)
In order to select which Loop Timer you wish to use, select the Loop Method near the top of the screen in Fig 5.
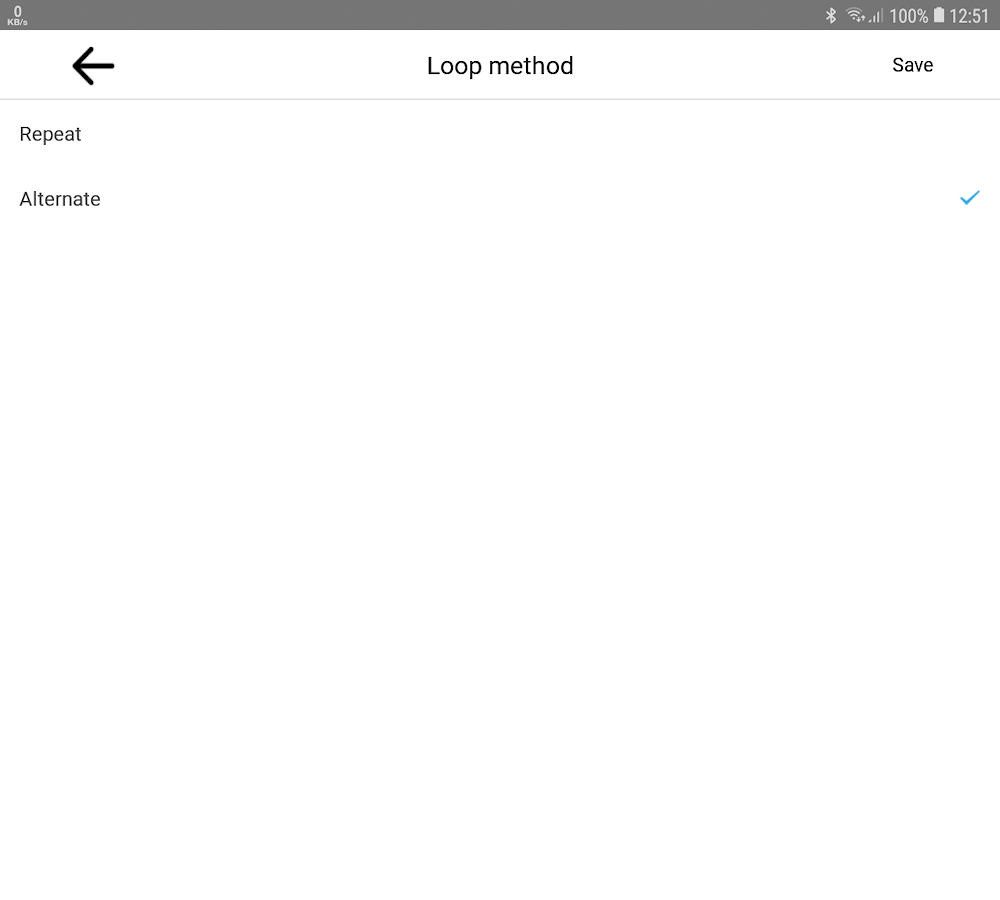
Fig 5a Selecting a Repeat or Alternate Loop timer
The Loop Alternate timer is a bit more tricky, especially as the instructions given on the eWeLink website are wrong (22 July 2020).
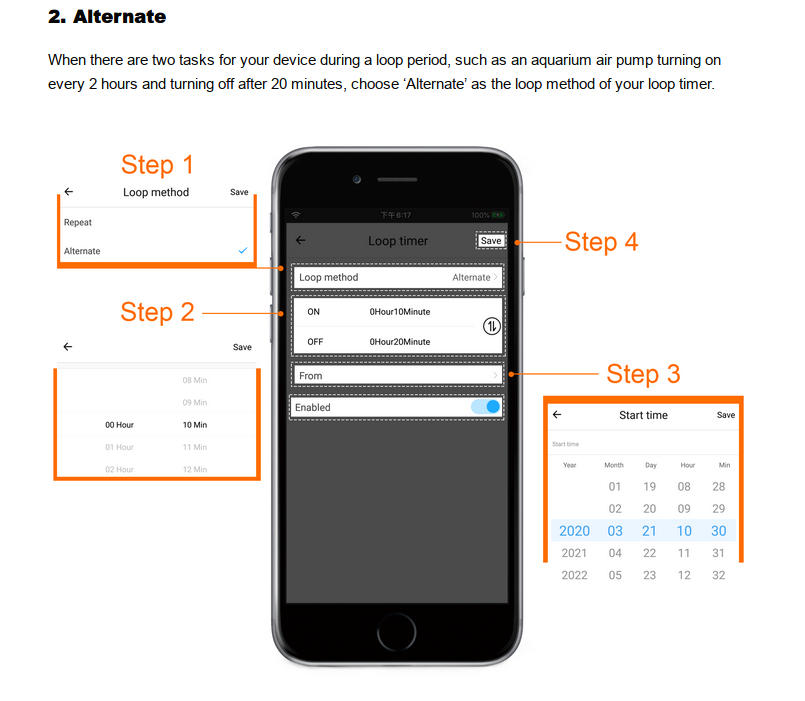
Fig 5b The Loop Alternate timer instructions from the eWeLink website
The blurb at the start says exactly what I was looking for to control the heating belt on my fermenter. You are setting up a timer which turns the device on every two hours and switches it off after twenty minutes. However, if you look at settings programmed in their example shown in Fig 5b, the On time is 10 minutes, and the Off time is 20 minutes. There is no way that a first time user can figure out where the two hours, nor the twenty minutes, in their scenario comes into play without trial and error experimentation. What I found was that the time that the whole event lasts (in their example, 2 hours) is the sum of the On and Off times. For their example, the On time should be 20 minutes, and the Off time 1 hr 40 min, to give a total time of 2 hours.
In my case, I was looking at a four hour cycle, with the heater On for one hour and Off for three hours. This is shown in Fig 5 above. With this in mind, the instructions given in Fig 5b can be followed.
Alexa
Alexa can control the device using a similar principle to the eWeLink app, once you have installed her eWeLink skill. She will recognise the name you have given to the switch, and switch it on and off on command. The switch however, must be named from a device with an active eWeLink app for Alexa to be able to access it - this cannot be done by Alexa.

Alexa showing the device on in the top pic and off in the bottom
Alexa can be programmed to do certain repetitive tasks from the Alexa app on (in my case) an Android device.
Irritations
Something I found very irritating about the eWeLink app is that you get logged out of the app very regularly, and it does not remember your password. I have not found out what triggers the logout, but while I was testing features of the app it was enough to make me pretty upset.
Only being able to have eight tasks can be an issue as mentioned above, but this is a hardware limitation of the Sonoff Basic switch.
Likes
One unexpected bonus I found was that after a power outage, the device remembers the last program.
The device can function without an Internet connection, once it has been programmed.
(updated: 19 July 2020)
