Camping
Snomaster Leisure 75L Fridge
Introduction
During 2022, Makro had a special on the Snomaster Leisure Series SMDZ LS75 fridge, which prompted me to buy it as it is a dual compartment fridge/freezer (this fridge is no longer part of the Snomaster range - see endnote). I would have preferred a slightly smaller steel jacketed fridge, but these devices are very much more expensive than the Leisure Series fridges.
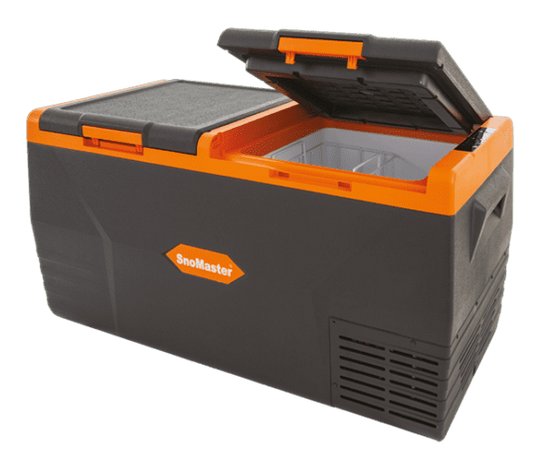
The Snomaster SMDZ LS75 fridge
The fridge casing is made from polypropylene, with cyclopentane as the insulating material between the walls (much like some of the better quality cooler boxes, such as Coleman). The top has an area of 840mm x 450mm and it has a height of 480mm. It weighs 21kg. It has moulded "handles" on the sides. These handles make it virtually impossible for two people to carry the fridge as there is too little to grip on to. Although not shown in the pic above, the newer version of the fridge has mounting/securing bolts below the handle (discussed later).
The volume of the left compartment (as shown in the pic below) is 45L, while the right one is 30L. Each compartment can be set at different temperatures and each compartment has a powder coated steel basket, which makes it very easy to pack the fridge.
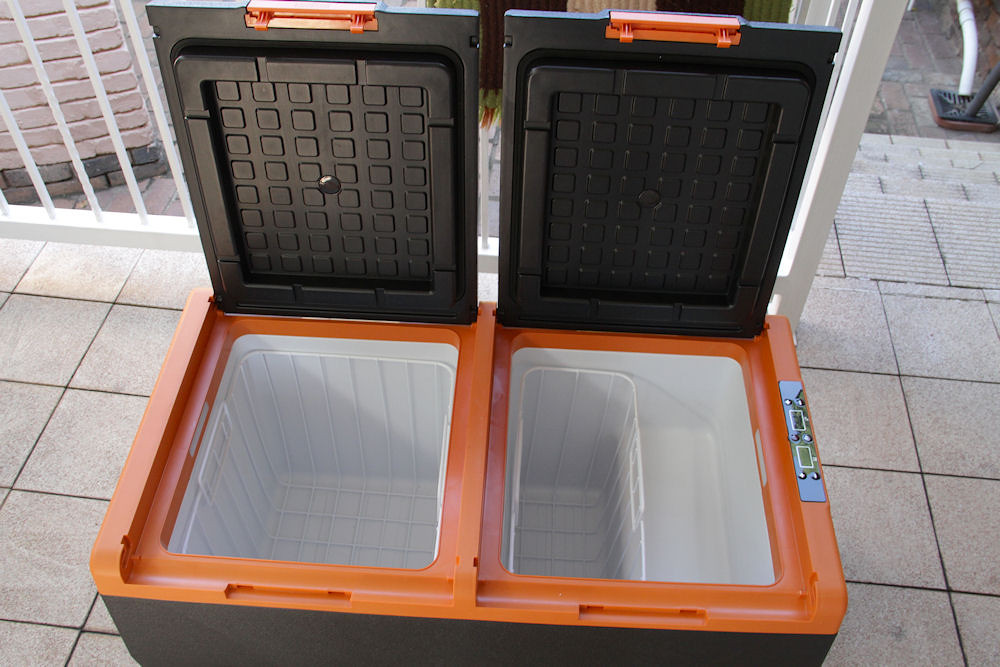
The fridge compartments, showing the baskets
The control panel is on the right of the lids in the pics above. Figuring out how to operate the controls took a bit of trial and error.
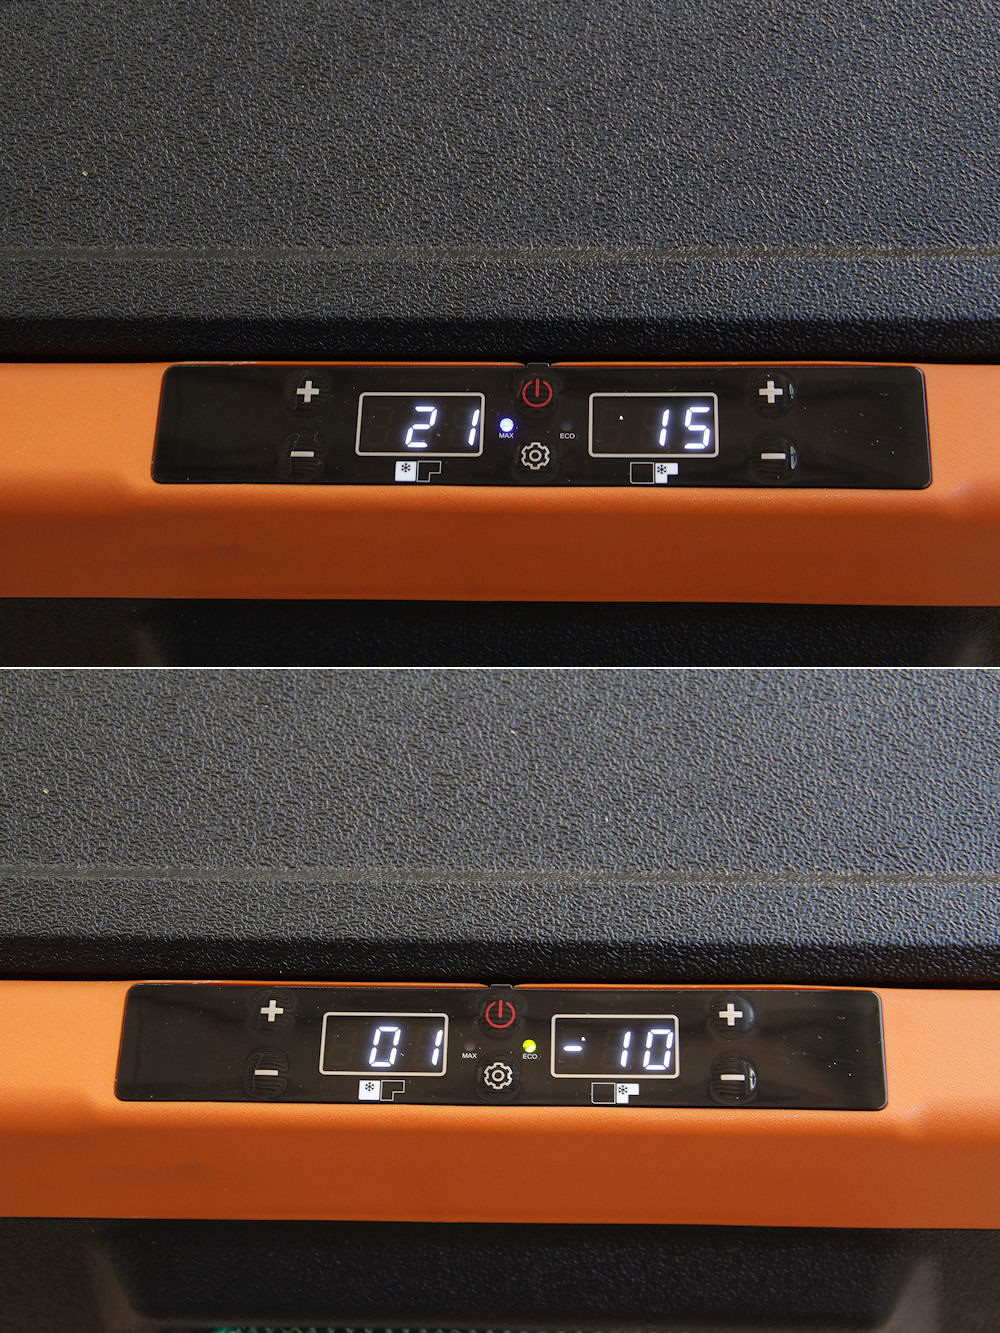
The control panel with the top pic in Max mode, the bottom in Eco mode
I normally run the fridge in Max mode (73W) until my required operating temperature is reached, after which I switch to Eco mode (43W). The readouts give the temperature of each compartment. Pressing a + or - key displays the set temperature of the associated compartment. Repeated pressing will move the set temperature up or down (I have the temperatures set at 4°C and -10°C). The control system does remember the settings after the device is shut down. The display cannot be switched off while the fridge is running — it is very bright at night.
The lids have a rubber sealing ring recessed into the plastic. If you look at the pic below, you will see a ridge around the edge of the compartment. This fits into a groove in the sealing ring to complete the seal.
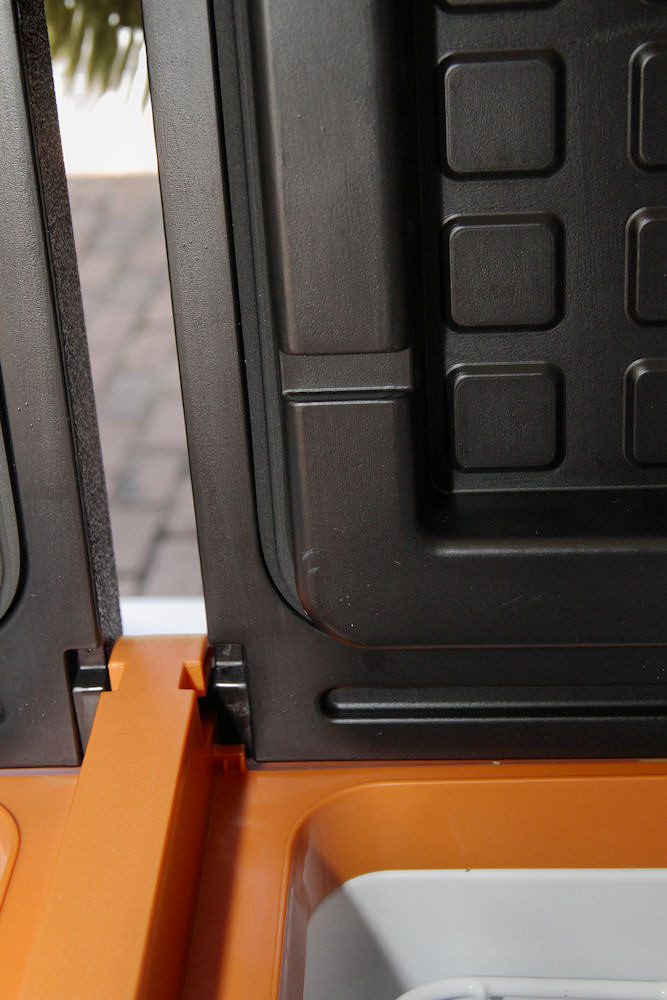
The rubber seal on the lid
The lids on the compartments can be reversed, which can help with the orientation of the fridge in the vehicle. (Link to video.)
The power cord is fitted with a cigarette lighter type plug. The AC power brick has a cigarette lighter socket to receive this plug. The cigarette lighter plug can also be changed to a Hella plug.
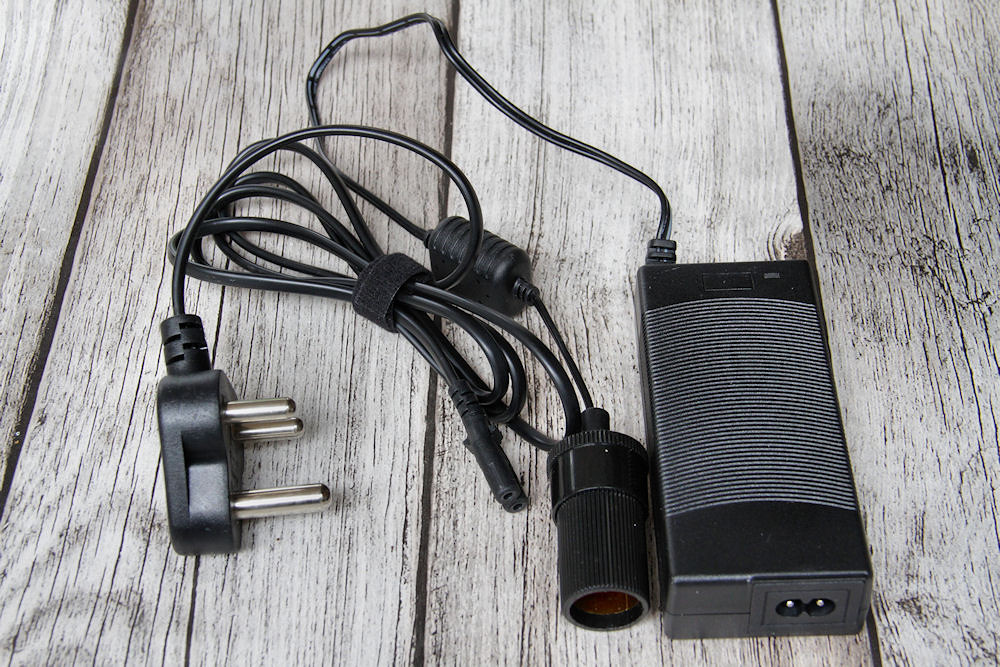
The power brick with cigarette light socket
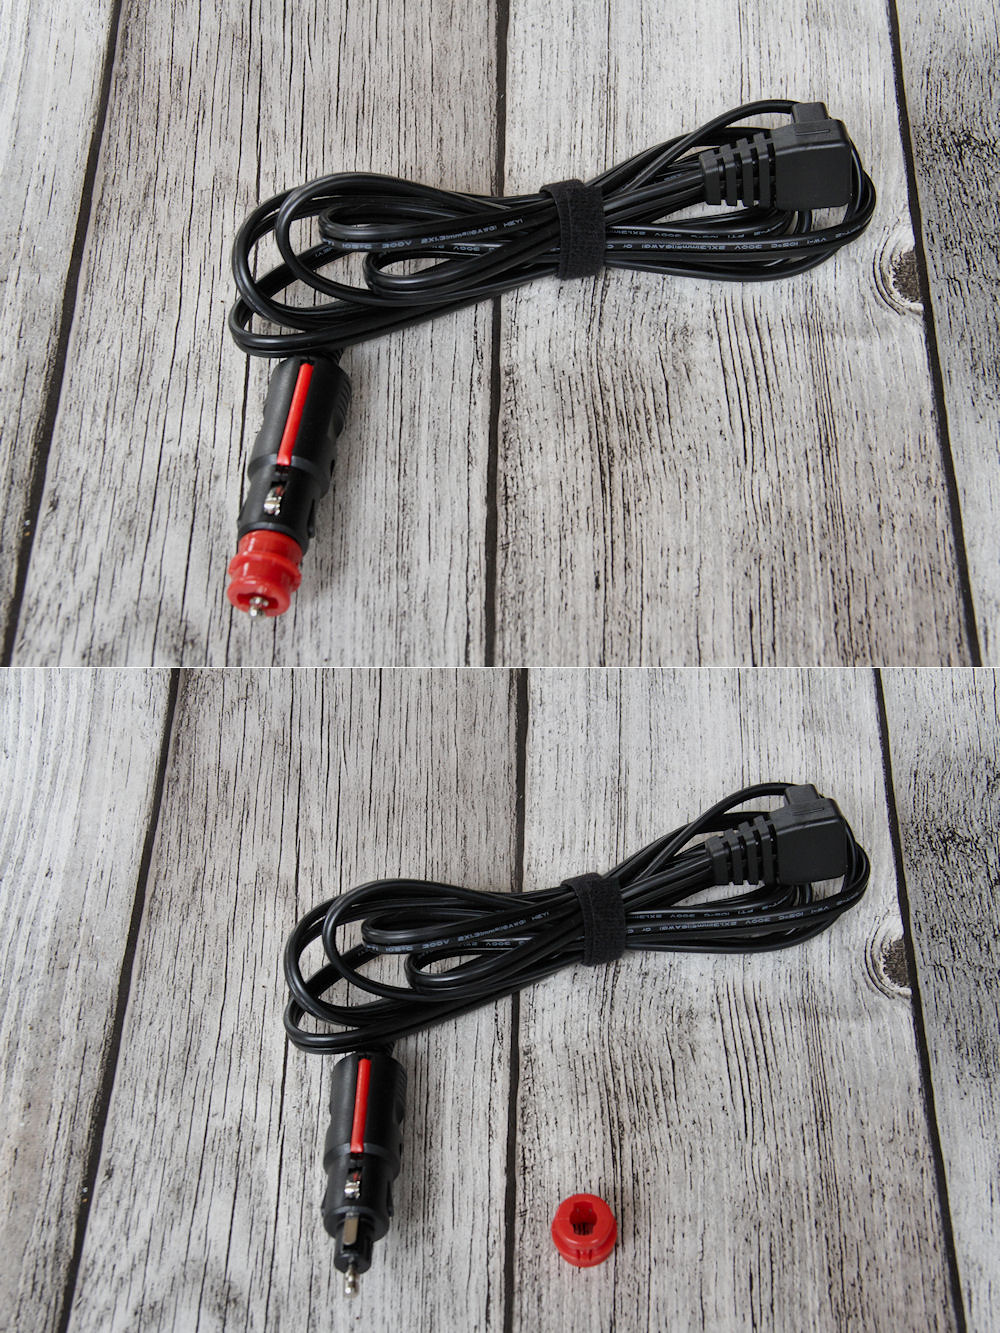
The fridge cable with the cigarette lighter plug on the top and the hella plug on the bottom
One thing that I don't like about the convertible cigarette lighter plug is that it does not fit as firmly into the socket as a standalone plug. I may replace this plug with a standalone plug once the warranty on the fridge expires. This may be a long time in coming, as the overall warranty is three years, with a seven year warranty on the compressor.
I must add here that the Snomaster support staff are very prompt in answering questions. One very important thing I learnt from them was that the fridge should be run once a month, for a couple of days, to circulate the refrigerant.
(updated: 6 April 2023)
Testing the fridge
A problem I ran into when starting up the fridge was trying to get it to run at the temperatures I wanted. The manual is rather vague in this respect (I have a feeling that this is probably because the manual is trying to cover three different fridge models). Fortunately, once I figured out how to set the temperature in the compartments (as described above), things like "Advanced Setting" became irrelevant. I still cannot swap between °C and °F (not that I would want to go to °F), and the "battery protection" function serves no purpose if you are running from a box like the Jackery, which has a regulated DC output. The Jackery's regulated DC output remains at 12 V as its battery discharges
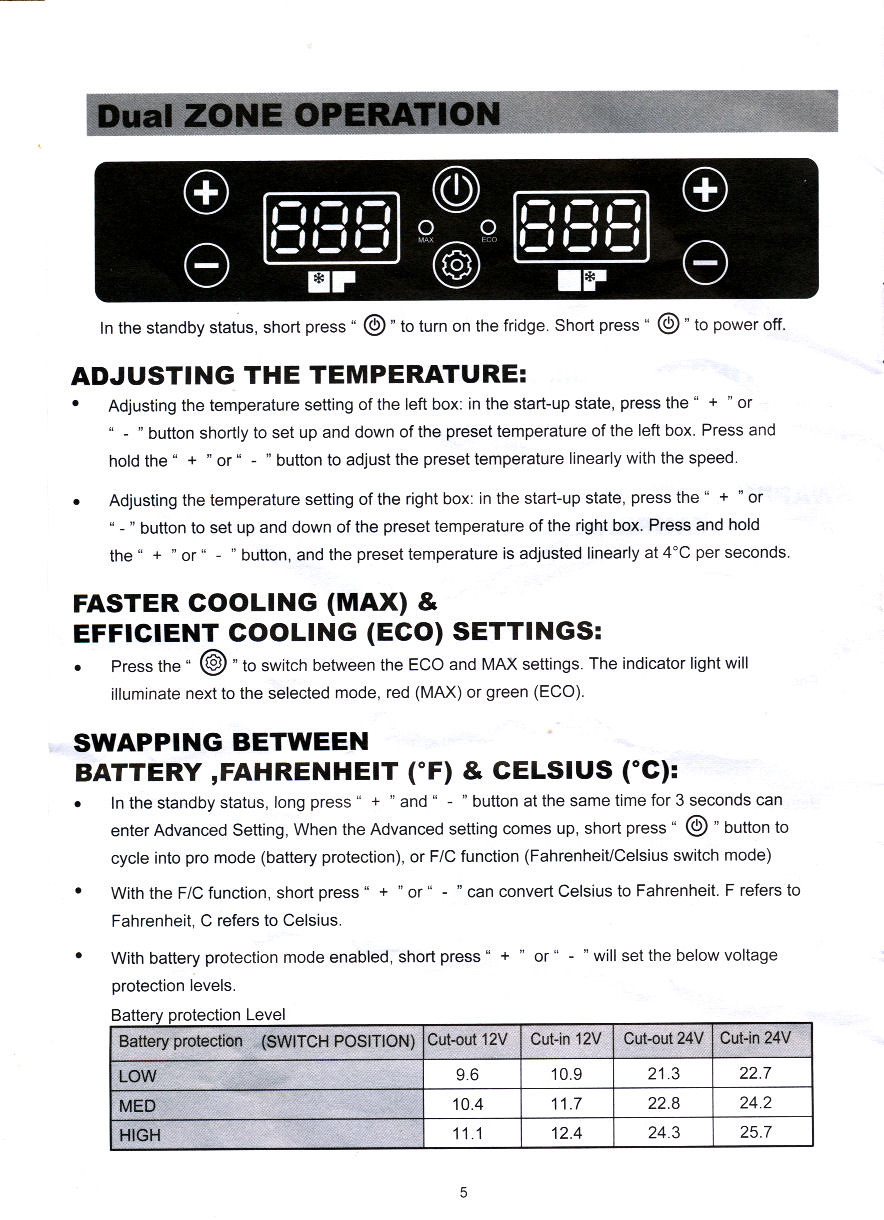
The instruction page for the dual compartment fridge
The first test was running the fridge from the Jackery. I had some frozen chicken pieces and an ice tray in the freezer section, with a six-pack of beer and a couple of bottles of water in the fridge section. I used the AC power brick to get the fridge compartments down to their operating temperatures in Max mode. This took roughly one hour, which has been fairly consistent on subsequent runs, although it does depend on the ambient temperature. I then switched to Eco mode and connected the Jackery. On this first run, the compressor only used 24 W in Eco mode (the ambient temperature was 15°C at the time). After 24 h, the Jackery still showed 20% of its capacity remaining.
The second part of this first test was to see how the Gizzu would fare running the fridge. As the fridge was already at the required temperature, I swapped the Jackery and Gizzu. Although the Gizzu has no digital read-out, I could follow the bar graph on the display to get an idea of how quickly the battery was being depleted. After 18 h, it seemed to be doing better than the Jackery, but five minutes short of 24 h running time, it switched off. I was very impressed with both boxes.
On subsequent runs, the compressor consistently used 73W in Max mode and 43W in Eco mode.
My second test was to see how the system would fare when using a solar panel to charge the Jackery while it was running the fridge. I have gone into more detail on my Solar Panel page, and found that with suitable solar conditions, the Jackery could run the fridge for several days.
(updated: 11 August 2026)
It is a Camping fridge!
The first time we were actually able to use the fridge for camping was towards the end of February 2023. All our plans to get out towards the end of 2022 was scuppered by the passing of Ray and Zeke shortly after each other, and then Squeaky's illness was something we could not leave her to deal with without us. The weather after that was also against us. February 2023 was one of the wettest months that we had experienced in a long time (almost 300mm of rain in our suburb in the first three weeks). When the rain seemed to have stopped, we decided to do a trip to Ruah Park. We did have lovely sunny weather during most of our time there, but the lack of shade was not ideal for our fridge tests. Unfortunately, I was very lax in taking pics for documentation purposes, but I will post some related before our trip to Eden Park.
While we were preparing and packing to leave, I ran the fridge from mains for about 12h (empty) to cool it down and to check that everything was ok (probably overkill as an hour is good enough). Just before leaving, we packed the fridge and then connected it to the Jackery. By the time we stopped at the campsite, less than 2% of the Jackery's battery capacity had been used.
With the weight of a packed fridge, it is very difficult to move, so our plan was to leave it in the bakkie, with the Jackery running it while being charged from [we hoped] solar.
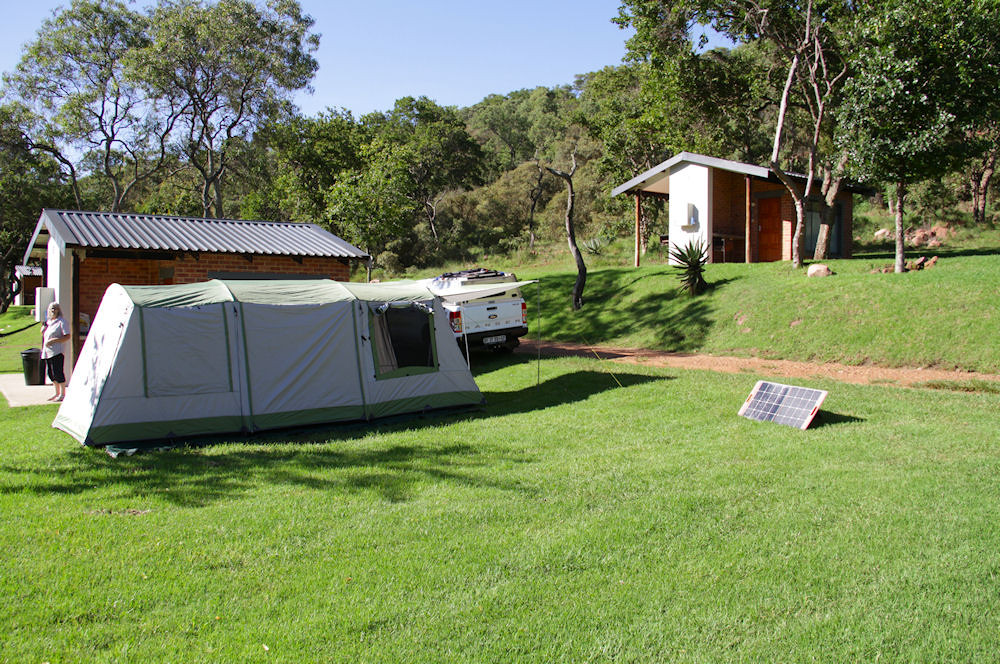
Solar panel charging Jackery while it was running the fridge
In the pic above, I had parked the bakkie in the only shade available in the vicinity of our campsite, and this after 16:00! Here you can see the advantage of having more than 10m of extension cable for the panel.
On day one, because we were setting up camp, I left the bakkie where I had originally parked it, which was roughly where the solar panel is in the pic above. I did connect the solar panel before we started pitching the tent. As you can see, there is NO shade where the panel is set up.
Although the panel provided enough power to run the fridge for the first day, because of the temperature inside the loadbox area of the bakkie, the compressor spent more time running than my tests at home (at home, the compressor was mostly off; at Ruah, it was mostly on during the day). To take some strain off the Jackery, I ran the fridge off the mains when load shedding allowed and the bakkie was close enough to a power point.
Another thing that I found was that even though the canopy only has two smallish windows, the sun shining through these onto the fridge had a serious impact on the temperatures in the two compartments. The lids of the fridge are black, and these got very warm from direct sunlight. I got around this by hanging a towel over the windows. I have since tried to minimise this heating, by putting a piece of polystyrene on each lid and stuck these down with Prestik.
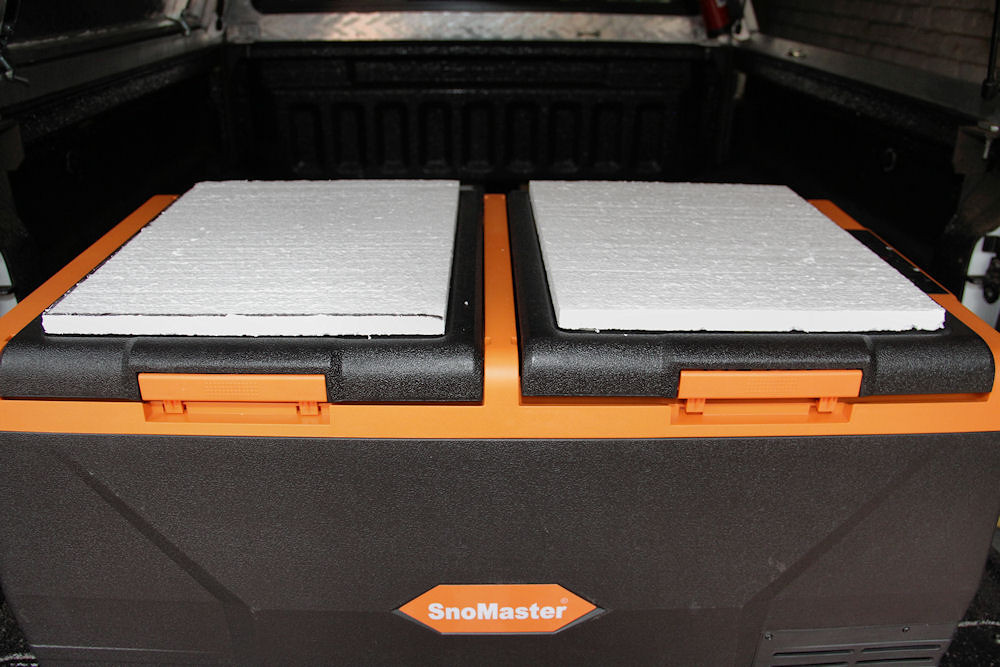
Polystyrene inserts on the lids of the fridge
Although the fridge battled to maintain the set temperatures during the day, I was more than happy the way it and the Jackery performed during our stay at Ruah — I had cold beer all the time!
(updated: 22 April 2023)
It is a Camping fridge (part 2)
This section maybe should have come before the previous one, but I thought showing real world use of the fridge first would help in thinking about the problems with using a fridge while camping.
What we did first off was to add usable handles to the fridge. I used ski rope with a piece of hosepipe over it to make it easier on the hands when carrying the box. The mounting bolts are Torx bolts, and fortunately I had a set of these wrenches as all the bolts in the load box of the bakkie are Torx bolts.
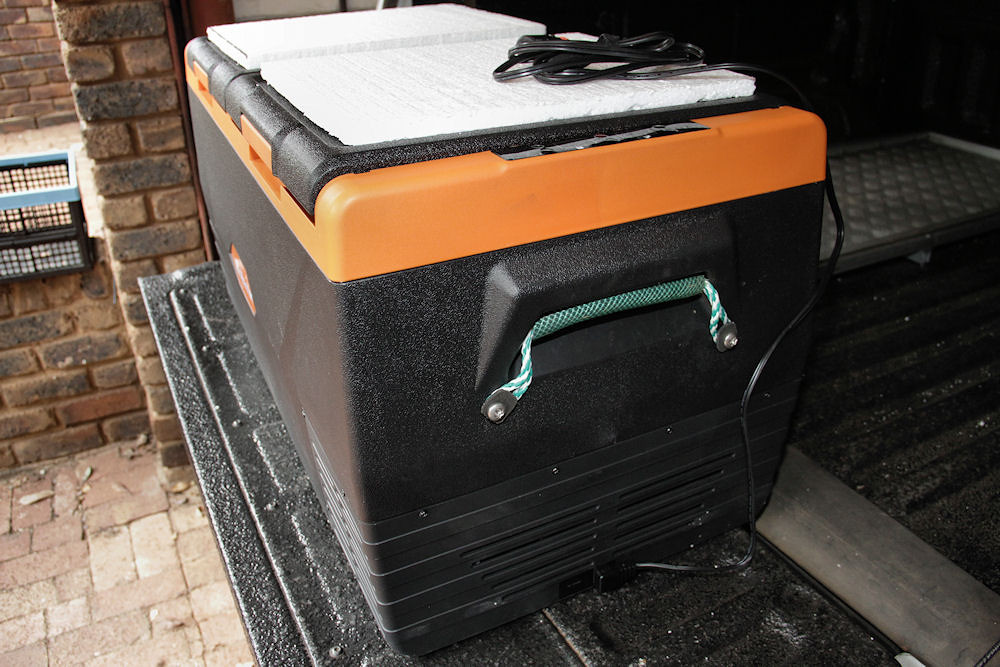
New handle
I would have liked to have used thicker rope, but the bolts were just too short to use in conjunction with my homemade rubber washers.
One thing you have to think of is where you are going to keep the fridge during your trip. Mine was a no brainer, it had to stay in the bakkie. For the fridge to function properly, you have to decide on the placement of the compressor vents on the fridge. I decided on these vents had to be on the cab side of the load box as I have a vent in the canopy on the same side (this vent doubles up nicely as a conduit for electrical cables to the Jackery when camping). In order to have free flow of air around the vents to the fridge, I made a wooden C-piece to keep the fridge from moving to the front end of the load box when braking.
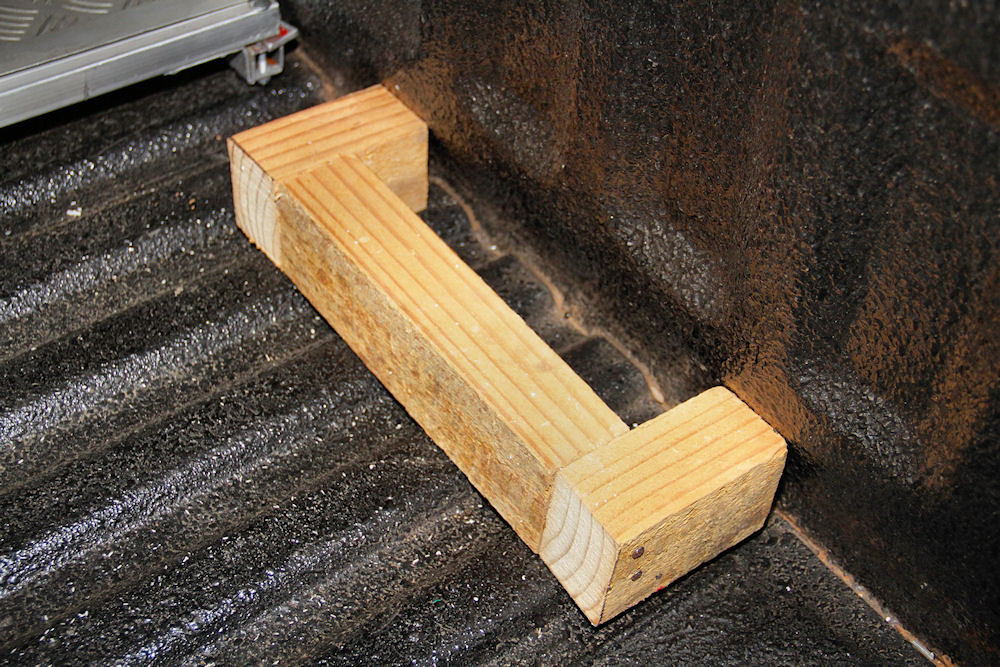
C-Piece to stop fridge from moving towards the cab
As you can see from the pic above, there are corrugations in the floor of the load box. I had to find some way of preventing the fridge from wobbling into these corrugations while travelling. Pat came up with the novel idea of using the polystyrene base from the packing material in which the fridge was shipped.
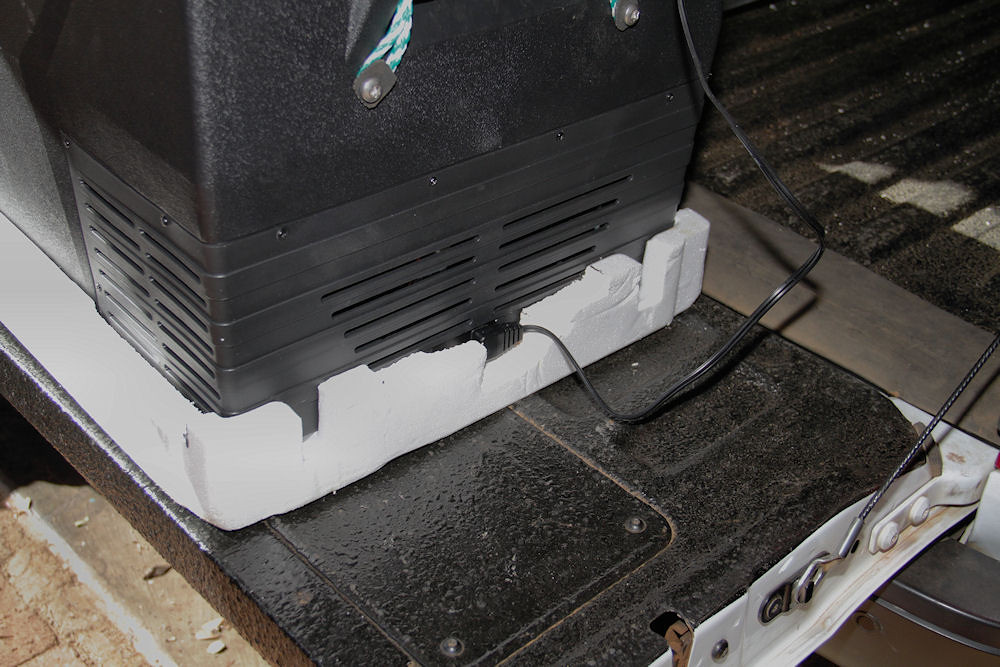
Polystyrene base for the fridge
This polystyrene base has the added advantage that the fridge slides very easily over the rubberising in the load box. The polystyrene was trimmed to allow air flow access to all the vents on the fridge, as well as the plug socket.
Here the fridge in position and tied down. I added two drawer handles to the frame of the canopy to use as tie-down points.
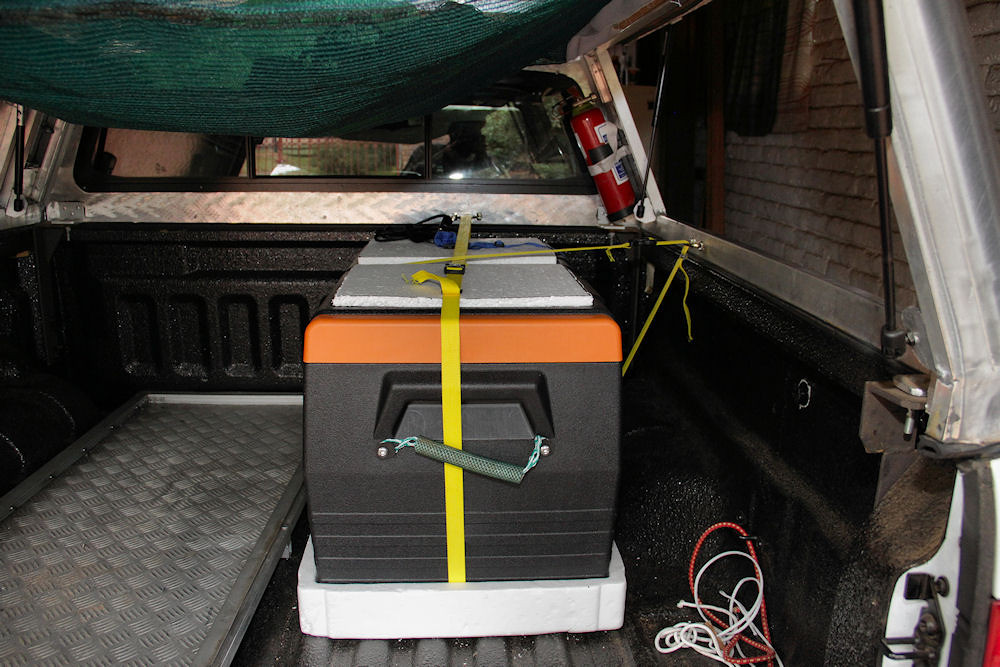
Fridge in position
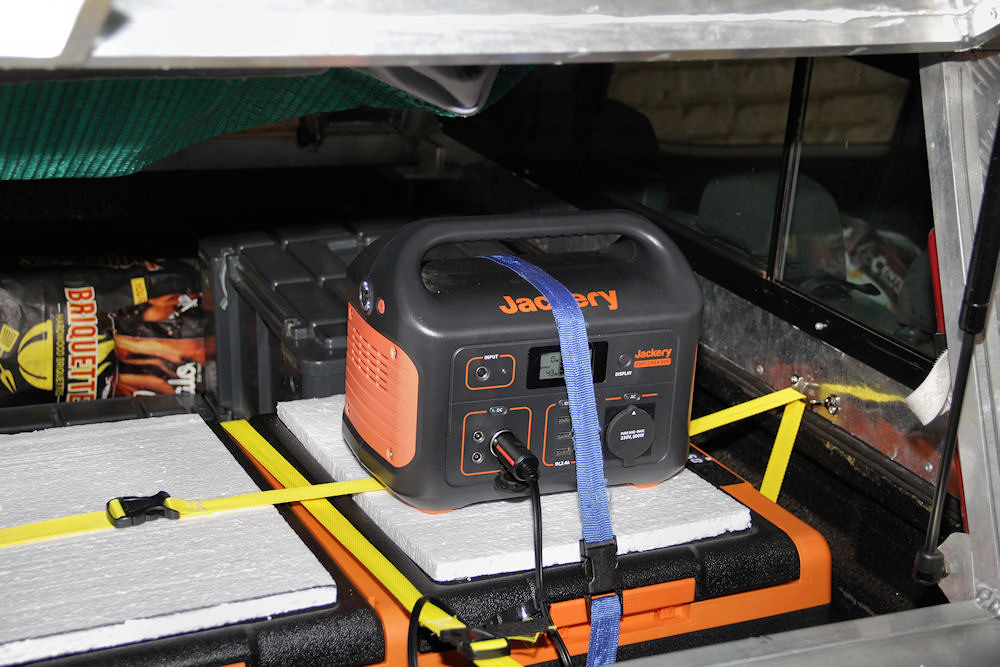
Jackery in position
Finally, the bakkie packed with the Jackery tied down and running the fridge.
(updated: 24 April 2023)
Charging the Jackery 500 from the Bluetti EB70
As the Jackery Solar Saga 100 panel normally delivers between 65 W and 72 W to the Jackery, I decided to use the Bluetti EB70 to charge the Jackery while it was powering the fridge. The EB70 delivers about 85 W to the Jackery via its cigarette lighter port, while the EB70 can be charged from a Bluetti PV200 solar panel at between 130 W and 140 W. Why not simply use the EB70 to run the fridge? The answer is weight – it is far easier to move the Jackery than the considerably heavier Bluetti.
I field-tested this arrangement on a trip to Almega Caravan Park. With the Jackery running the fridge, I used the EB70 to charge the Jackery once its SoC dropped to around 60% during the day. At the same time, the EB70 was being charged by the PV200 panel. During the night, the Jackery ran the fridge without being charged. Over the four-day trip (home to home), the Jackery never dropped below 40% SoC. The EB70's SoC also remained in the 80–100% range during the trip, despite also being used to charge mobile devices. I am very happy with this setup.
(updated: 9 August 2026)
Concluding Remarks
The fridge does take strain if the ambient temperature is on the high side. It does perform very well with decent shade.
(updated: 24 April 2023)
Addendum
Snomaster removed this fridge from their product list during 2023. Recently, while browsing a Makro catalogue, I came across a Campmaster fridge which looks almost identical to the Snomaster SMDZ LS75, apart from the colour.
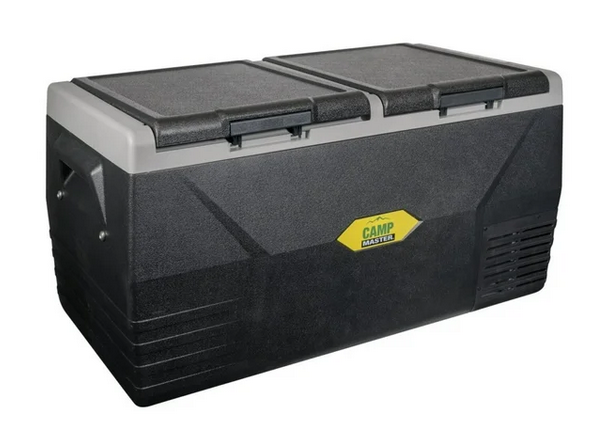
Campmaster 75L fridge
Now I am not sure whether Snomaster has sold this design to Campmaster, or this is a generic Chinese camping fridge!
(updated: 23 December 2023)
Back to Camping Gadgets
