Portable Solar Panels
This page has been extensively revised since it was first written in 2023 to reflect several years of additional experience with portable solar panels.
Quick Links
Introduction
Part of our new camping setup was a compressor fridge and, more importantly, a way to keep it powered. In our tests of portable power supplies, we had decided that the Jackery 500 was the best choice, mainly because of its relatively low weight. However, keeping the Jackery charged meant looking at portable solar panels.
Although these panels were originally purchased for camping, they have since proved equally useful as an emergency power source during power outages at home.
Note: A portable solar panel usually consists of several foldable sections. On this page, I use the term panel to refer to the unit as a whole, and the term section to refer to an individual foldable part.
(updated: 9 July 2026)
Enertech 130 W Panel
Although I no longer have this panel, I have left this section intact because it illustrates several important lessons about portable solar panels, connectors and compatibility. It also documents a mistake that could easily have damaged the Jackery, and I think these experiences are just as valuable as successful tests.
The problem with portable solar panels is that their real-world output is usually well below their rated output. For example, the 100 W Jackery SolarSaga typically delivers around 90 W under excellent conditions. I therefore looked for a panel with a higher rated output, hoping it would consistently produce about 100 W to match the Jackery's MPPT controller.
I eventually chose the Enertech 130 W panel. In hindsight, this assumption was potentially dangerous. Under ideal conditions, a 130 W panel could exceed the Jackery's recommended solar input and risk damaging its MPPT controller.
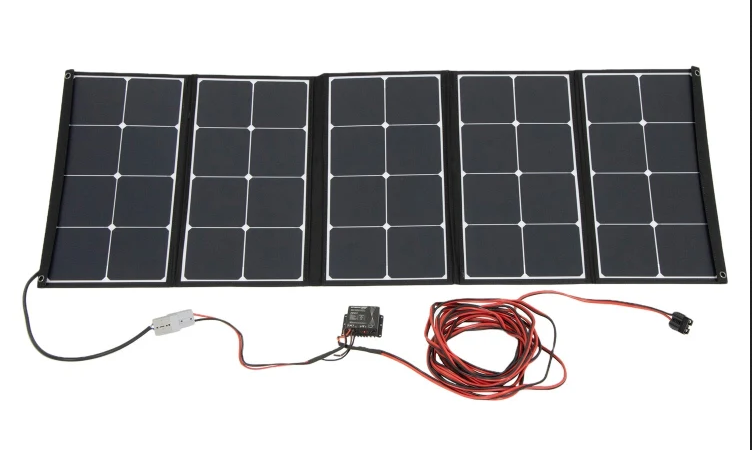
The Enertech 130 W Panel with accessories
The panel consisted of five foldable sections and was supplied with its own external MPPT controller, extension cable and Anderson connectors. To connect it to the Jackery 500, I had to buy an Anderson-to-DC7909 adaptor. This rather convoluted arrangement is a good example of the connector compatibility issues discussed later on this page.
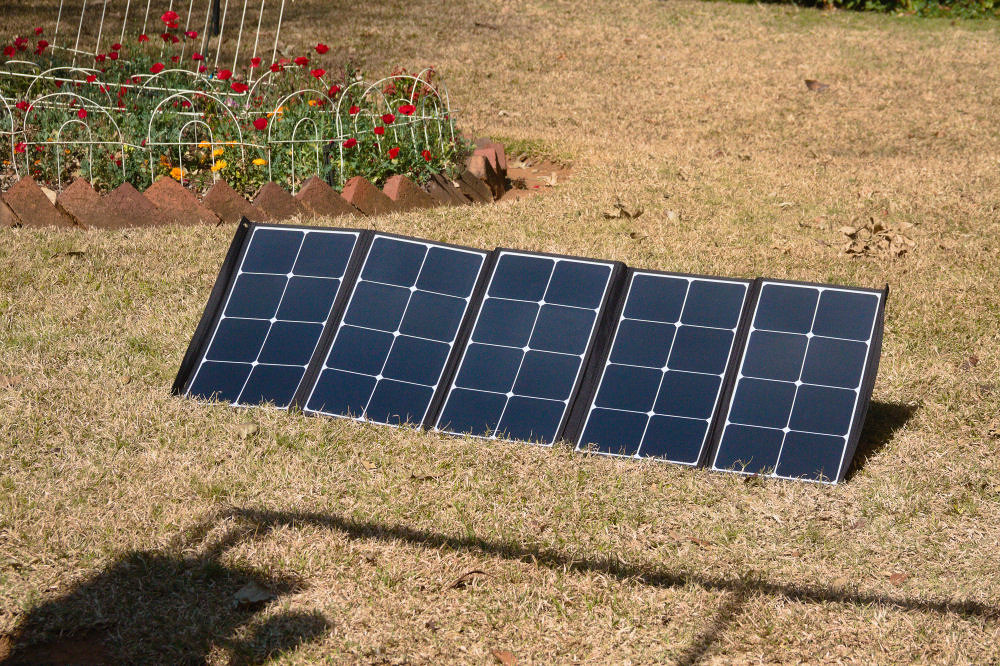
The Enertech 130 W Panel in my garden
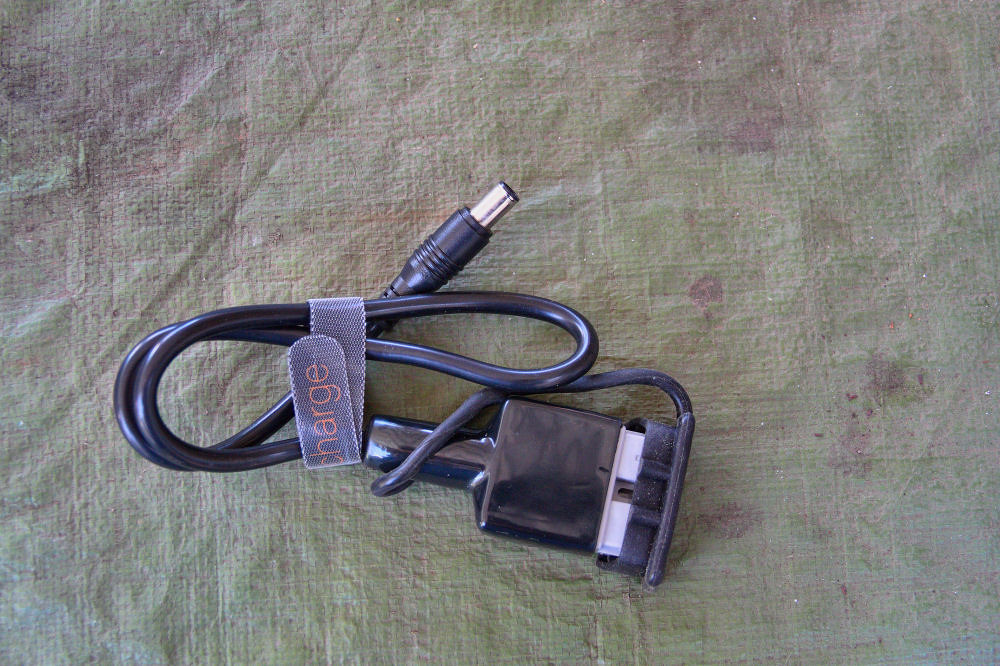
An EvoCharge adaptor cable from Anderson grey connector to DC7909 barrel connector
Unfortunately, the supplied MPPT controller was dead on arrival. The output measured only 1.2 V instead of the expected 24 V, with the fault indicated by a flashing red LED.
Because the Jackery already contains its own MPPT controller, I was able to connect the panel directly to the Jackery using the adaptor cable. This allowed me to evaluate the panel itself despite the failed controller.
Even under favourable conditions, the best output I recorded was 83 W, and this was only achieved briefly. For most of the time the output was between 57 W and 62 W, well below the panel's 130 W rating.
I returned the panel and, rather than waiting for a replacement, bought a Jackery SolarSaga 100 W instead.
I now know that expecting a portable panel to produce its rated output under normal conditions was unrealistic. However, even allowing for this, the Enertech panel's performance was disappointing.
(updated: 9 July 2026)
Jackery SolarSaga 100 W Panel
The Jackery SolarSaga 100 consists of two foldable sections, each with its own stand. One section has a rear storage pouch for the attached 3 m output cable, which terminates in a DC7909 barrel plug for connecting directly to a Jackery power box. The panel also includes two USB charging ports for compatible devices, although I have never found these particularly useful, as I would not want to leave a phone charging in the blazing African sun.
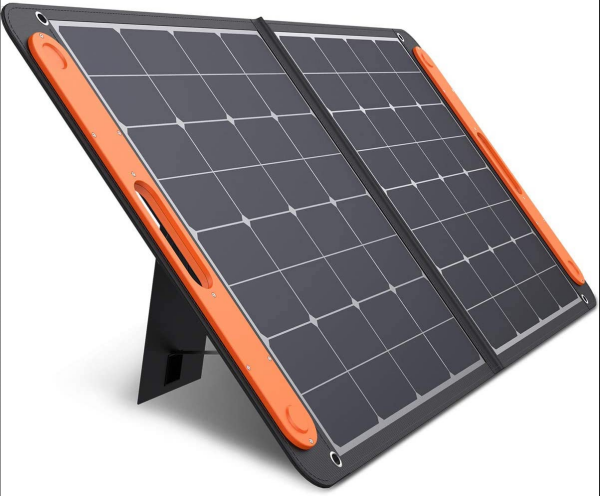
The Jackery SolarSaga 100 W Panel
The supplied 3 m cable proved too short for my needs, so I bought a 5 m extension cable. Fortunately, both Jackery and third-party manufacturers such as EvoCharge offer a range of compatible extension cables and adaptors.
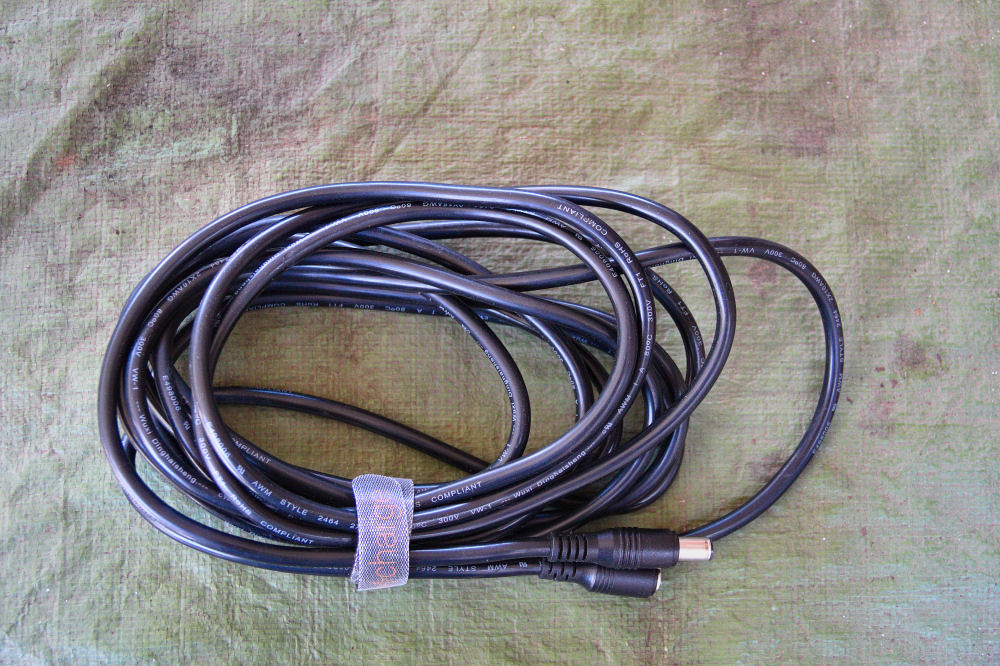
An EvoCharge 5 m extension cable
The 5 m cable is still shorter than I would ideally like. I therefore investigated the effect of using longer cables and additional connectors. The results are discussed later on this page.
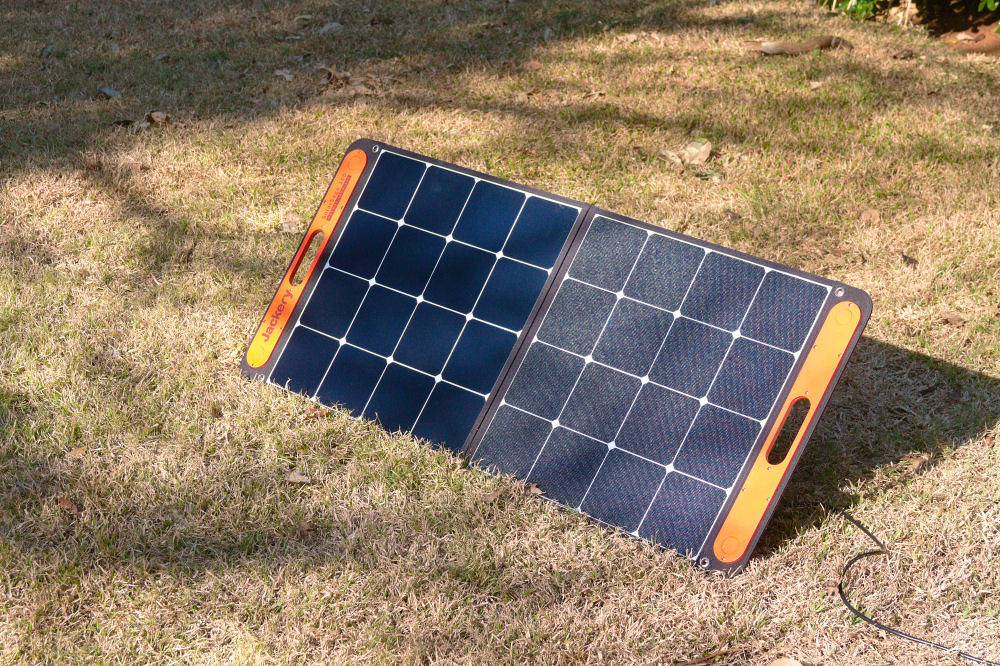
The Jackery SolarSaga 100 W Panel in my garden
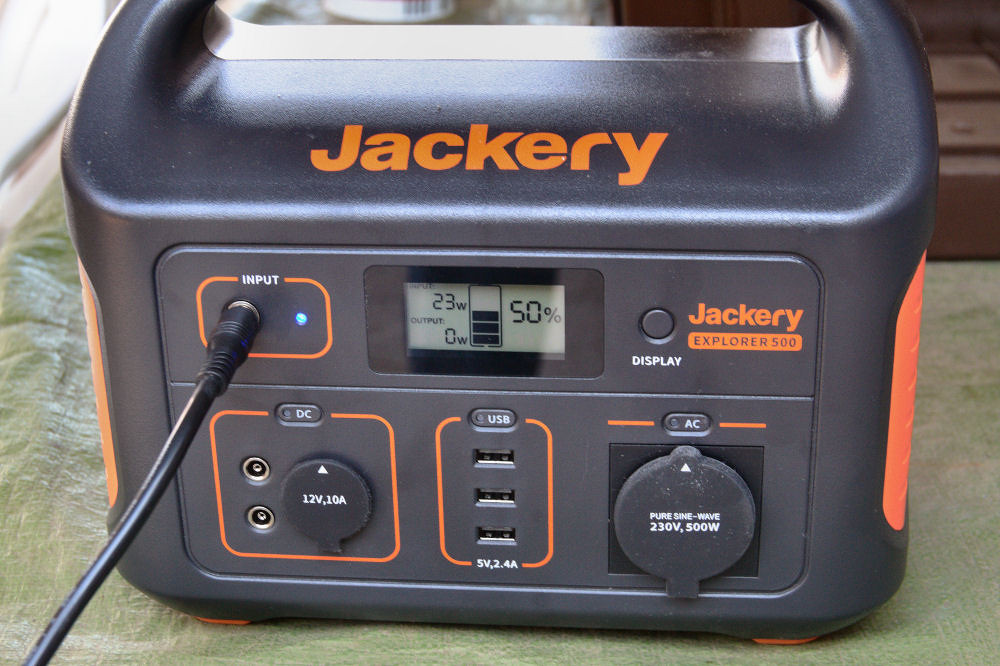
The Jackery Explorer 500 being charged from solar
The two photographs above were taken about the same time. Although the power station was reporting only 23 W, the reason is immediately obvious from the photograph of the panel: a narrow shadow from a nearby tree was falling across the cells. Simply moving the panel into full sunlight increased the charging power to about 75 W, before settling at around 72 W.
This was my first indication of just how sensitive portable solar panels are to even small shadows. Later tests, described in the Shadow Effects section, confirmed this behaviour in much more detail.
(updated: 13 July 2026)
Bluetti PV200 Panel (200 W)
With the purchase of the Bluetti EB70 power supply, we decided that we needed a panel with a higher output than the Jackery SolarSaga 100. A maximum charging power of 100 W would take too long to recharge the EB70 during a typical solar day, so we bought the Bluetti PV200. (Incidentally, the purchase had an unexpected sequel due to an extraordinary stock-control error by both the supplier and Takealot. The full story can be found here.)
The PV200 is quite a bit heavier than the SolarSaga 100 (7.3 kg vs 4 kg). It consists of four foldable sections, three of which have adjustable stands. The additional size and weight make it less convenient to move when tracking the sun.
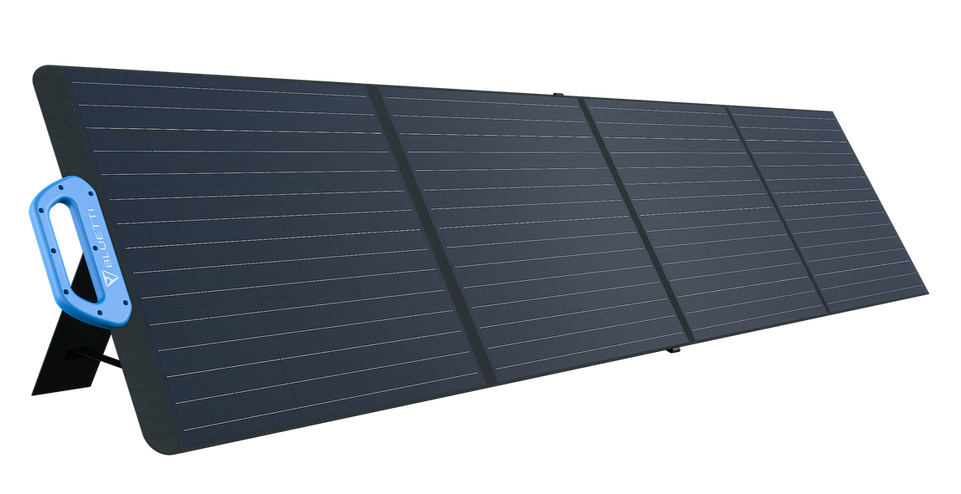
The Bluetti PV200 Panel
As the stands are adjustable, it allows some leeway in setting the angle of the sections relative to the sun.
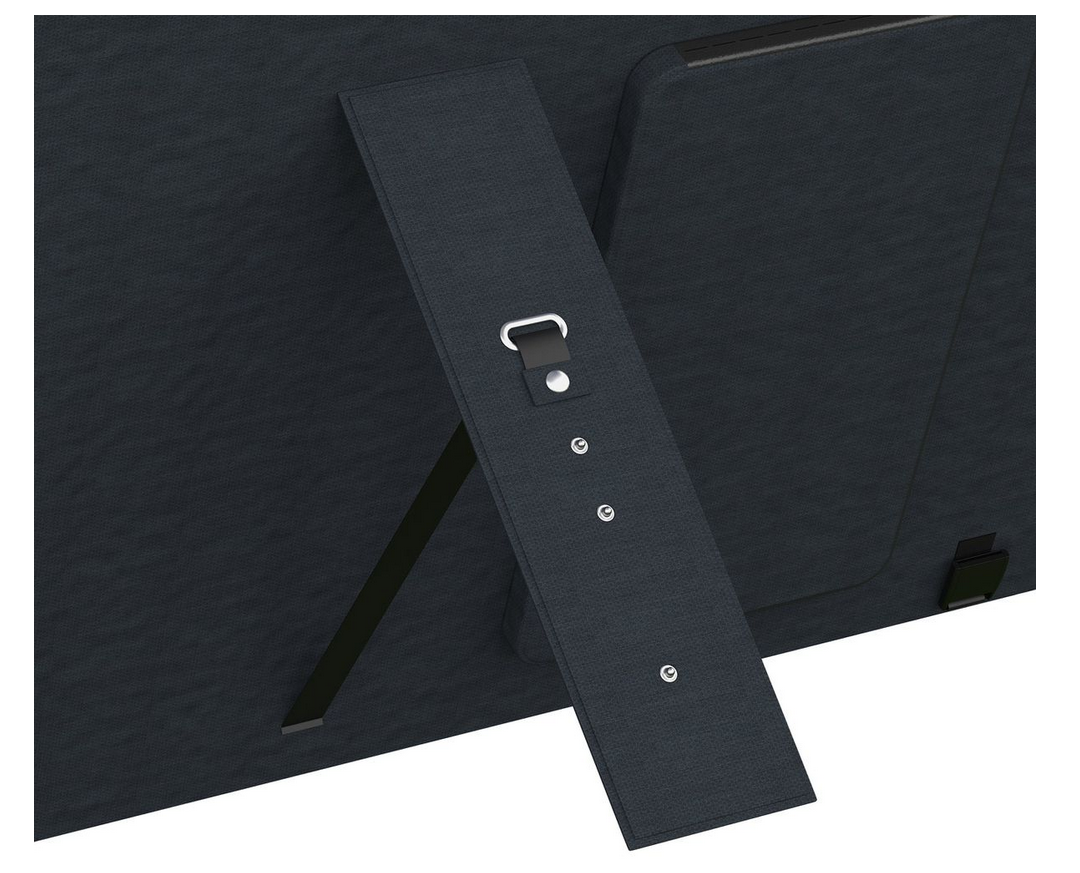
One of the Bluetti PV200's stands
The panel has MC4 connectors, but there is an adaptor cable (MC4 to DC7909) that comes with the EB70. The panel's cable plus the adaptor cable is about 4 m (every bit helps). Keeping this adaptor permanently attached to the panel allows me to use the Jackery's extension cables.
During the first test, the EB70's charge level was between 40% and 60% (third bar flashing). With misty sun to start, followed by periods of intermittent heavy cloud, the panel managed to top up the EB70 within 3½ h. The best output we saw (according to the EB70's input meter) was 160 W.
Initially I was not impressed with the two push clips used to keep the panel closed. They did not feel as robust as the magnetic fasteners used by the Jackery SolarSaga. However, after several years of regular use, they have proved to be far more durable than I expected.
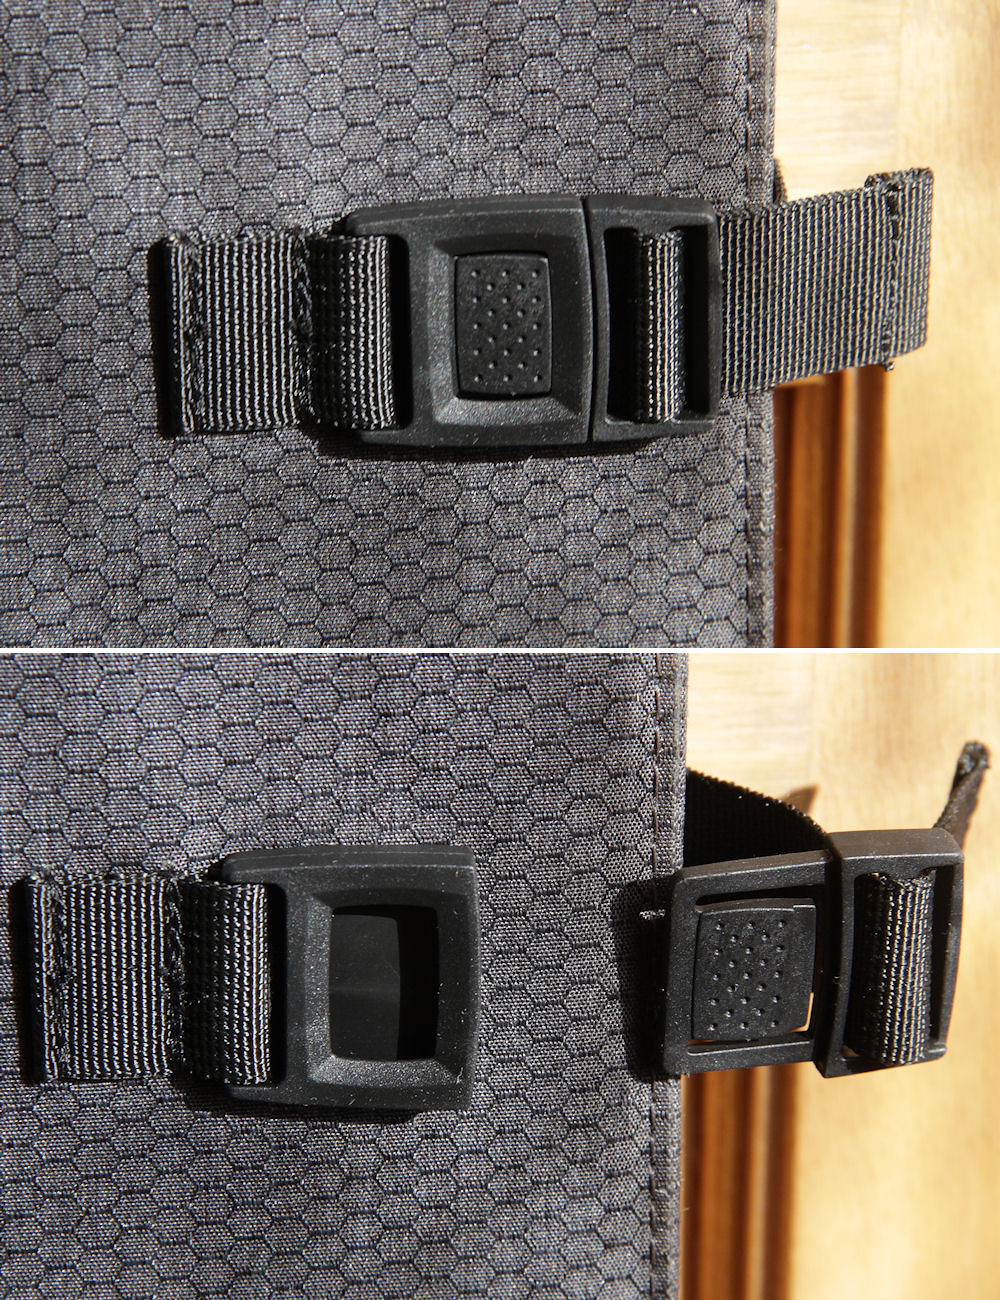
One of the PV200's two clips
One aspect of the design still concerns me is that the sections have to be folded in such a way that the section without a stand is on the outside (to show the Bluetti branding). This means that one (or more) studs on the stand are in contact with the face of a section. This could scratch or damage the solar cells in that section.
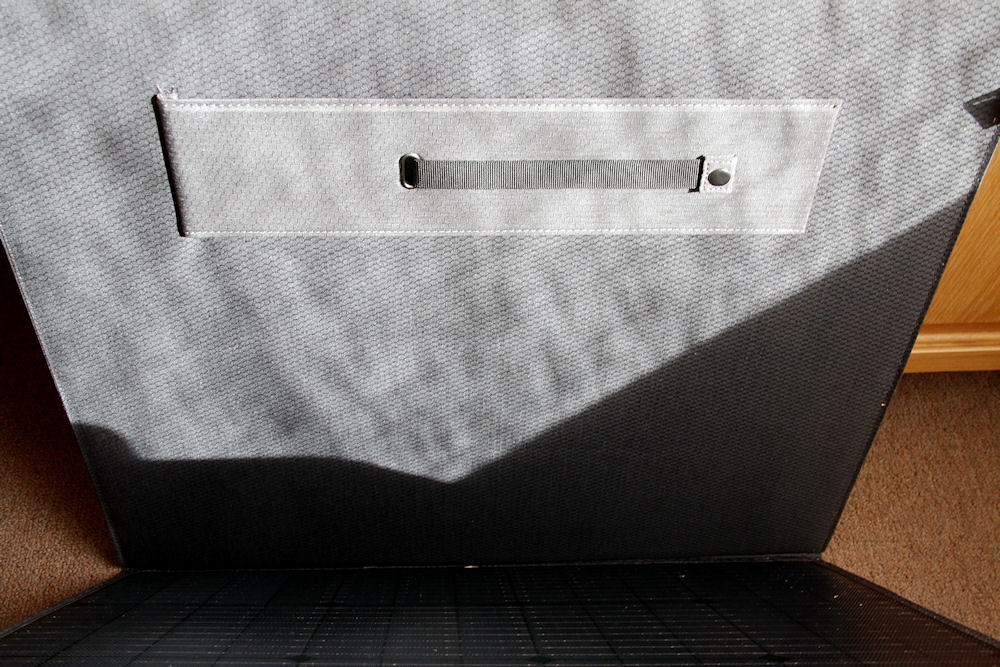
A stud in contact with a section.
Folding the sections in a zig-zag eliminates this problem, but then the clips to close the panel don't work.
There are also no grommets, so you have no way to tie the panel down in windy conditions (Pat has since made a gadget to tie down the stands of the panel).
I have added a page to try and demonstrate the easiest way I have found to open the panel (and close it).
(updated: 14 July 2026)
Temperature Effects
I have found from many hours of using the Jackery panel, the efficiency of the panel decreases as the panel gets warmer. Immediately after setting up the panel, it delivers between 75 W and 80 W. Within 15 minutes, this drops to between 70 W and 72 W and after another 15 minutes, this then stabilises at between 67 W and 69 W. This value remains fairly constant with regular rotation of the panel to track the sun.
As this is panel is rated at 100 W output, an input to the Jackery Power Supply of 67 W means an efficiency of 67%.
Interestingly enough, the Bluetti PV200 shows very similar temperature characteristics to the Jackery panel. On a recent run, I monitored the power decrease with time. On this particular run, the PV200 started at 153 W out (Bluetti EB70's meter reading). After 15 minutes, this dropped to 134 W. Normally the steady state output power from the PV200 is around 132 W.
As this is a 200 W panel, this means the panel efficiency is 66%, which is almost identical to the Jackery SolarSaga 100.
(updated: 18 September 2023)
Shadow Effects
As mentioned earlier, the Jackery panel is very sensitive to shadows. The photographs below show how a narrow shadow from the patio awning, crossing all the sections of the panel, affected its output. Simply moving the panel a short distance into full sunlight increased the charging power from 43 W to 71 W.
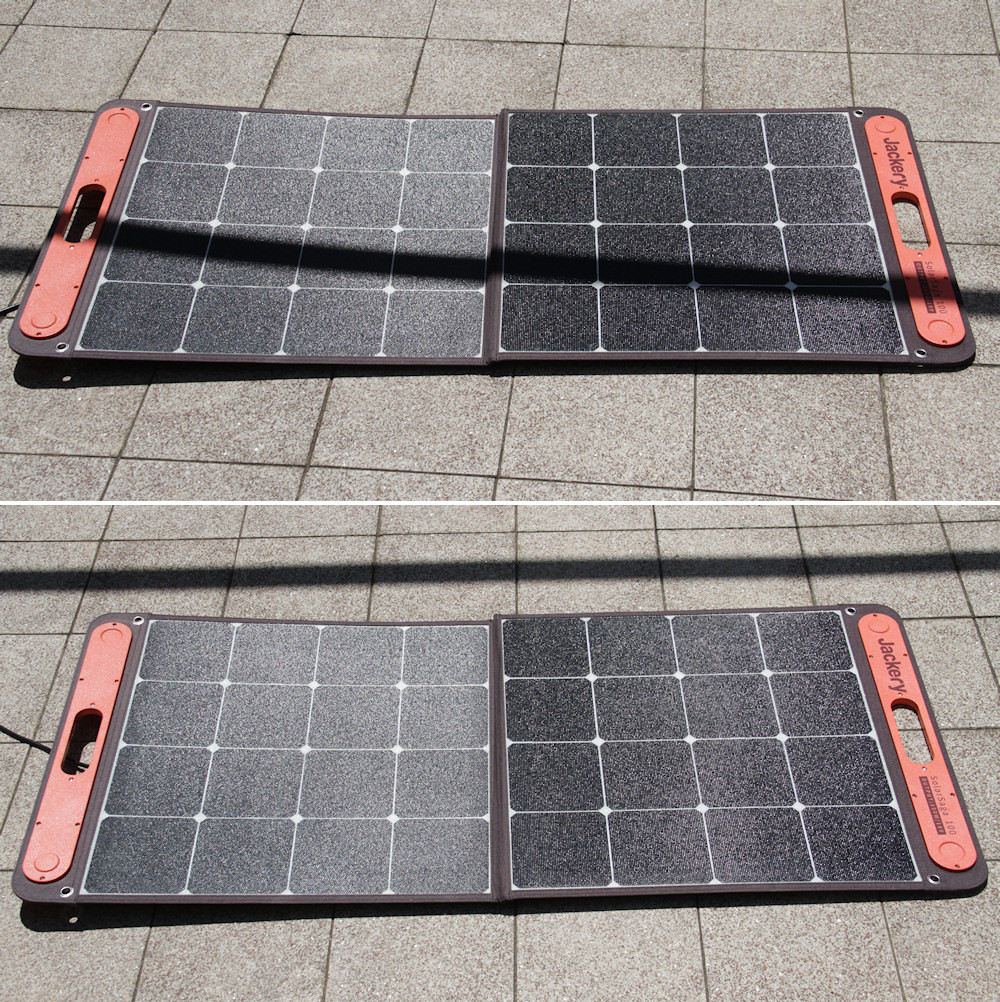
Shadow on the panel
This same shadow effect is even more marked on the Bluetti panel. I repeated the test one year later, on the same date and at approximately the same time, so that the Sun was in almost exactly the same position in the sky. This made the two sets of measurements directly comparable.
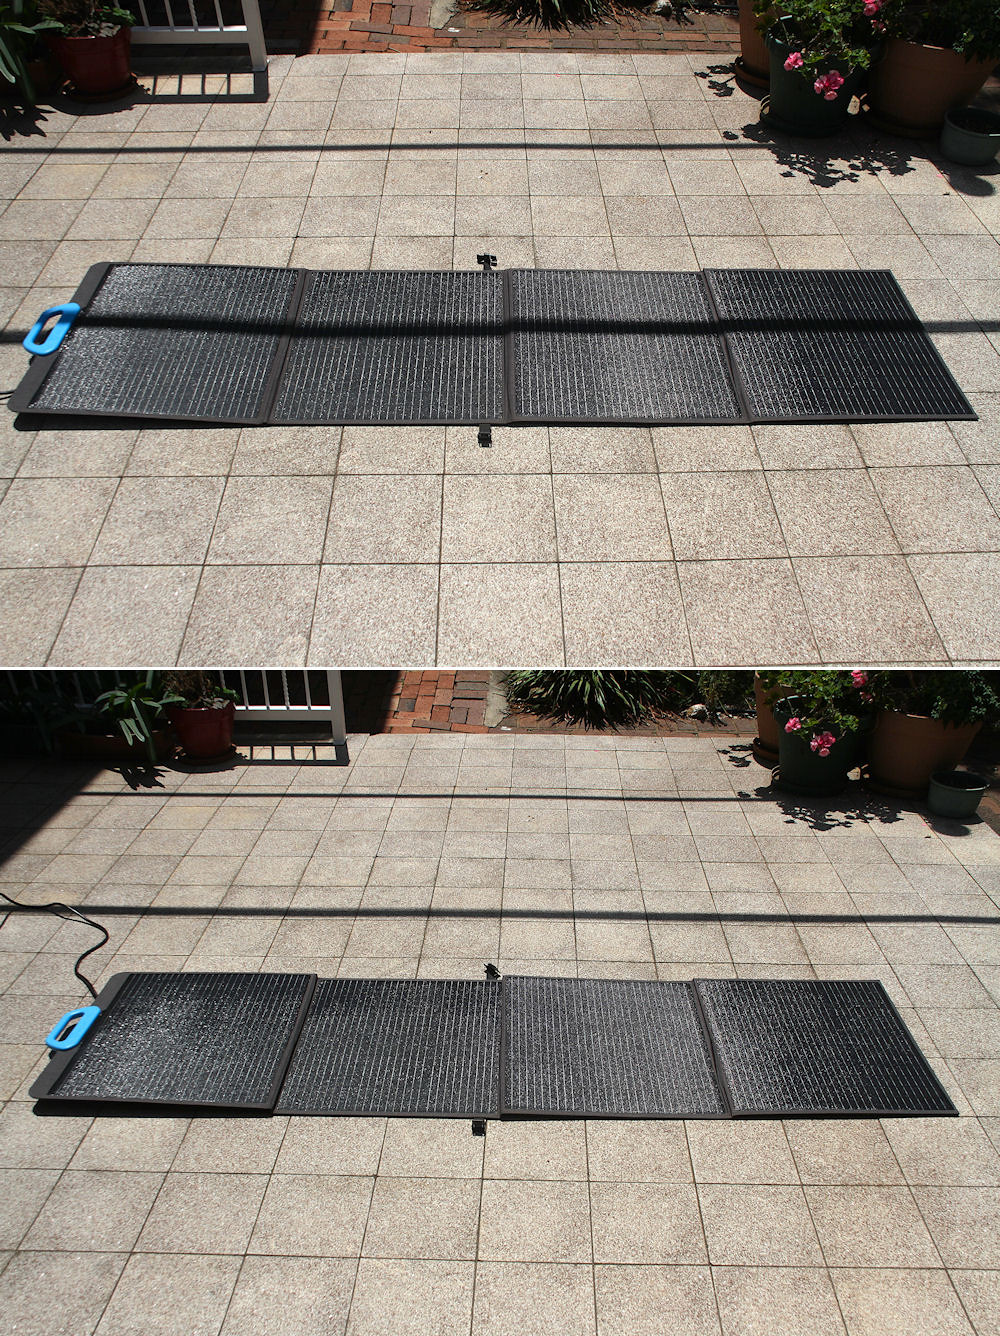
Shadow on the panel
With the shadow across all sections of the panel, the output was 39 W. Moving the panel into full sunlight increased the output to 140 W. The same shadow therefore reduced the Bluetti's output by 73%, compared with 39% for the Jackery panel.
I did some further tests by covering individual sections on both the Jackery and Bluetti panels and measuring the output. What I found was that a single shadow across all the sections has a bigger impact than shadows across individual sections.
The practical lesson is simple: keep the entire panel in full sunlight whenever possible. Even a narrow shadow crossing several sections can reduce the output dramatically.
(updated: 8 July 2026)
Power Drop from Extension cables
As the output from the panels is far too variable for meaningful measurements, I plugged the extension cables into the Jackery AC power supply and noted the input power reported by the Jackery. Although this isn't a laboratory-grade measurement, it provides a reasonable indication of the losses introduced by the extension cables.
My measurements showed losses of approximately 2 W with one extension cable, 4 W with two, 5 W with three and 11 W with six connected in series.
I also compared Jackery-approved Evocharge extension cables with similar-length Temu cables. Despite the different brands, both produced virtually identical power losses. This suggests that a significant proportion of the loss occurs at the connectors rather than in the cable itself.
The idea that much of the power loss occurs at the connectors is supported by the rather loose fit between the male and female DC7909 plugs. When moving the panels, they can sometimes be pulled apart by something as soft as the lawn if they become snagged. To me, this suggests that the metal contacts are not held together as firmly as they could be. Poorer contact is likely to increase the contact resistance, resulting in a small voltage drop across each connector.
However, in view of my need to have the Jackery quite a distance from the panel when camping, I can live with the drop of 2 W per extension cable connected.
(updated: 17 July 2026)
Camping Fridge
Snomaster recommends running a camping fridge for a couple of days every month to ensure gas circulation is working properly. In August 2022 I did this using the Jackery 500 to run the fridge, and the Jackery solar panel to charge the box while it was running the fridge. For the test, the fridge and freezer compartments were set at 4°C and -10°C, respectively.
With the panel connected to the power box, I ran the fridge in MAX mode until the freezer compartment reached 0°C, then switched to ECO mode. At this stage, the state of charge (SoC) had dropped to 97%. On day one and two the position of the panel was not in an optimum position, limited by the length of two extension cables. On day three, I moved the fridge to a position that allowed me to place the panel in a more suitable position.
| SoC (%) | Loss/Gain (%) |
| Day 1 | 99 | -1 |
| Night 1 | 49 | -50 |
| Day 2 | 84 | +35 |
| Night 2 | 38 | -46 |
| Day 3 | 82 | +44 |
The first test suggested that the panel was unable to recover the overnight loss during the following day. At the time, I suspected that the less-than-ideal panel position was largely responsible.
In July 2026, I repeated this experiment, but this time, I used four extension cables between the Jackery 500 and the panel. This allowed far more freedom of movement in placing the panel in an optimum position.
| SoC (%) | Loss/Gain (%) |
| Day 1 | 100 | 0 |
| Night 1 | 59 | -41 |
| Day 2 | 99 | +40 |
| Night 2 | 60 | -39 |
| Day 3 | 89 | +29 |
| Night 3 | 48 | -41 |
In the second test, the overnight losses were slightly lower than in the original experiment, probably because of the cooler winter temperatures. During my later testing, I found that ambient temperature has a much greater effect on a camping fridge's power consumption than I had originally appreciated. On the third day, hazy conditions and occasional cloud reduced the solar input, resulting in a smaller daytime gain.
Under good solar conditions, and with the fridge operating in relatively cool ambient temperatures, the Jackery 500 and SolarSaga 100 panel should be capable of keeping the fridge running for at least a week. In hotter weather, however, the increased compressor running time will substantially increase the power consumption.
(updated: 14 July 2026)
Panel output to power supply input adaptors
The three panels discussed above each have different output connectors:
| Panel | Output connector |
| Enertech | Grey Anderson |
| Jackery | DC7909 |
| Bluetti | MC4 |
Fortunately, all the power boxes I have use DC7909 as input connectors, so it was relatively easy to find adaptors from the solar panel output to DC7909.
Other boxes have many different types of solar input connectors, and while some follow recognised formats, manufacturers seldom specify exactly what they are using. In practice, this often leaves the user to figure out compatibility by trial and error.
For instance, the input socket on the Gizzu GPS 500 is a 4.0 × 1.7 mm barrel connector — a size that is very uncommon locally and difficult to source in South Africa.
The current trend with larger boxes and panels is to use XT-60 or XT-90 connectors. XT-60 has effectively become the de facto standard, while XT-90 is less common but still used on higher power equipment.
Another trend is to describe the input simply as an “8 mm” barrel connector — Jackery being a notable example. In reality, two different connectors are used depending on the model of the box: DC7909 and DC8020. Both fall under the vague “8 mm” description, but are not interchangeable.
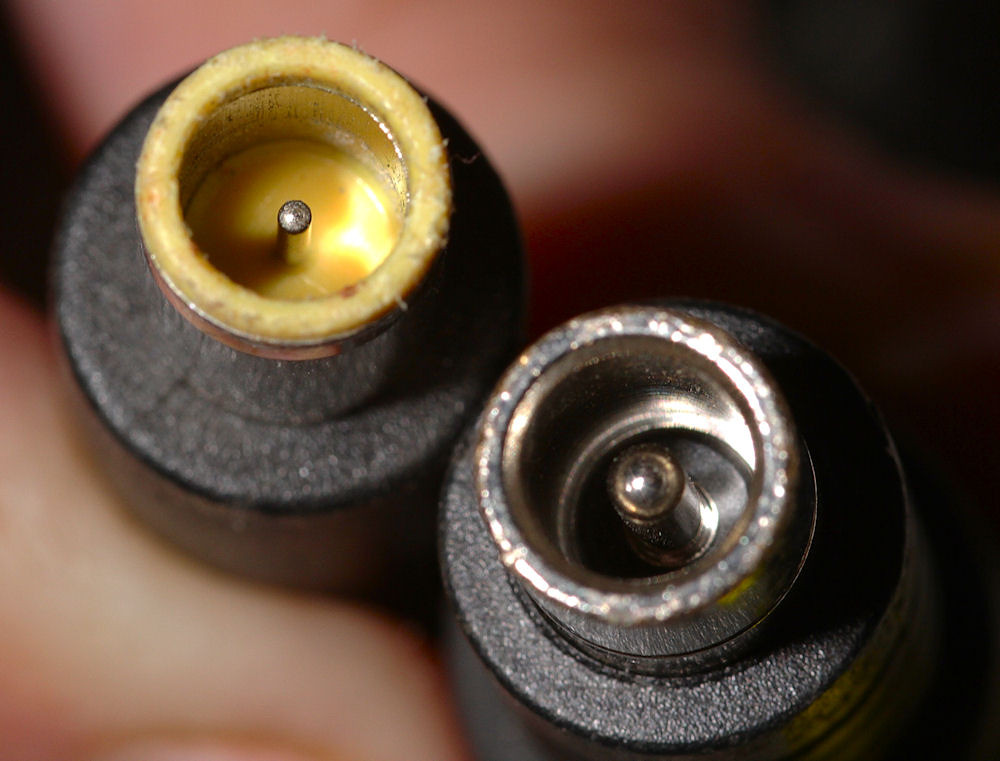
Jackery “8 mm” connectors (DC7909 vs DC8020)
Adaptors can be a real issue when buying panels for a specific box. They are not always easy to find, and sourcing the correct connectors for DIY solutions can be equally frustrating.
(updated: 6 July 2026)
Concluding Remarks
During all my tests with the panels, one of my major findings was that the placement of the panel, relative to the sun, had a huge impact on the output from the panel. Once I did get 93 W output from the Jackery panel, but I am not sure how reliable that was. Under optimum conditions, between 67 W and 75 W was the best I would normally see. However, this did require moving/rotating the panel regularly.
I have collected a considerable amount of performance data for the panels. However, I have chosen not to present it as graphs because there are too many interacting variables for the results to be meaningful on their own. Panel output depends not only on the angle of the panel to the Sun, but also on the Sun's position in the sky, the season, cell temperature, atmospheric conditions (such as haze, dust and humidity), wind, and passing cloud. Unless all these factors are measured and accounted for, comparisons between different days can be misleading. The most important consideration when positioning a portable panel is to keep it as close as possible to perpendicular to the Sun's rays. This means the optimum tilt changes throughout the day and throughout the year. In midsummer, when the Sun is almost overhead in southern Africa, laying the panel nearly flat around midday can produce the highest output.
As the efficiency of the panel is very dependent on the angle at which it faces the sun, fixed panel systems, such as most home systems, it is necessary to over-panel the solar system to get a decent current throughput to the batteries. If I was looking at a fixed panel system, I would love to be able to include a sun tracking panel adjustment system. This should decrease the number of panels needed to achieve the required output current.
(updated: 2 July 2026)
