Gadgets
High Pressure Cleaner: Turbo Nozzle
Introduction
One thing Francois has rated very highly with his high pressure washer system (Kärcher K3) is the turbo nozzle. After my initial tests with the Trade Professional HP2000, I decided that this might be something worth investing in. However, trying to find the correct adaptor for the HP2000 proved to be a bit more tricky than I expected. I was very lucky with the Ingco Foam Cannon that I bought as it fitted the HP2000's gun without any issues - I could find no turbo nozzle with the same connector. Fortunately, there are a whole host of accessories for high pressure cleaners which attach via a Quick Connect coupling (QC). This meant my problem would be simplified if I could find an adaptor from the HP2000 to QC. As usual with these things, this was not as trivial as it sounds...
QC adaptor
The HP2000 has a bayonet connector, like many other pressure cleaners. What I was astonished to find was the number of variations of bayonet connectors out there. Just from the look and proportions of the connector, I decided that it was an old Bosch connector. As adaptors to QC were almost impossible to find in South Africa, I decided to see what I could find on Temu.
Unfortunately, the Bosch to QC adaptor I bought is no longer available, but can be seen in the image below. As luck would have it, the Bosch adaptor was way too small. By measuring the connector on the HP2000's wand (which ironically, I had already done), I was eventually able to find and order the correct adaptor. As you can see, the proportions of the two adaptors are similar, just the Bosch adaptor is smaller.
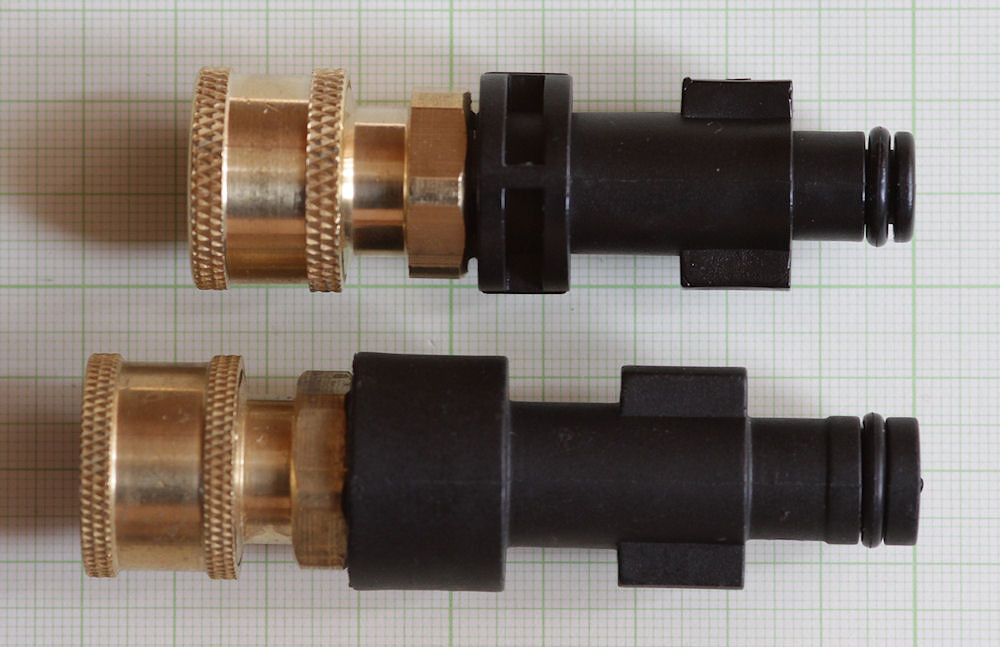
The two adaptors: the Bosch on the top and the HP2000 equivalent on the bottom
Some of the adaptors on the Temu website do have measurements included with the sales blurb. Below are the measurements of the adaptor which I bought.
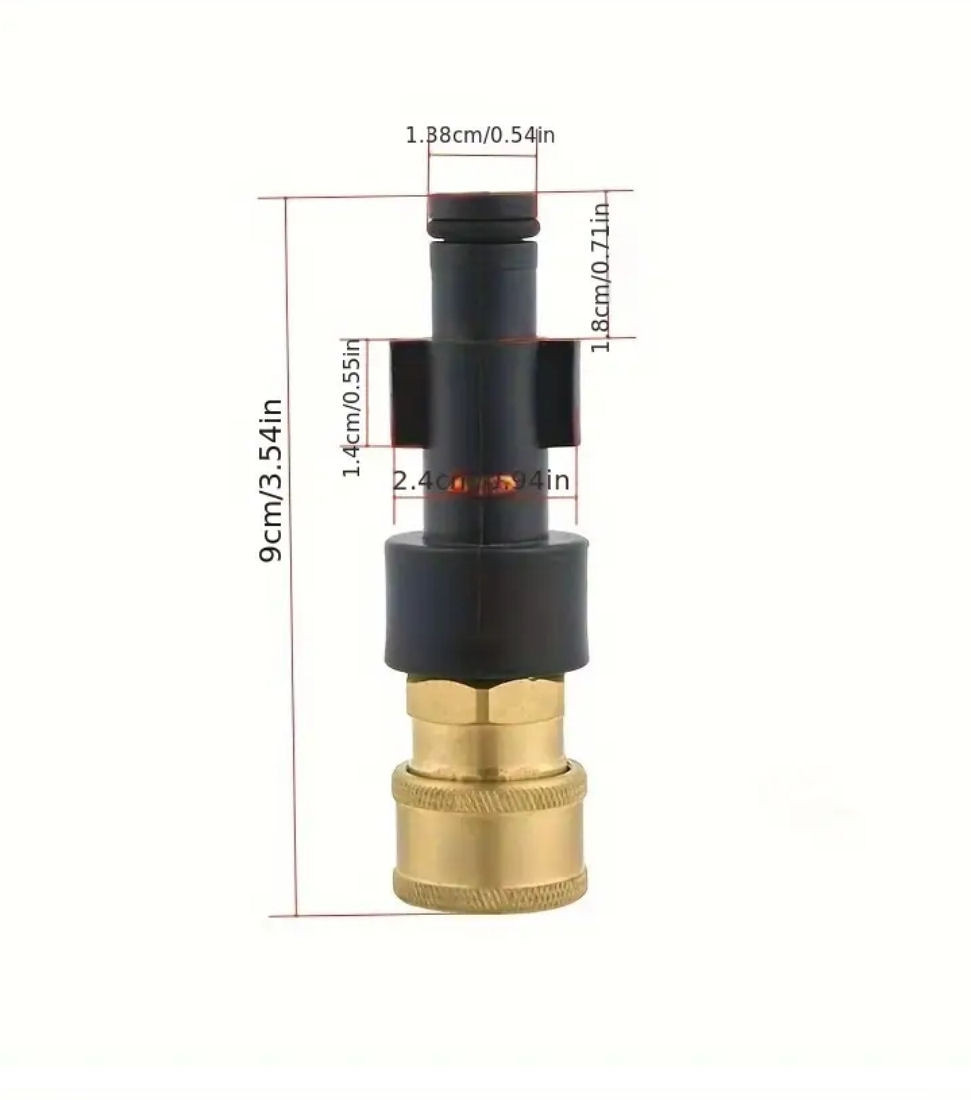
Some measurements on the HP2000 equivalent adaptor
Apart from the general shape, the important measurement is the length of the fins on the bayonet fitting - in this case 14mm.
As an exercise in futility, I tried to find which major pressure cleaner manufacturer uses this type of connector. From reading the reviews on the Ingco Foam Cannon, in South Africa, brands such as Bennett Read, Ingco and Trade Professional use it. Two reviewers (accessed: 19 June 2025) also mention Ryobi. As Ryobi is a reasonably major power tool manufacturer, I thought that maybe the connector could be attributed to them. However, it would seem that Ryobi are moving toward QC couplings and I could find no links on Ryobi's own website, nor dealer websites, to this connector. I did get obscure references on Amazon (page 1, page 2) to a connector for Ryobi. These pages included other even more obscure pressure cleaner brands which use this connector: Powerclean; Portland; Husky; Elitech; Sturm; and Robinzon. I still do not know which brand owns the design of the connector in question.
The turbo nozzle
With my Temu order which included the Bosch adaptor, I also bought a turbo nozzle. The discount that I recieved on this gadget made the purchase a no-brainer.
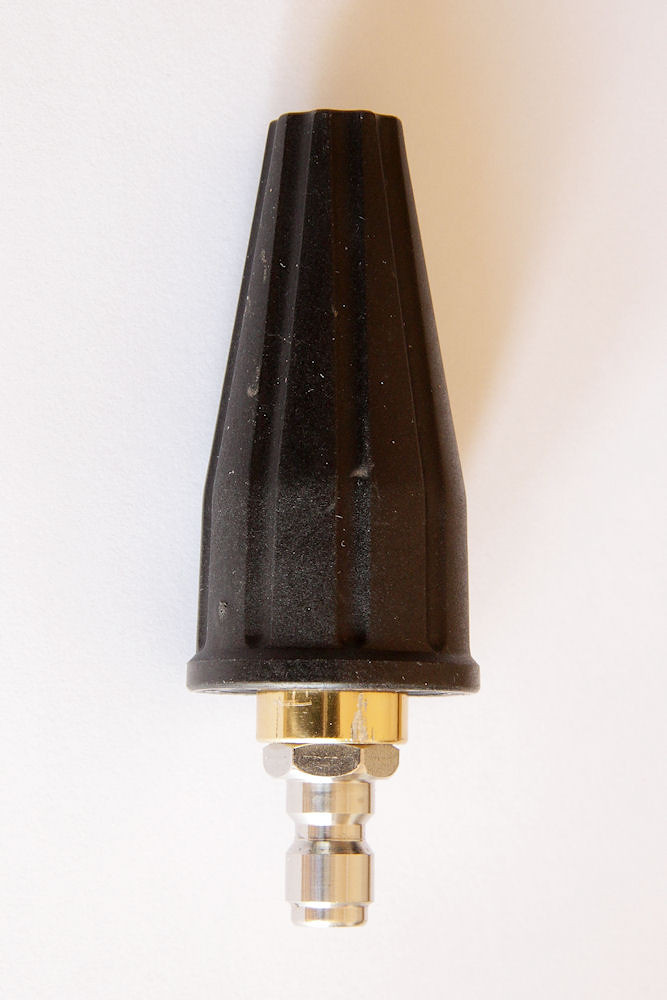
Fig 2: The turbo nozzle with a QC coupling
As soon as I recieved the QC adaptor, I tried it out, and this was the start of my next problem. The turbo nozzle did not work. The stream of water from the nozzle was definitely not what was expected - it could hardly move a leaf stuck to the tiles on the patio. Inspection of the nozzle showed the cause of the problem.
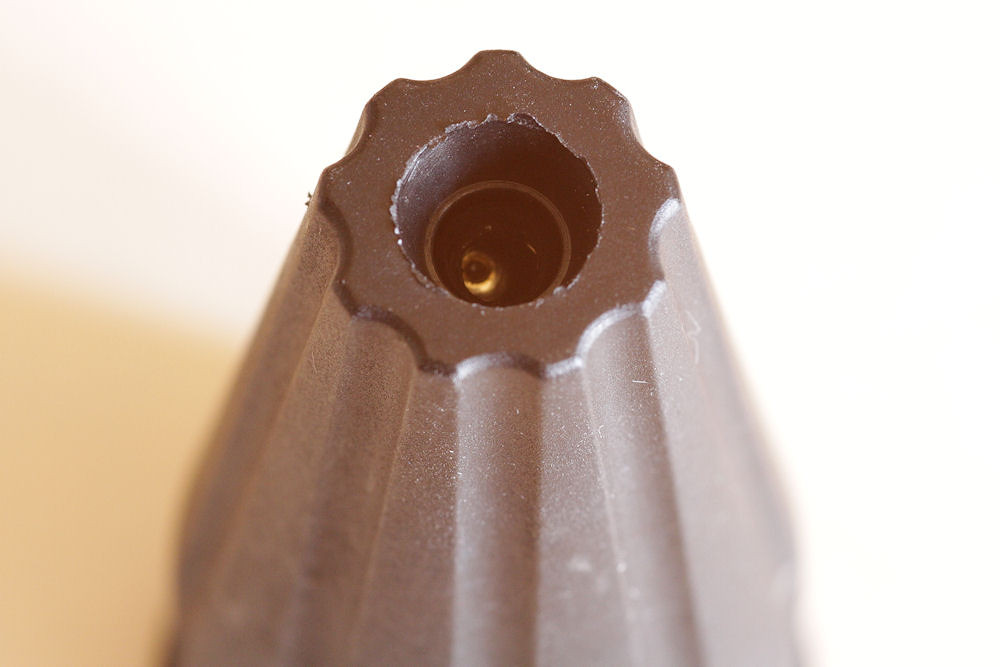
Fig 2a: The nozzle blocked by the housing
The nozzle was stuck behind a ridge on the housing. Water could flow past the nozzle without actually having to go through the nozzle.
This made me decide to disassemble the nozzle to see how everything fitted together.
First problem: the QC coupling has a reverse thread - clockwise to loosen, anticlockwise to tighten.
Second problem: once the QC coupling was removed, there was a disk preventing access to the nozzle:
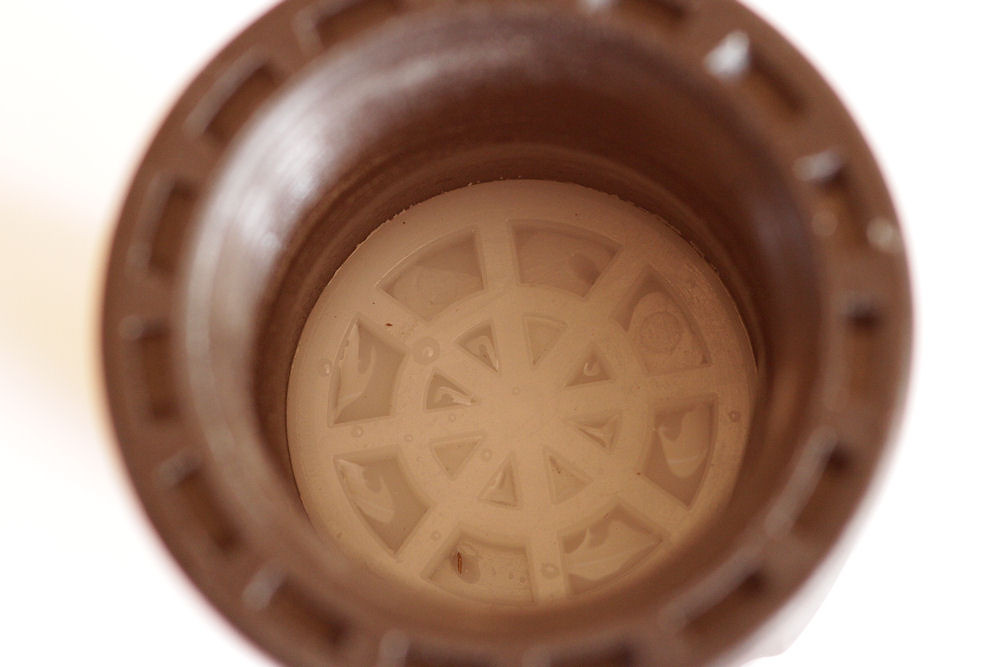
Fig 2b: The nozzle blocked by a disk
The clever people on YouTube say a gentle tapping of the housing on a hard surface would make the disk fall out - this did not work. My first attempt at removing the disk entailed using a small pair of long-nosed pliers to grab one of the ridges on the disk and pulling it out. This was not easy as the disk did not come out straight and jammed against the housing. On subsequent occasions (and I have done this quite a few times to take these pics) I found that it is easier to use a small screwdriver and gently push down on the nozzle from the other side (such as Fig 2a). The disk and the nozzle then fall out quite easily.
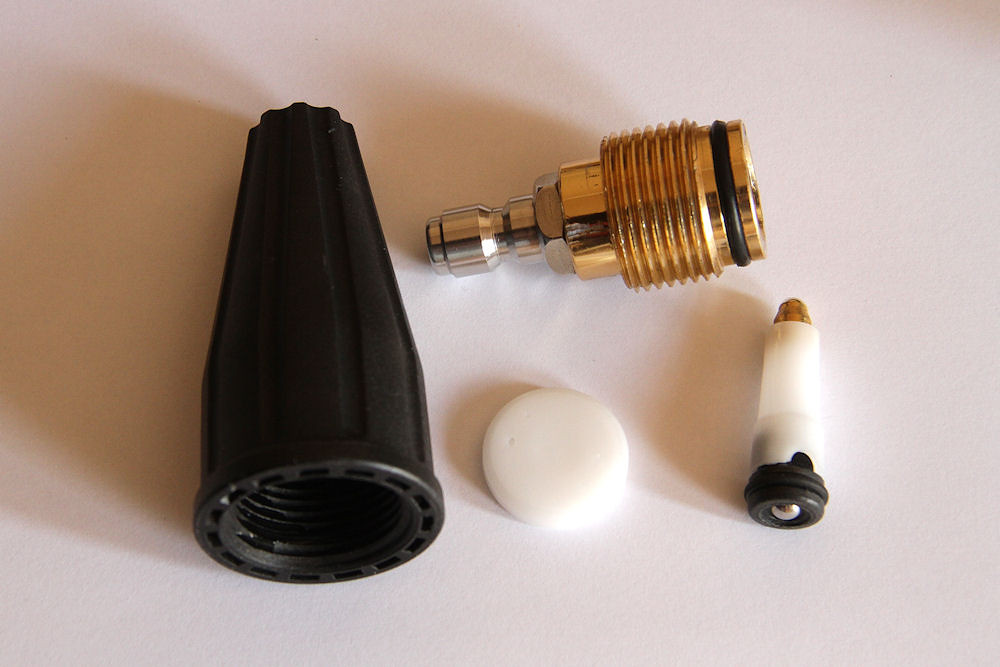
Fig 2c: The components of the turbo nozzle
The components shown in Fig 2c in a clockwise direction from left:
- the housing;
- the QC coupling;
- the nozzle; and
- the disk which separates the high and low pressure sides of the turbo nozzle.
The components of the nozzle shown in the sales blurb on the Temu website bear little resemblance to that shown in Fig 2c.
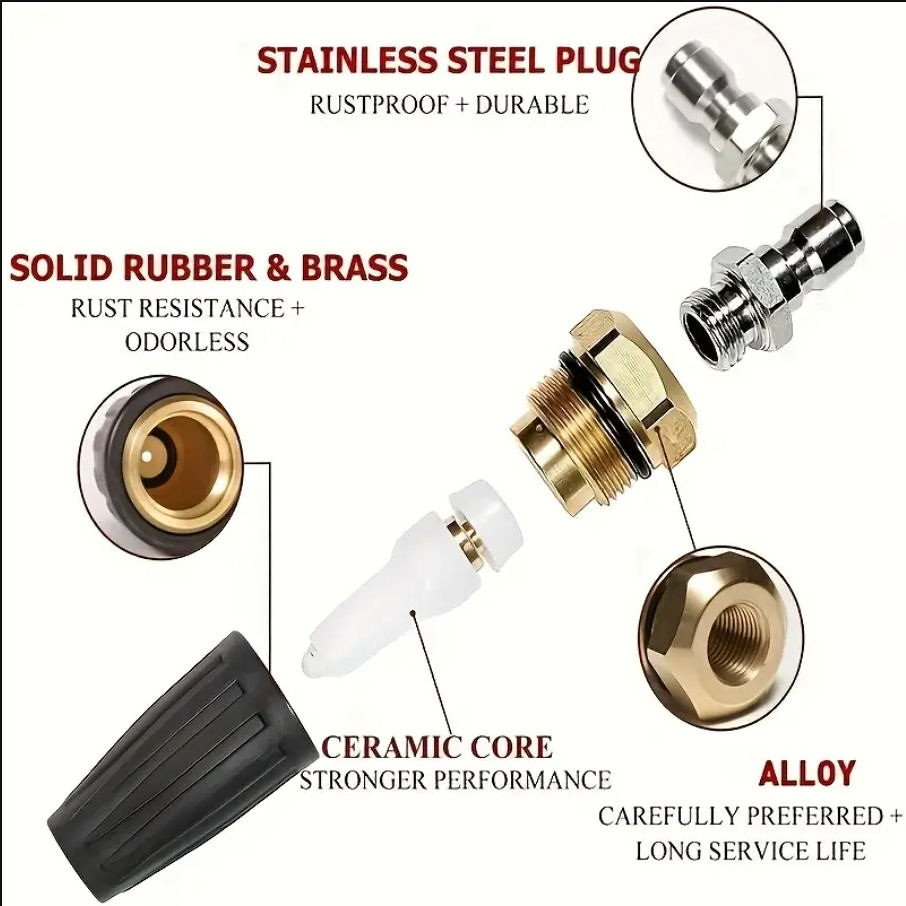
Fig 2d: The components of the turbo nozzle as shown on the Temu website
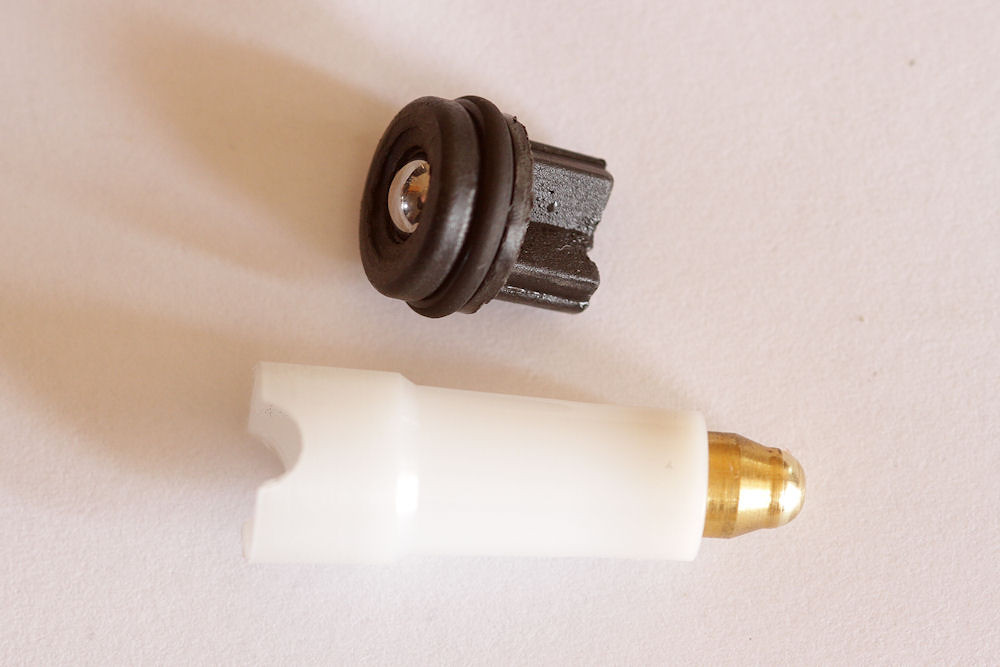
Fig 2e: The base of the nozzle removed
When reseating the base of the nozzle, don't press it all the way in. Leave a gap of about 1mm.
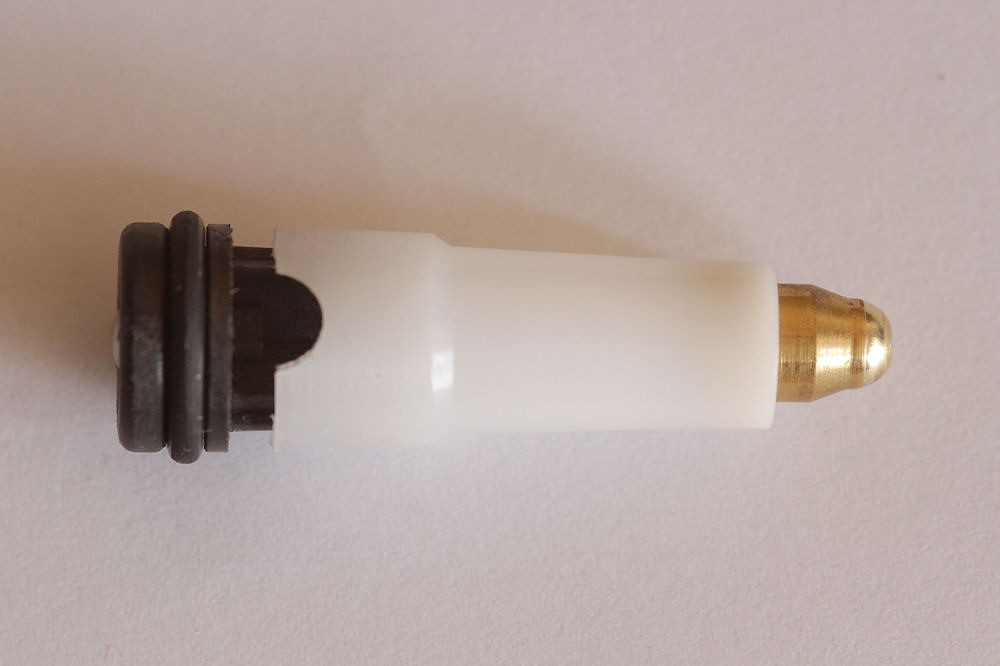
Fig 2f: Reseating the base of the nozzle
This change will move the nozzle head further into the exit orifice, moving it away from the the ridge around this orifice as shown in Fig 2a.
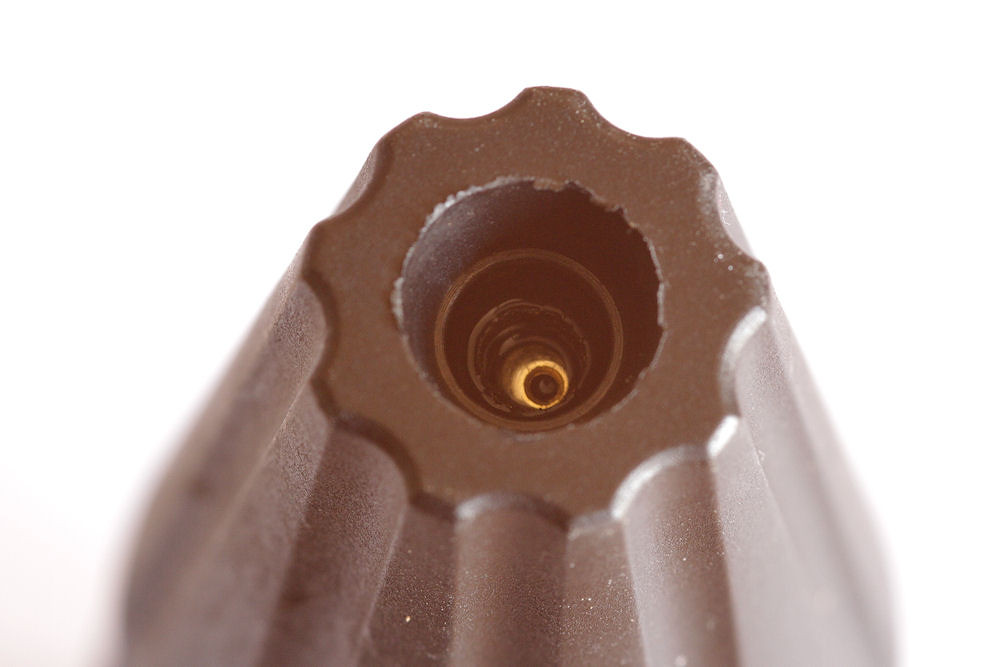
Fig 2g: The nozzle reseated in the housing
Once you have replaced the disk when reassembling, make sure the nozzle can roll freely within the housing.
This tiny change gives the conical spray pattern expected from a turbo nozzle.
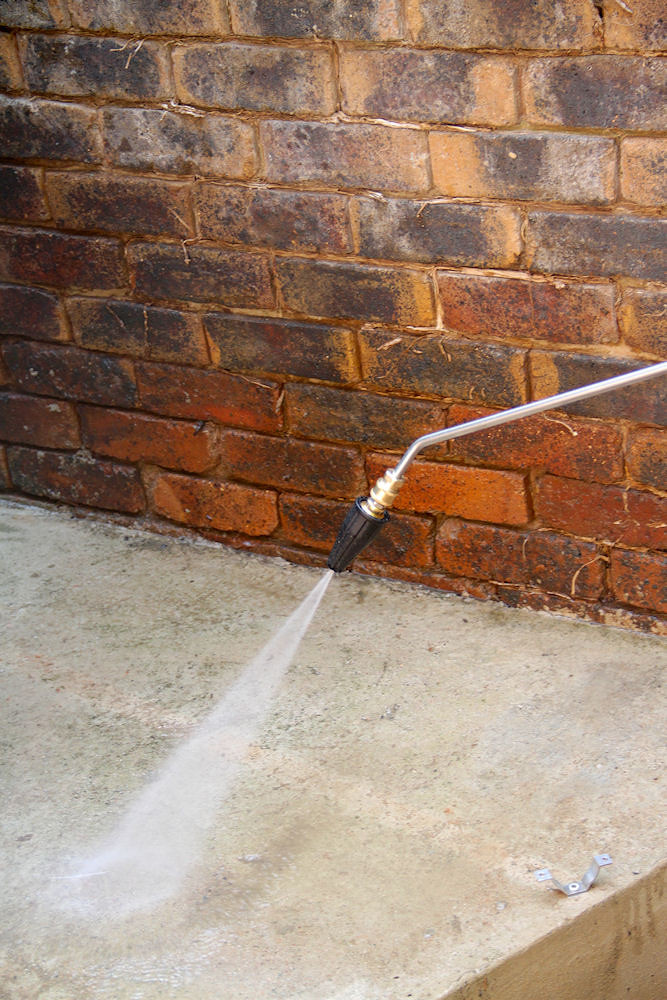
Fig 2h: The conical spray pattern from the turbo nozzle
Extension tubes
As it is quite awkward to use the nozzle connected directly to the gun, I bought two QC extension tubes on Temu.
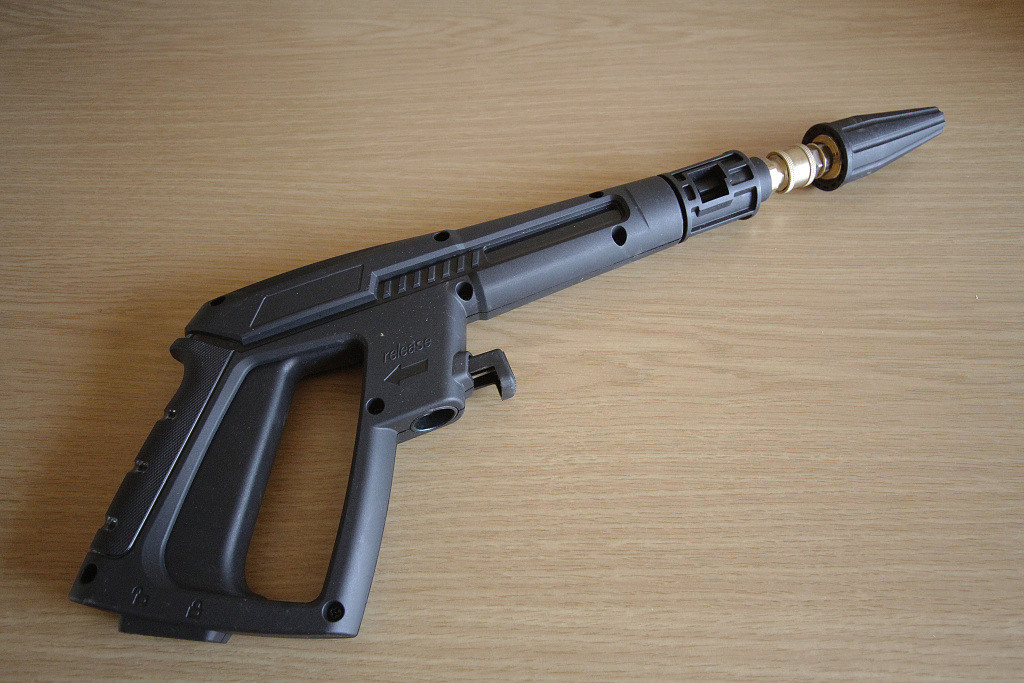
Fig 3a: The nozzle connected directly to the gun
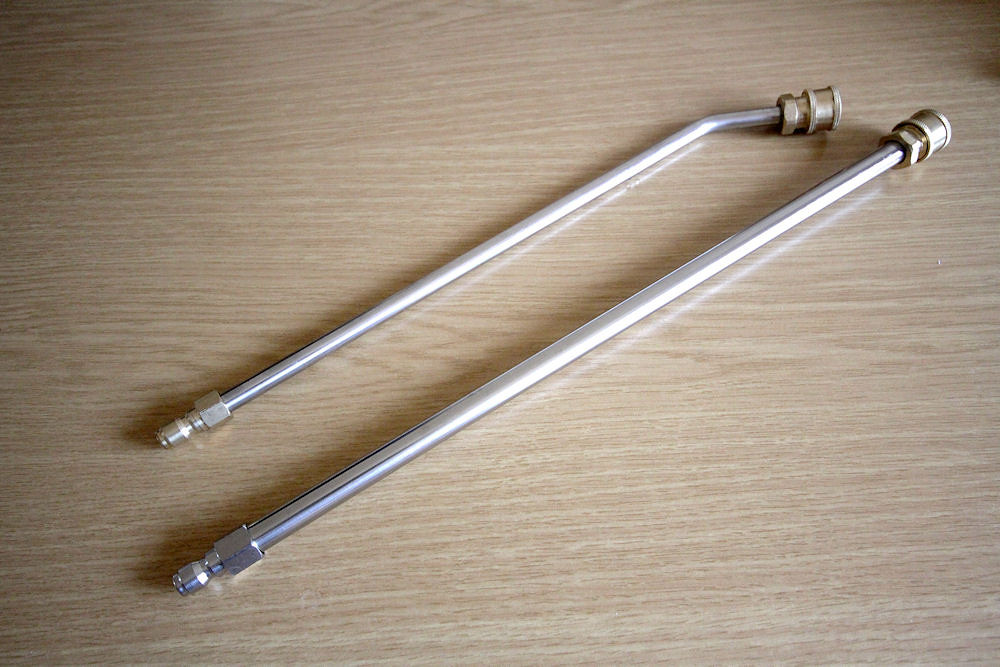
Fig 3b: The two extension tubes
The extension tubes are useful for getting more reach. As you can see, one of the tubes has a 30° bend on the one end. This is especially useful for cleaning horizontal surfaces as can be seen in Fig 2h.
Update (28 November 2025)
Unfortunately, I managed to break the adaptor when using both extension tubes. I had the nozzle a bit too close to the surface I was wanting to spray, and the back pressure on the nozzle (and hence on end of the arm of the lever formed by the extension tubes) caused the plastic on the adaptor to rupture.
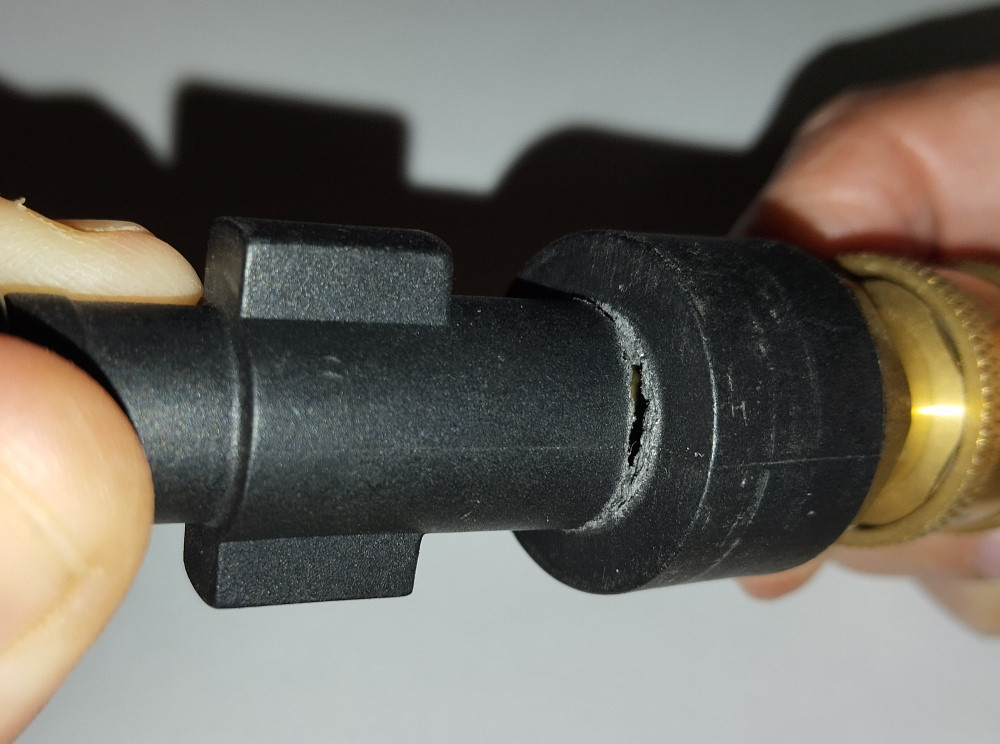
Fig 3c: Ruptured adaptor
If you do use extension tubes, make sure you have enough distance between the nozzle and the surface you are spraying. This problem will be exacerbated with each extension tube you add as you are increasing the length of the arm.
(updated: 9 October 2025)
How does it work?
I like figuring out how things work, especially as the experts out there don't seem to have a clue.
With this particular design, the water has to find a way through the disk at the base of the nozzle. If you look at the left side of the disk in Fig 2c, you will notice a hole. There is an equivalent hole on the right which is a bit more difficult to see because of the lighting. In Fig 4, I have put pins through these holes.
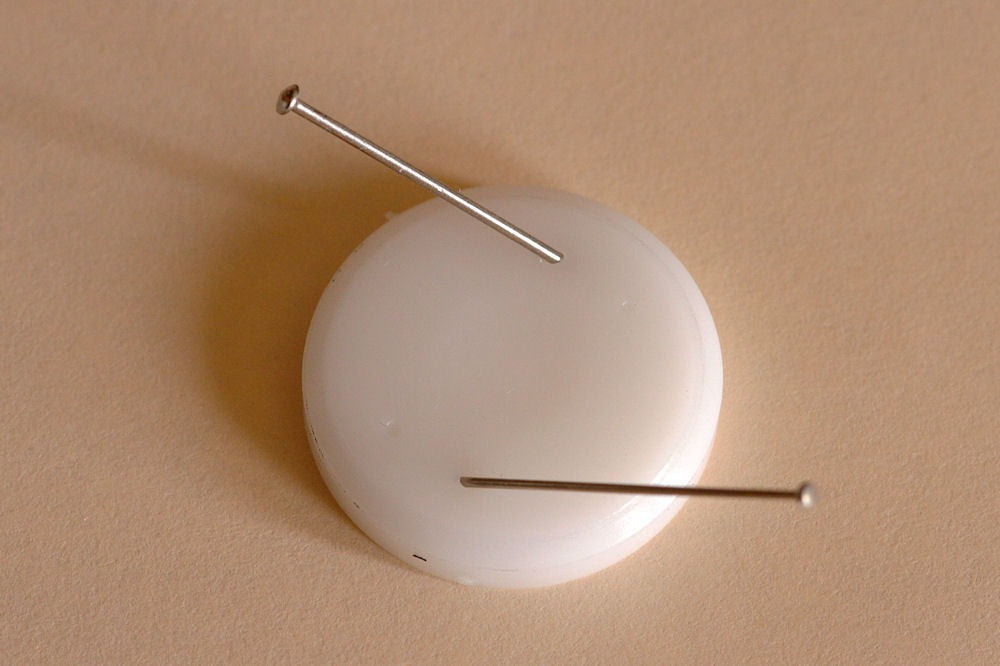
Fig 4: Pins through the holes in the disk
Water coming through the holes will be forced to flow in an anticlockwise direction because of the angle that the water stream exits the disk. This anticlockwise vortex will cause the nozzle to rotate around in the housing in an anticlockwise direction. Once the housing is filled with water, the water will be forced into the nozzle casing through the two slots in the sides (see Fig 2e). This water will then be forced out of the nozzle. In Fig 2e you can also see a ball bearing in the bottom of the base of the nozzle. This ball bearing adds weight to the base of the nozzle and because the nozzle is rotating around in the housing, the centrifugal force will push the base of the nozzle into the wall of the housing. With the base of nozzle rotating around on the wall of the housing, a consistent conical spray pattern is achieved.
If one looks at the base of the nozzle (Fig 2e and 2f), you will notice an o-ring around the base. This o-ring is not there to act as a sealing ring, but rather as a tyre for the nozzle as it moves around the housing.
The anticlockwise movement of the nozzle in the housing is the same direction as the loosening action of a conventionally threaded screw. Thus the housing is reverse threaded to prevent this from happening.
(updated: 27 June 2025)
Update
I am becoming less enamoured by this device the more I use it. The conical spray pattern only occurs when the stars are aligned correctly. When it does work, it is great, but to get the nozzle spinning remains an issue, in spite of my efforts discussed above. A case in point was while washing windows recently - the nozzle stopped spinning when changing the gun from one hand to the other and nothing I tried would get it to spin again.
I would suggest getting a more expensive nozzle rather than this one - I am definitely on the lookout for a different one.
(updated: 25 November 2025)
Useful links
