Ramblings
Micro JoJo tank
Introduction
Although the tank referred to in this note is not a JoJo, it forms part of my Jojo system. JoJo, as part of their rainwater harvesting system have something called a First Flush Rainwater Diverter (PDF).
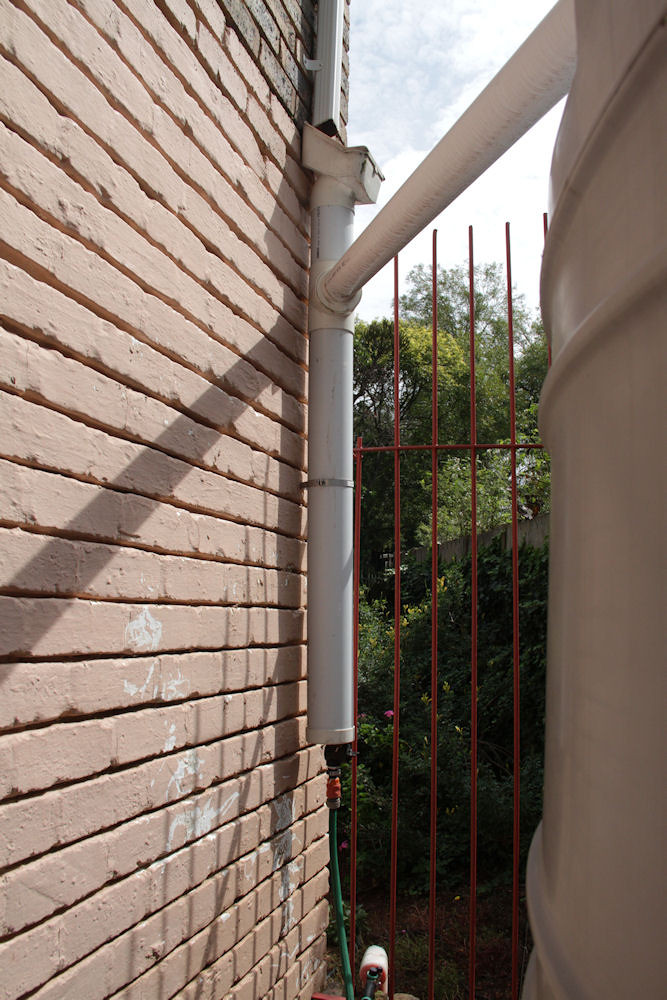
The first flush trap
This is basically a trap for the first water coming off the roof, before the water is diverted into the JoJo. Water first flows into the trap, and once it is full, a non-return valve diverts the water to the JoJo.
Now this trap contains about 10L of water and Pat felt it should be possible to harvest this water, as well as the water going into the JoJo, after each rain. The sediment from the roof settles to the bottom of the trap, and the rest is clear water. She felt this water could be used for watering pot plants.
The sediment is present after every rain, so if you have one of these traps, do empty it after each rain, otherwise, the sediment will end up in your JoJo.
Trap diverter
As strange as it sounds, I had to divert the outflow from the tap on the first flush system as this flow was very close to the wall of the house, as well as a small security fence and its wall (see previous pic). The conditions on the side of the house where the JoJo is situated, is for some reason, very favourable for the growth of algae, so I wanted to try and inhibit this growth as far as possible. This required a length of pipe from the outlet tap to divert the water away from the wall.
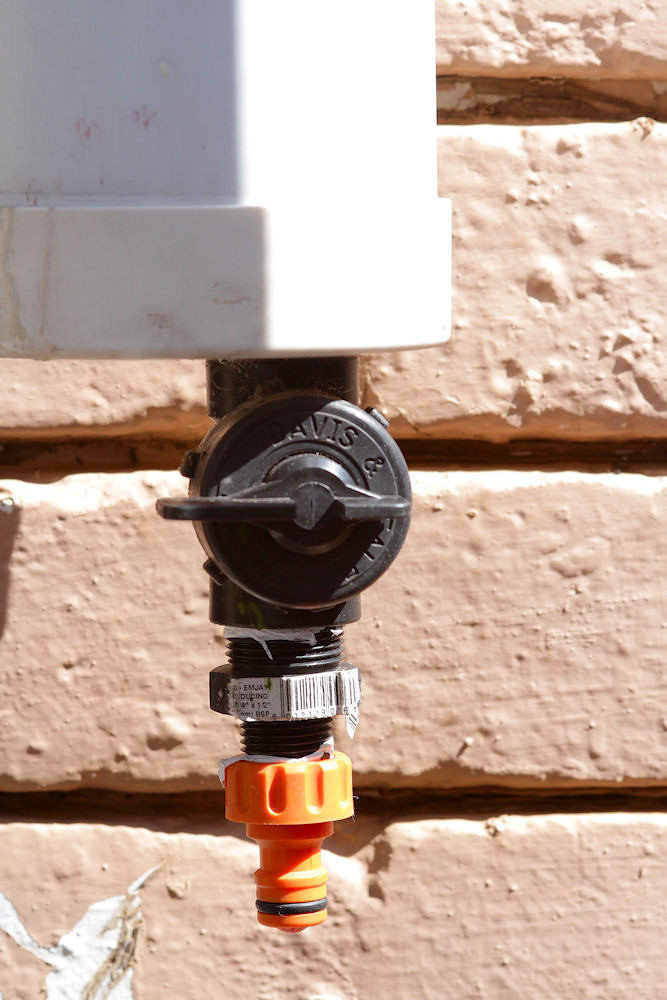
The tap on the first flush system
Although not mentioned in JoJo's blurb on the system, there is a screw thread on the inside of the outlet from the tap. I managed to find an adaptor at Builders Warehouse which allowed me to connect a standard Gardena-type tap connector for a hose (as shown in the pic above).
Pat's first experiments used a couple of containers, with lids, for collecting this water, but it was difficult to retrieve this water without disturbing the sediment from the trap on the bottom of the container.
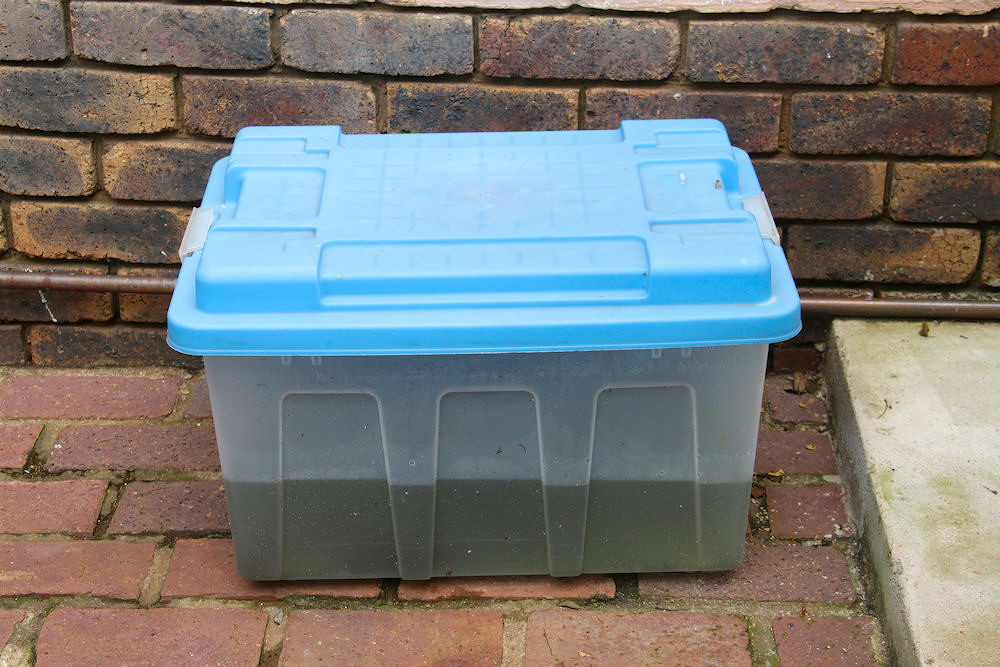
Container for collecting water from the trap
This results of this experiment were reasonably successful as this saved a lot more water. The problem was, if you look closely at the previous pic, you will see that the water in the container is dark green. This green is the algal growth that I mentioned earlier. The container has translucent walls which allow enough light into the container to promote the growth of algae.
This required me to rethink Pat's strategy of harvesting water from the first flush trap, AND did not cost an arm and a leg.
The Micro JoJo
My idea revolved around using a dustbin for the container and a tap to let out the water at the height of a standard bucket or a watering can. I was hoping to get a plastic bin of around 250L, but I found that these things were way out of my price range. Eventually I settled on a 90L black plastic bin from Mambo's which cost R220 (unfortunately, no longer in their product range).
For the tap, I found a plastic tap at Builder's Warehouse and a plumbing soldering connection which I could use as a nut. I used a washer from a large Gardena-type tap fitting, which Pat had in her irrigation system spares, to seal the hole. I had to buy a 20mm spade bit to make the hole in the bin for the tap. This spade bit cost almost as much as the bin!
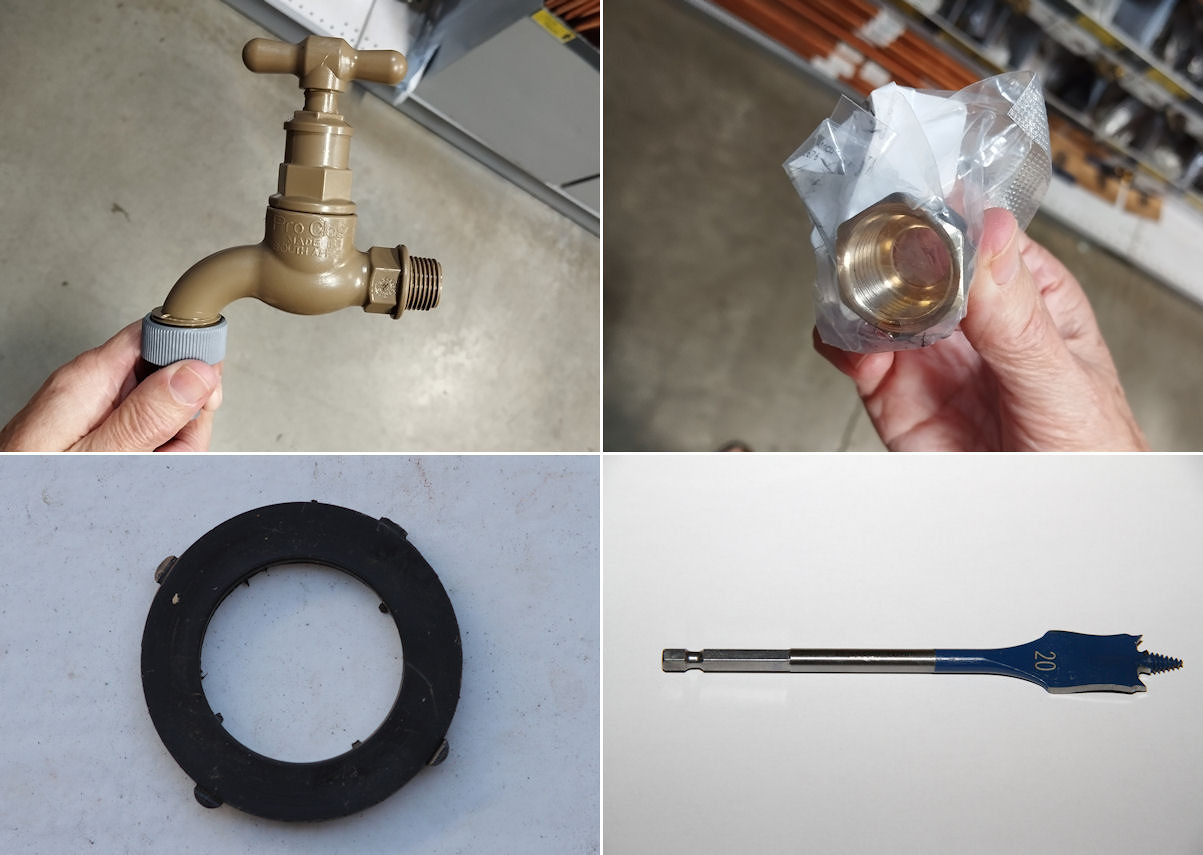
Top row: the tap and the "nut", bottom row: the washer and the spade bit
The hole for the tap was made at the height of a watering can above the base of the bin. According to my calculations this would allow 50L to be fed directly from the tap before having to tilt the bin. As the thread on the tap made it marginally larger than the 20mm of the hole, I could screw the tap into the bin. As the hole in the washer was also 20mm, it had to be screwed onto the tap. Finally, my nut could be screwed onto the tap to make a seal between the washer and the bin. (Francois said that I should have put bricks under the bin which would have made it possible to put the tap lower - too late now!)
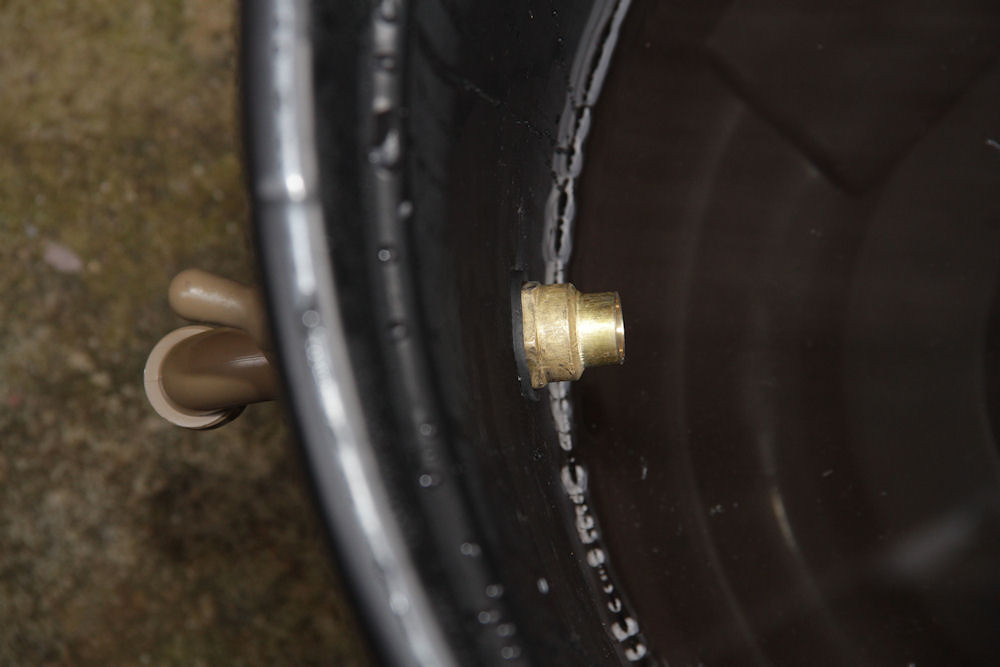
Nut and washer in position
(I have edited the pic above to remove a distracting reflection of the nut and washer.)
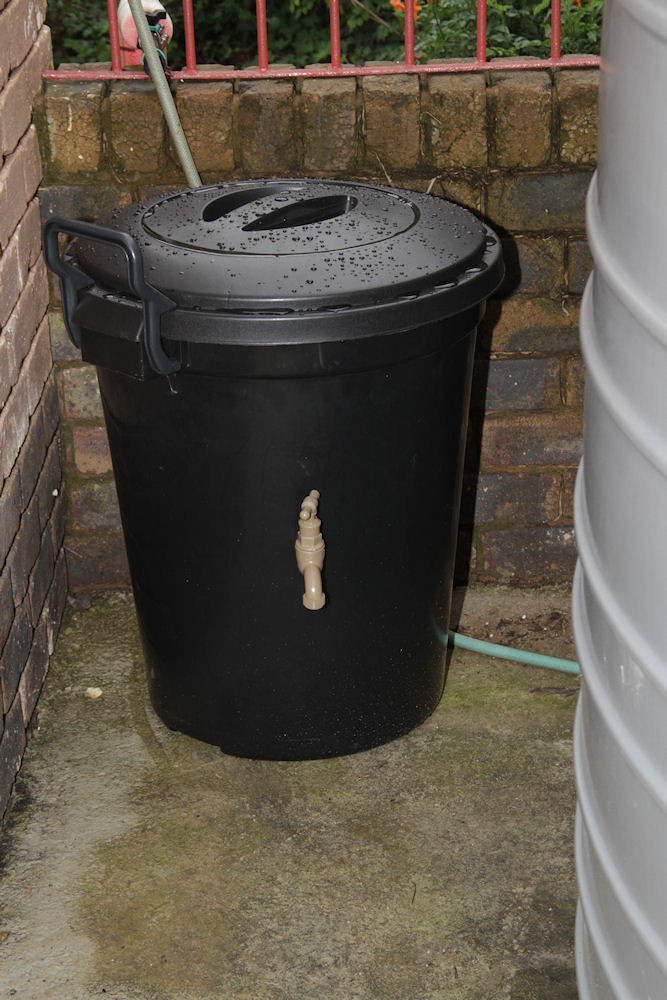
The final product
(updated: 29 April 2025)
Update
On using the Micro JoJo for the first time, Pat found that the flow from the tap was way too slow. It was quicker to scoop water from the bin rather than using the tap. The pressure head, together with the geometry of the tap, worked against me here. I will have to rethink the method I use for draining the bin.
Pat also found about a hundred dead mosquitoes floating on the surface of the water when she opened the bin to scoop out the water. As there is no way for the mosquitoes to have gotten into the bin with the lid closed, the larvae must have been introduced through the first flush trap. As the grid on the first flush trap is too small for mosquito ingress (and the trap was emptied after each rain shower), the only place the larva could have come from was residual water in the gutter feeding the downpipe. This is another reason to have the first flush trap installed in your rainwater collection system - you want to stop things like mosquito larva from getting into the JoJo.
(updated: 22 May 2025)
Update
If you look at the two previous pictures you will notice a rather heavy algal growth on the concrete slab. We have put some effort into removing this algae and then sealing the concrete to try and prevent the algae from returning.
(updated: 19 November 2025)
Off topic
In order to drill the hole in the bin, I used my antique Black and Decker drill. For power, I used my Jackery 500 due to the low power consumption of the drill (370W). I have done this several times in the past as it saves the effort of finding and running extension cables. On this occasion, the Jackery powered off as soon as the spade on the bit dug into the plastic of the bin. The power surge caused by the spade digging into the plastic must have exceeded the Jackery's limit (1000W), which is rather strange.
My Bluetti EB70 had no problems in drilling the hole.
(updated: 30 April 2025)
