Android Software
Photo Editor by dev.macgyver
A practical user guide
Using the Clone tool
A clone tool is normally used for removing items from an image or replicating an item from another part of the image. The Clone tool in Photo Editor had me stumped for a while, so this tutorial is intended and help you avoid the problems I faced.
In this tutorial, I am going to use a photo I took recently showing a sliver of the moon, with Mercury and Venus in close proximity (10 October 2026 at 19:15). It's set against an urban background, and what appealed to me was that it looked as though Mercury and the moon were falling into the gap between the cypress trees, pulling Venus along.
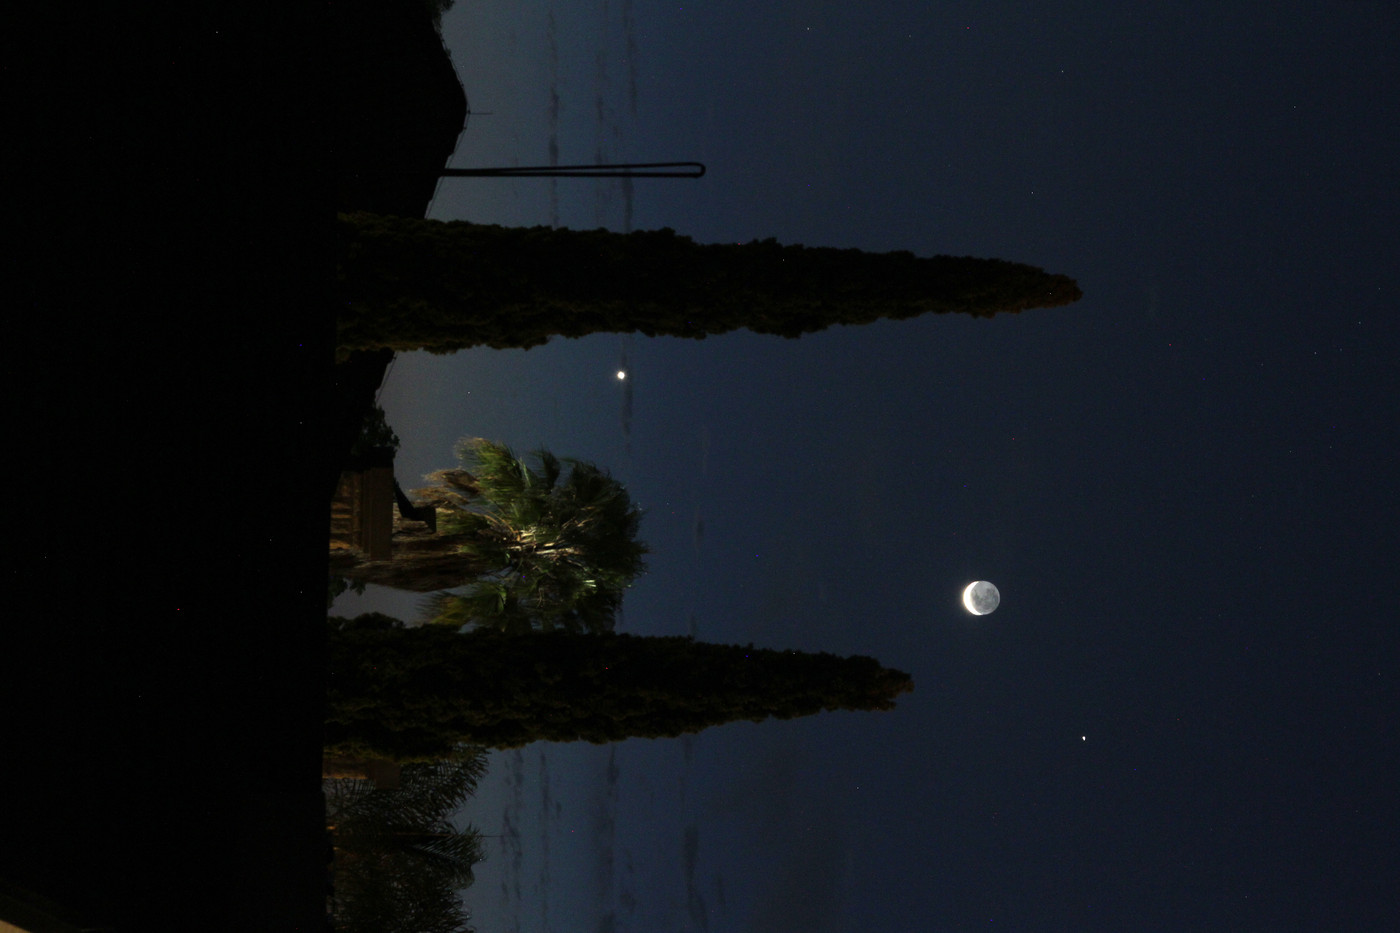
Moon, Mercury and Venus (on its side)
Note that this image has not been scaled down. It is the full 5184×3456 pixels direct from the camera. This is important for the tutorial, as the fine detail in the wispy clouds can affect the cloning process. The brightness has been increased considerably using Photo Editor's Exposure adjustment to make the darker areas more visible.
A jarring element in this photo is the overflow pipe from the neighbour's geyser. In this tutorial we are going to remove that pipe. What makes this difficult is the light gradation in the sky, from almost black to a yellowish afterglow of the sun which had set an hour or so earlier. The wispy clouds add another complication, as we need to preserve their appearance while removing the pipe.
(17 October 2026)
The Clone tool
Before starting, we need to look at the clone tool and its menus. After loading an image, tap on the Clone menu item.
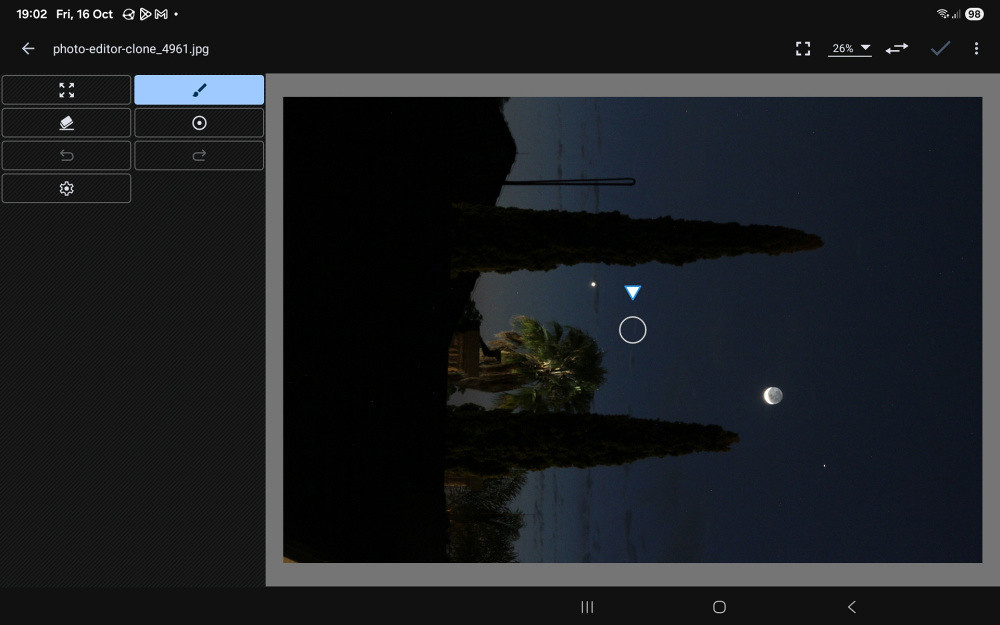
The clone tool screen
On the left of the screen is the clone tool menu. The seven items are, from left to right and top to bottom (on a phone, the first three items are accessed by tapping the paint brush icon):
- The zoom/move button;
- The clone button (a paintbrush);
- The eraser button;
- The size, hardness and opacity menu button (a bullseye);
- The undo button;
- The redo button; and
- The settings button.
In the centre of the image window is the clone source indicator. It consists of a triangle pointing to a circle, which is the location of the cloning source. This can be moved to the required location by dragging the circle.
The purpose of the triangle had me flummoxed for a while, but all it is is a pointer to the location of the cloning source. As the source circle is white, it can easily disappear on a white background.
None of the options in the Settings menu need to be changed for this tutorial.
(15 October 2026)
A useful external tool
When doing cloning work, it is always useful to have a tool that is more precise than a fat finger. A tablet with a pen is a bonus. However, the following pen-like gadget does the job.
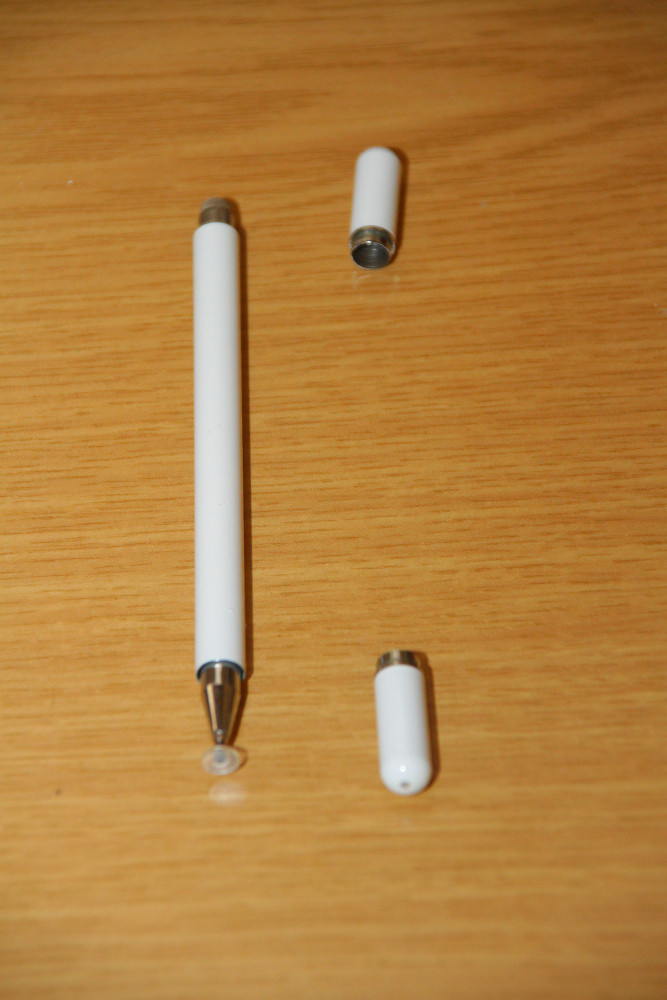
Generic pen for a mobile device
The small transparent disk on the tip allows you to position the pen reasonably accurately. Even the usual soft, rounded tip on the other end is more accurate than a finger.
Another alternative is a Bluetooth mouse, although I find the pen easier to use. However, when using a pen, you need to be careful not to let your hand touch the screen — this will leave an unwanted cloned spot.
16 October 2026
Setting up
First, we need to zoom in on the image to get the pipe as large as possible above the clouds (to the right in the picture). Tap on the Zoom/Move button. Use two fingers to zoom in on the pipe and then move the image so that the pipe is the dominant feature. Move the clone source while you are zooming so that it ends in a position such as the one shown below.
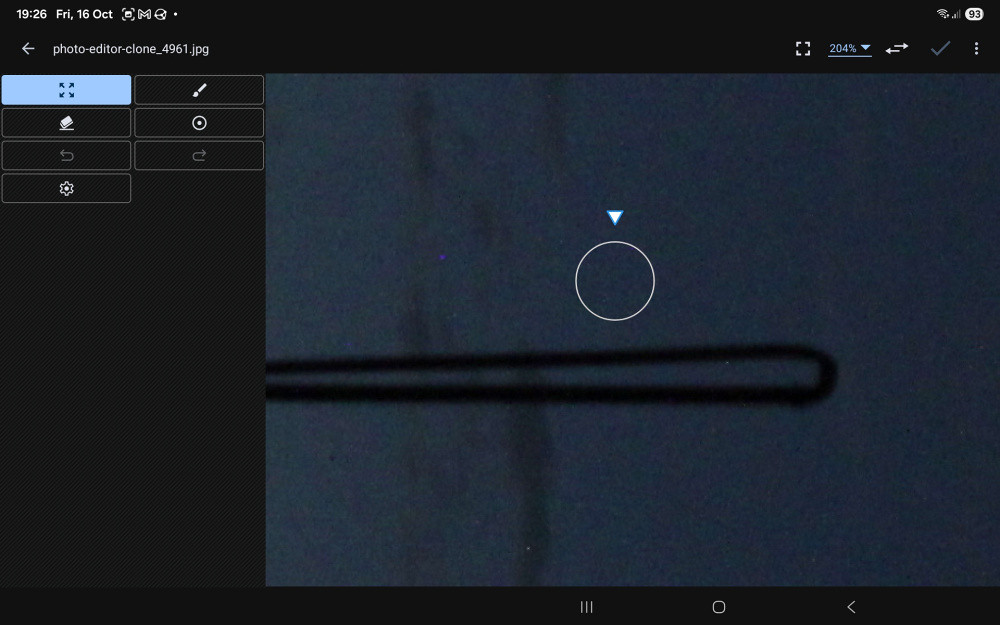
Zooming in on the pipe
We now need to set up the brush for cloning. Tap on the bullseye button.
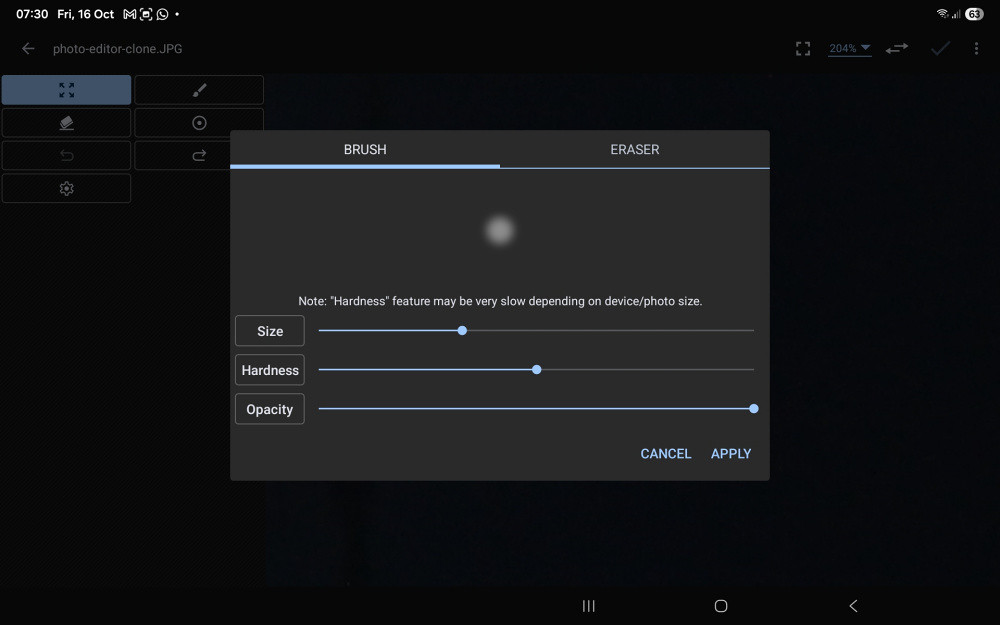
Setting up the clone brush
The settings shown in the image above should be sufficient — we want the diameter of the brush to be roughly the same as the thickness of the pipe.
The Hardness setting controls how soft or hard the edges of the cloned area are. In most cases, you will want to use a value below 100%, as softer edges help the cloned area blend into the background. One exception is when cloning something with a clearly defined edge, such as a building against a light background.
You may need to move the source again so that there is roughly a pipe thickness between the source circle and the pipe — too close and the pipe maybe included in the cloning; too far and colour gradation maybe different. Move the clone source near the clouds as shown below.
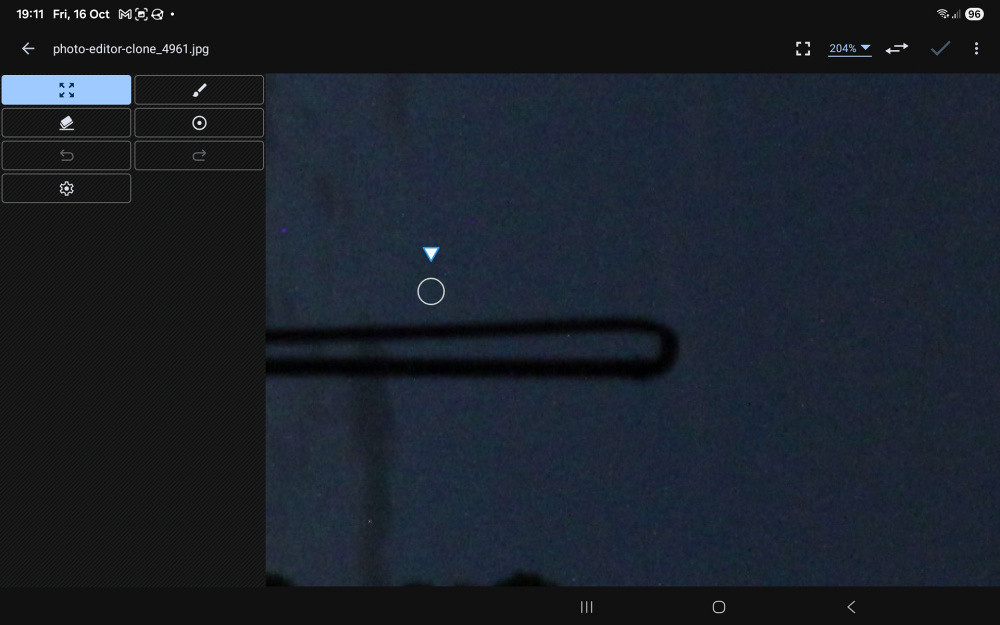
Getting ready to clone
(16 October 2026)
Cloning
In this section, I am going to refer to top, bottom, left and right as you see it in the picture in its current orientation.
The top pipe
Select the Paintbrush button. Position your painting tool (finger, pen or mouse pointer) as close as possible to vertically below the clone source circle. Now drag to the right. If your brush was wide enough (and your aim was good 😁), the top pipe should have disappeared completely.
If not, drag back and forth, without lifting your painting tool until the pipe has disappeared. If you do lift the tool, you will most probably have to reposition the clone source.
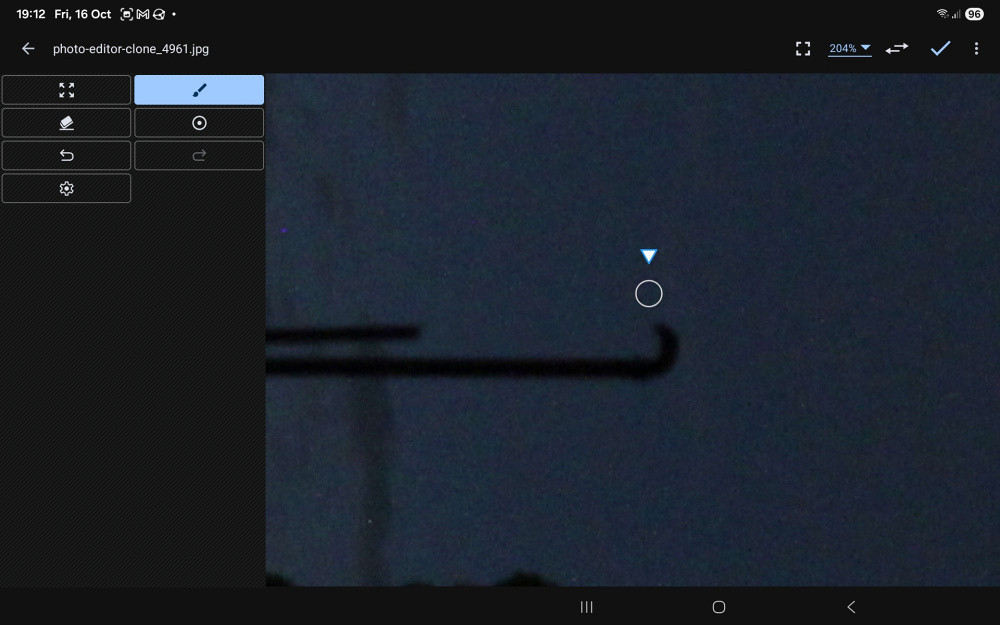
The top pipe gone
The bend
Now position the clone source to the right of the bend, again about the thickness of the pipe away.
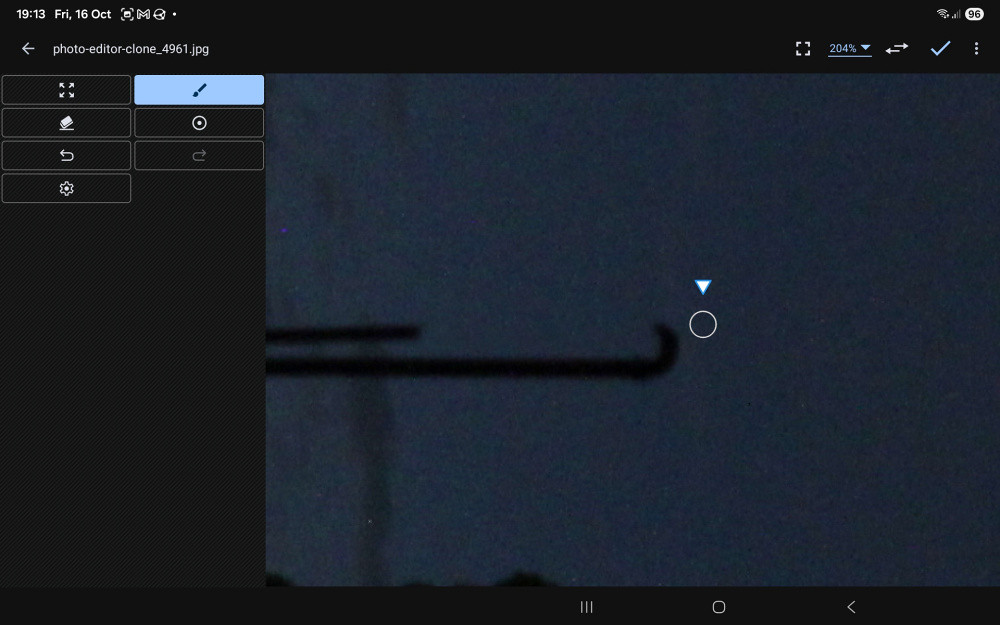
Positioning the clone source for the bend
Follow the same procedure as above, this time following the arc of the pipe downwards.
The bottom pipe
For the bottom pipe, you can place the triangle of the clone source on the pipe when positioning it. This gives you a nice aiming point 😁.
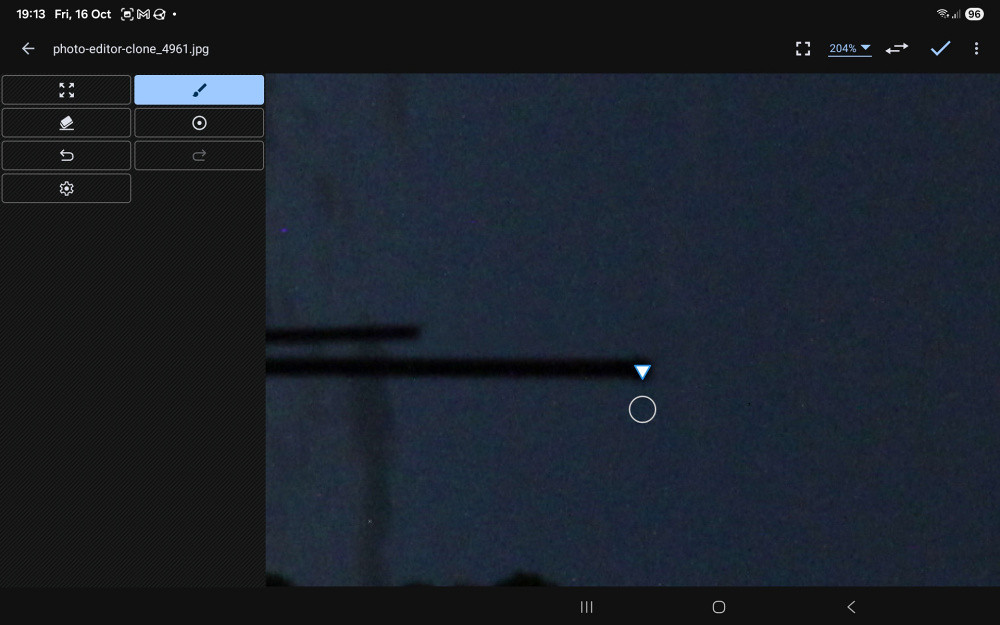
Positioning the clone source for the bottom pipe
Now remove the bottom pipe.
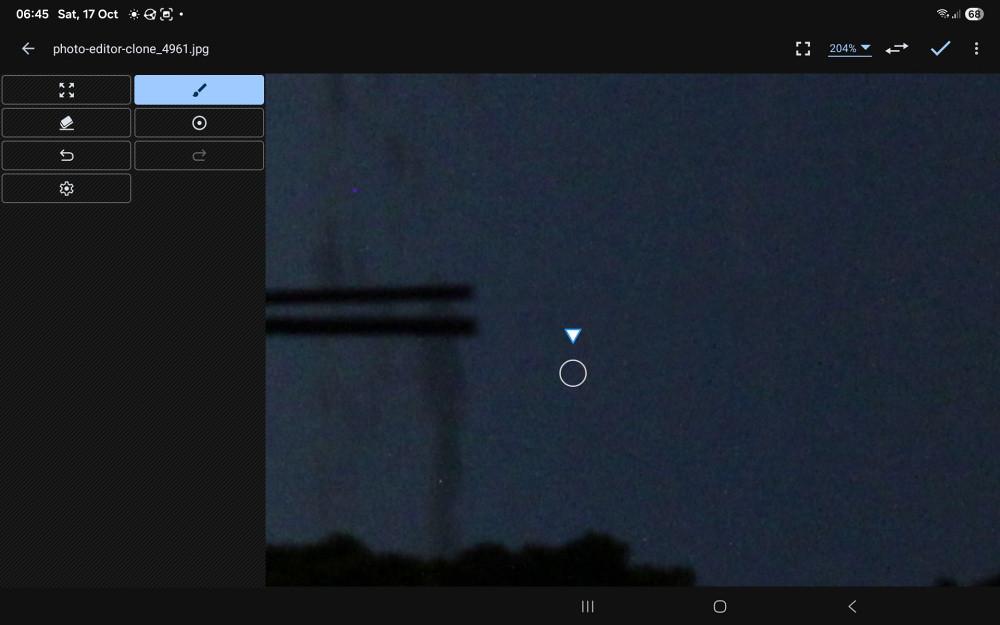
The righthand section of the pipe removed
What you can now do is to zoom in further and remove a bit more of the pipes closer to the cloud. You don't have to get too close as you will remove the final bits when cloning the cloud.
The first cloud
For the clouds, the zoom level will have to be set to its maximum (300%). We will start with the cloud on the right. This cloud ends beneath the top pipe and tapers towards it, which makes this part of the tutorial quite tricky.
Firstly, decrease the brush size to between 25 and 30, as we will be working more finely. Then place the clone source in the middle of the cloud below the bottom pipe.
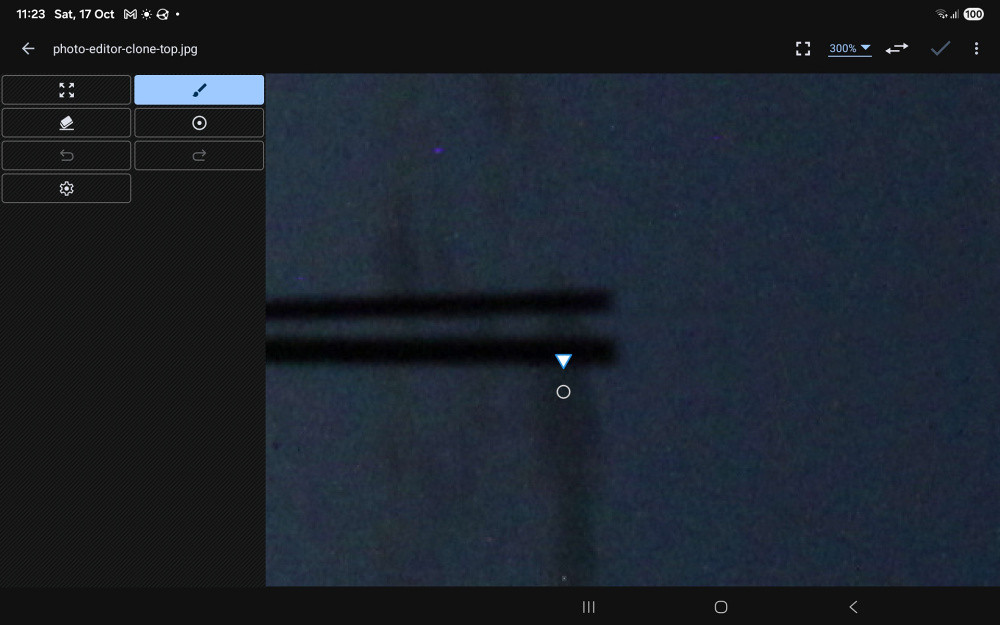
Positioning the clone source for the cloud
Now carefully remove the pipe, taking care not to clone it back into the image. Lift the brush periodically and reposition the clone source so that it remains within the cloud. Be particularly careful to stay within the cloud's boundaries above the pipe.
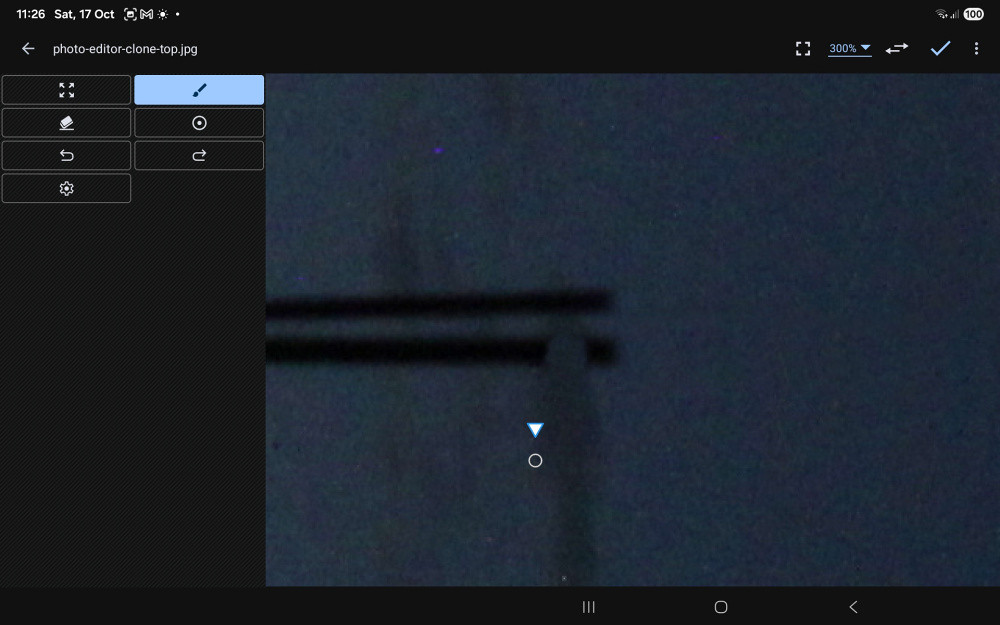
Positioning the clone source for the sky on the left of the cloud
With the clone source positioned as shown, paint over the pipe towards the left to extend the sky to the left of the cloud. Then do the same on the right-hand side of the cloud.
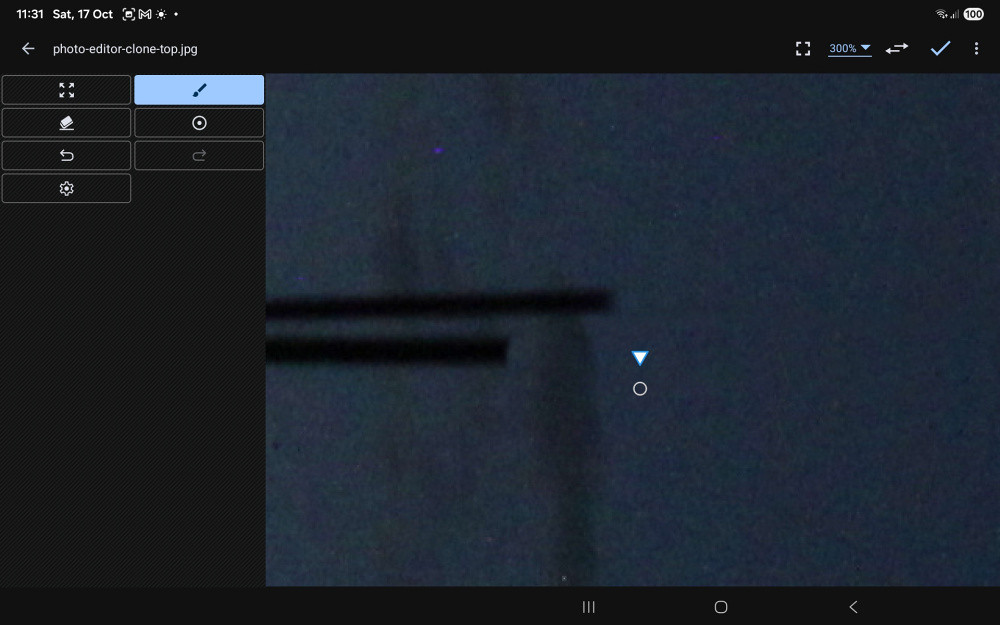
The bottom pipe covering the cloud removed
The top pipe can be removed in the same way. Carefully sculpt the cloud to follow its expected shape. Remember, it only needs to look realistic. If you are unhappy with any bits of the cloud, reshape it using a brush with low opacity and a suitable source. You may need to go over the same area several times, but the lower opacity will help blend the new cloning with what is already there.
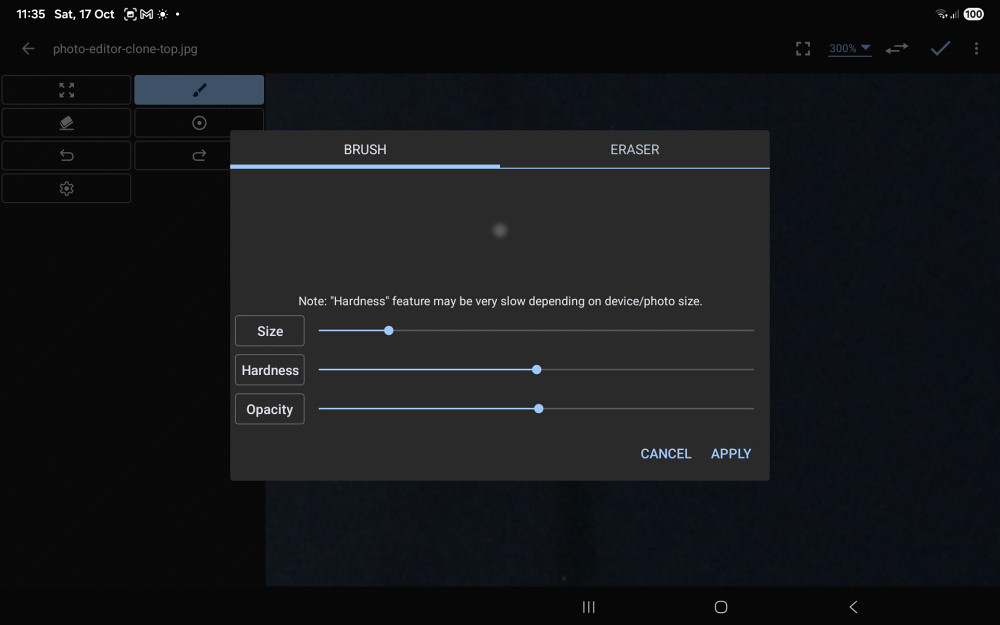
Changing the opacity of the brush
The really wispy clouds
If you look carefully at the position of the clone source , you will notice the wispy clouds form a V, starting above the top pipe and meeting below the bottom pipe. When cloning, looking for fine detail like this is very important.
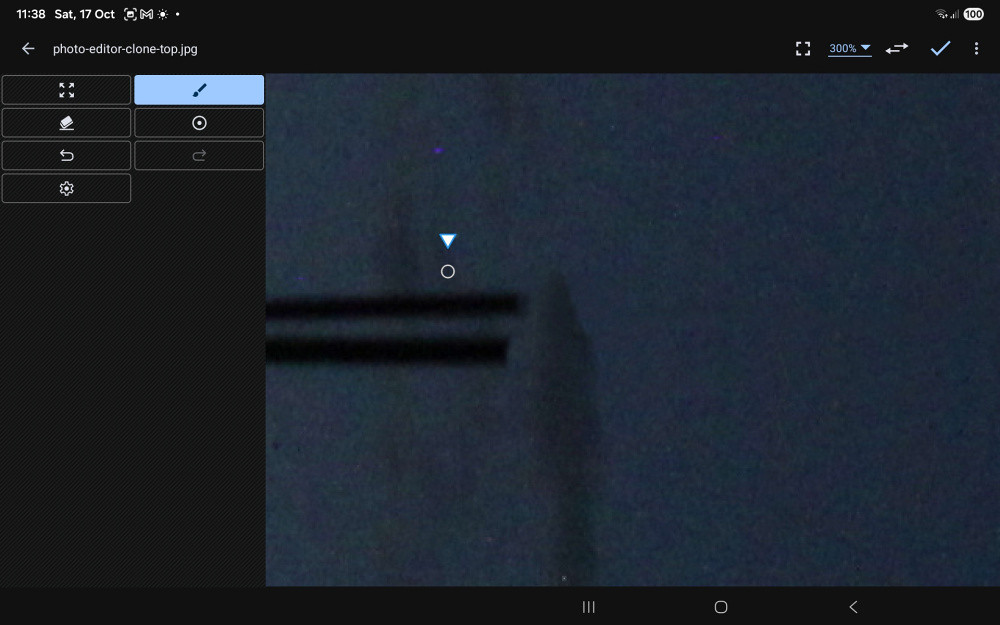
Positioning the clone source for the left arm of the V
Set the opacity back to 100% and start painting downwards, but this time diagonally following the line of the V rather than vertically. Take care not to clone the pipe.
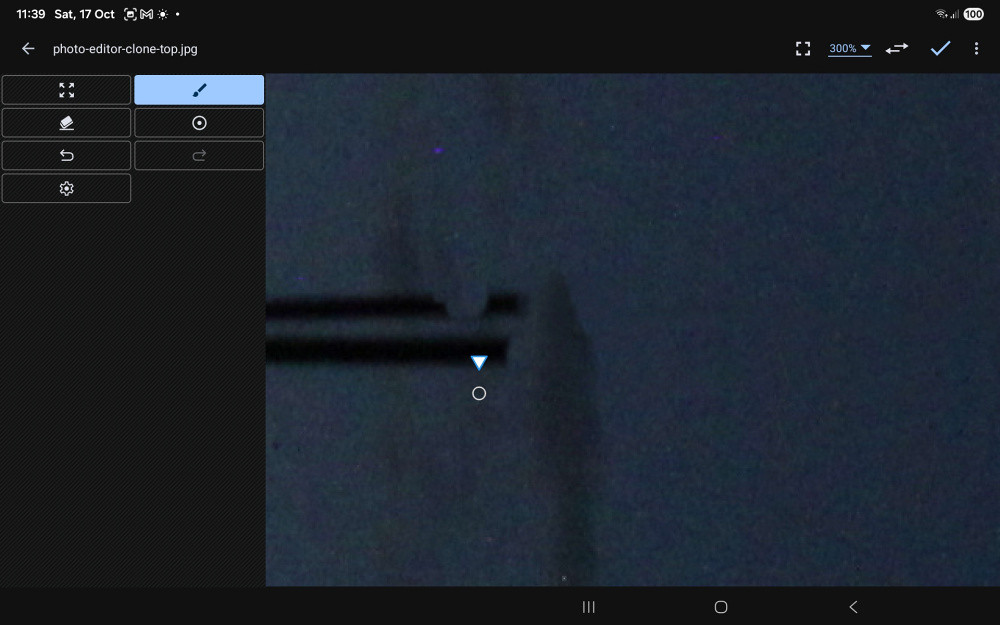
Positioning the clone source for the bottom of the V
From the bottom of the V, carefully clone over the bottom pipe, working diagonally upwards, towards the area you have just cloned. You will probably need several passes to complete this. Once you have joined the two sections of left arm of the V, repeat the process for the right arm. Finally, remove any remaining traces of the pipes.
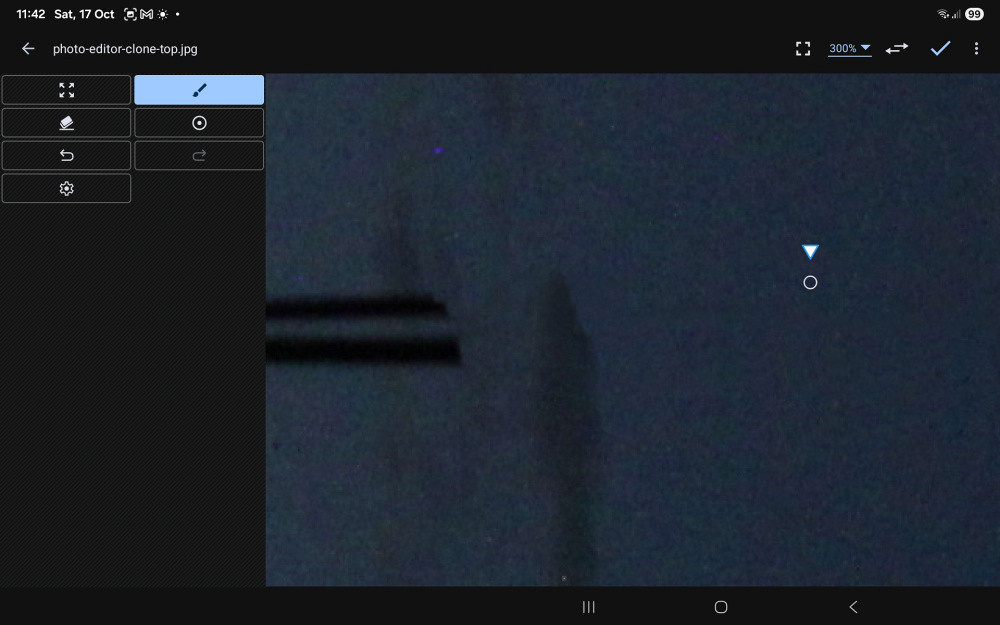
Completing the V
Now, remove both pipes below the darkish cloud to the left of the V. I worked from the bottom upwards and, as you can see, ended up with a very straight edge that is very much lighter than the cloud. We can fix this using the darker area of the cloud.
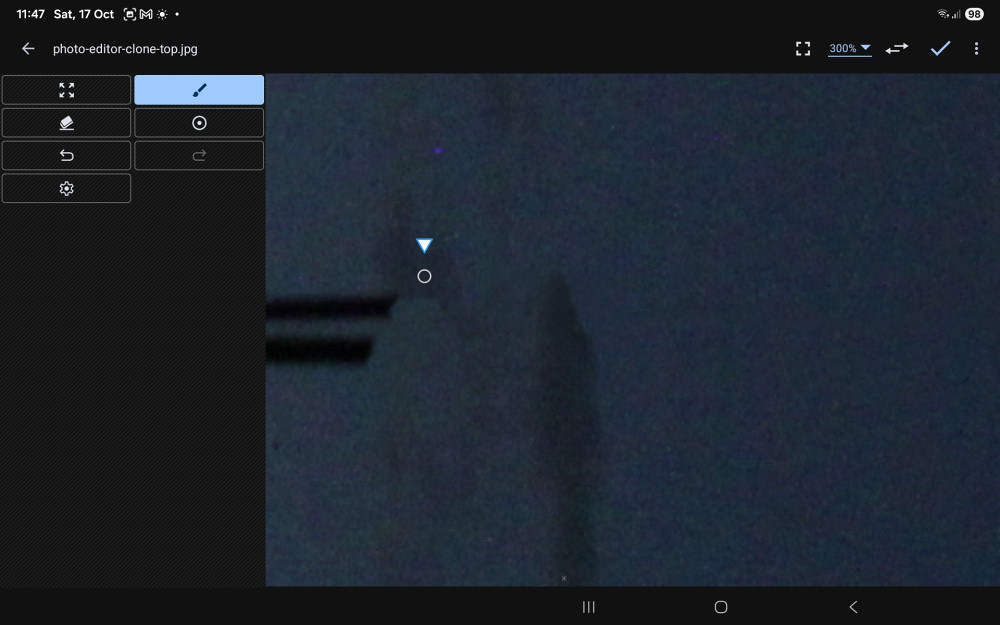
Positioning the clone source to soften the straight edge
Decrease the opacity of the clone brush, and paint a curved edge to the cloud to soften the straight edge. Several passes may be necessary to achieve the right effect.
The final stretch
You can now remove the pipes up to the edge of the last cloud in much the same way as in the first part of the tutorial.
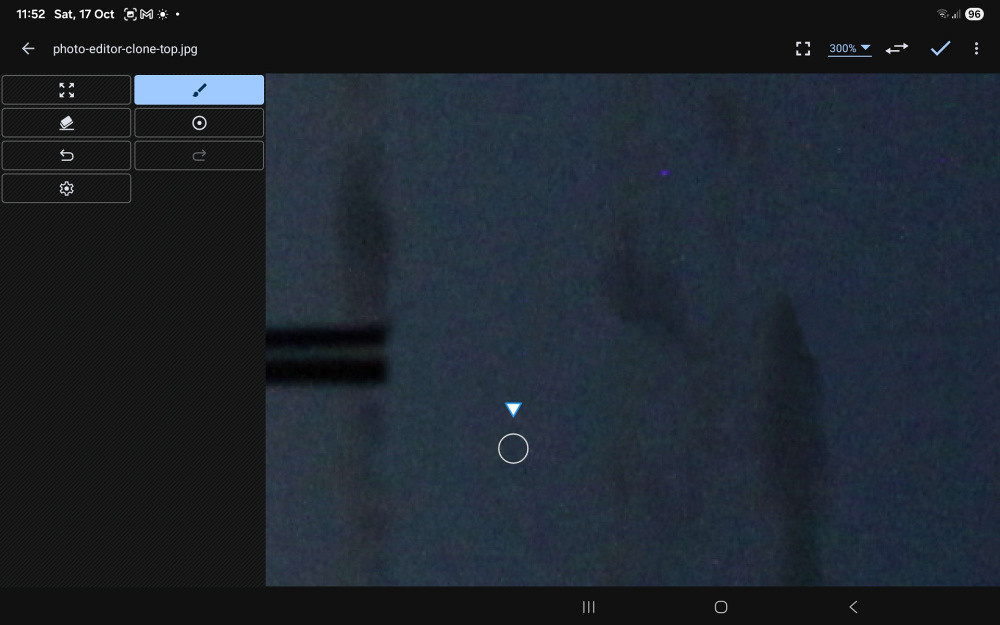
Removing the pipes up to the last cloud
Removing the pipes from this last cloud is relatively straightforward.
Zoom out a little, so that the last cloud and the top of the roof are visible. You will notice the two pipes appear to merge into one We are going to take advantage of this to remove them with a minimum of strokes. For this, we will increase the brush size to just larger than the combined width of both pipes.
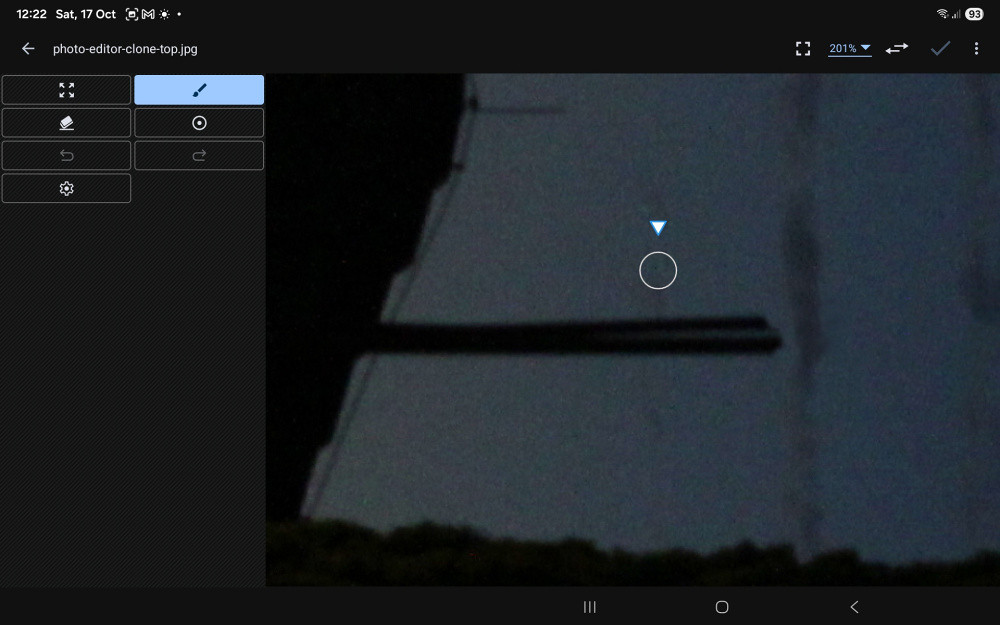
Positioning the clone source for the penultimate strokes
The clone source is positioned over another indistinct cloud. From this position, paint to the right which will remove the pipe and extend the cloud slightly. Now reposition the clone source in a similar position to the one shown above and paint to the left, stopping short of the roof.
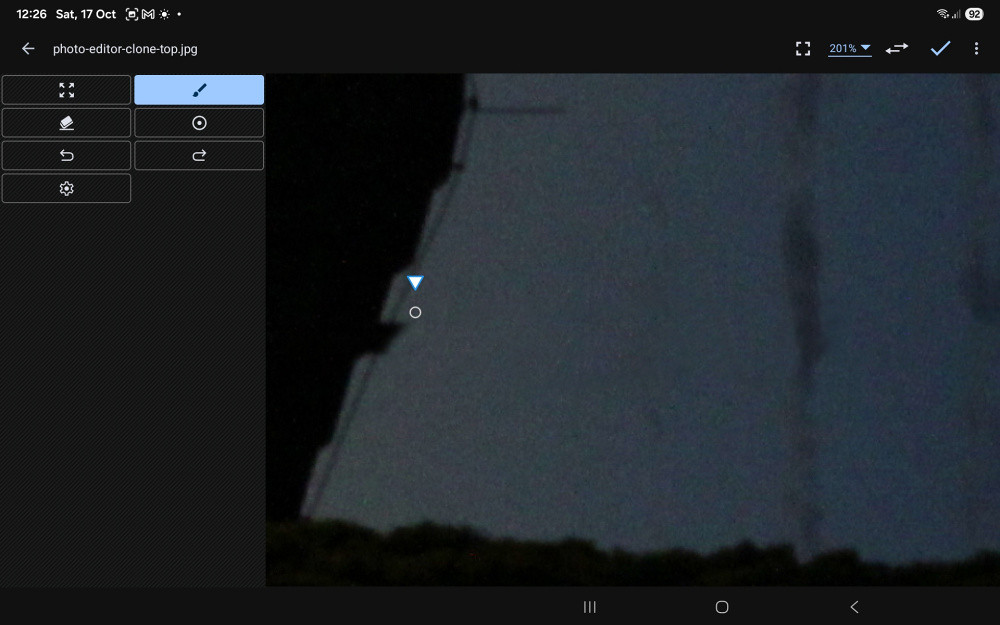
Positioning the clone source for the final strokes
You will notice a wire along the length of the ridge cap. Using a small brush, paint over the residual pipe up to the wire. The section of pipe to the left of the wire can be left as it is, since it lines up very nicely with the edge of a tile.
For good measure, remove the long wire on the apex of the ridge cap, as it will no longer have to deter any birds 😁.
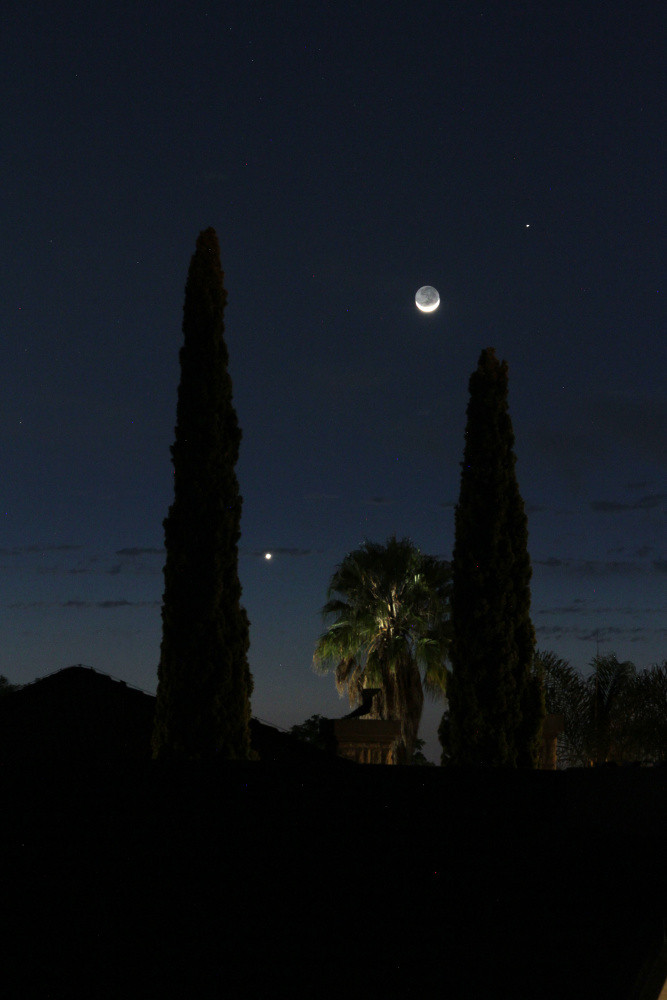
The finished product, rotated to its correct orientation
(18 October 2026)
Things to look out for
Apart from the points mentioned above, there are other things to be aware of when cloning. Two of these, which can be seen in our tutorial picture, are worth mentioning.
Clone trails
Clone trails occur when a recognisable pattern or feature in the source area is repeated in the cloned area, where it does not belong. This can make it obvious that the image has been edited.
Unfortunately, the trails I found in our tutorial picture are not particularly easy to see, partly because of the digital noise introduced by boosting the exposure. They may also be difficult to see on devices with low screen brightness. If you have trouble spotting them, try increasing the brightness of your screen while looking at the image below.
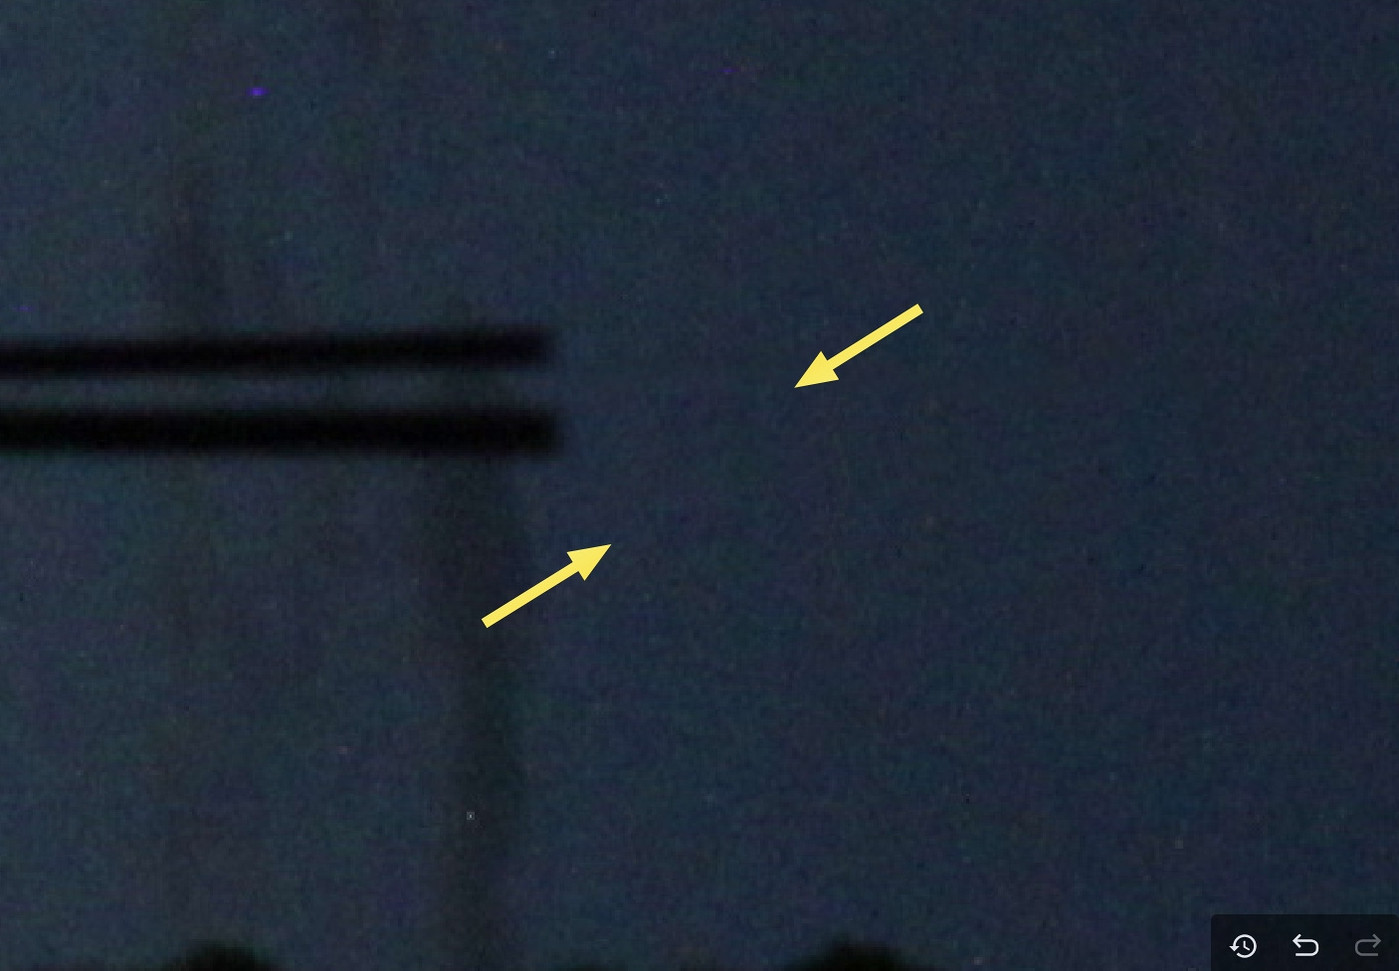
Clone trails
Fixing these is relatively easy, using some of the techniques mentioned above. My favourite is to use a soft brush with low opacity and a source that has the characteristics I am looking for. The original source that produced the unwanted pattern may also need a little attention!
Hot pixels
Hot pixels often become noticeable in photographs taken with long exposure times. These are bright or coloured spots caused by individual sensor pixels behaving abnormally. Long exposures, particularly when the sensor heats up, can make them more prominent. In night photography, especially when photographing stars, these spots can spoil an otherwise good image.
There are many hot pixels in our current image.
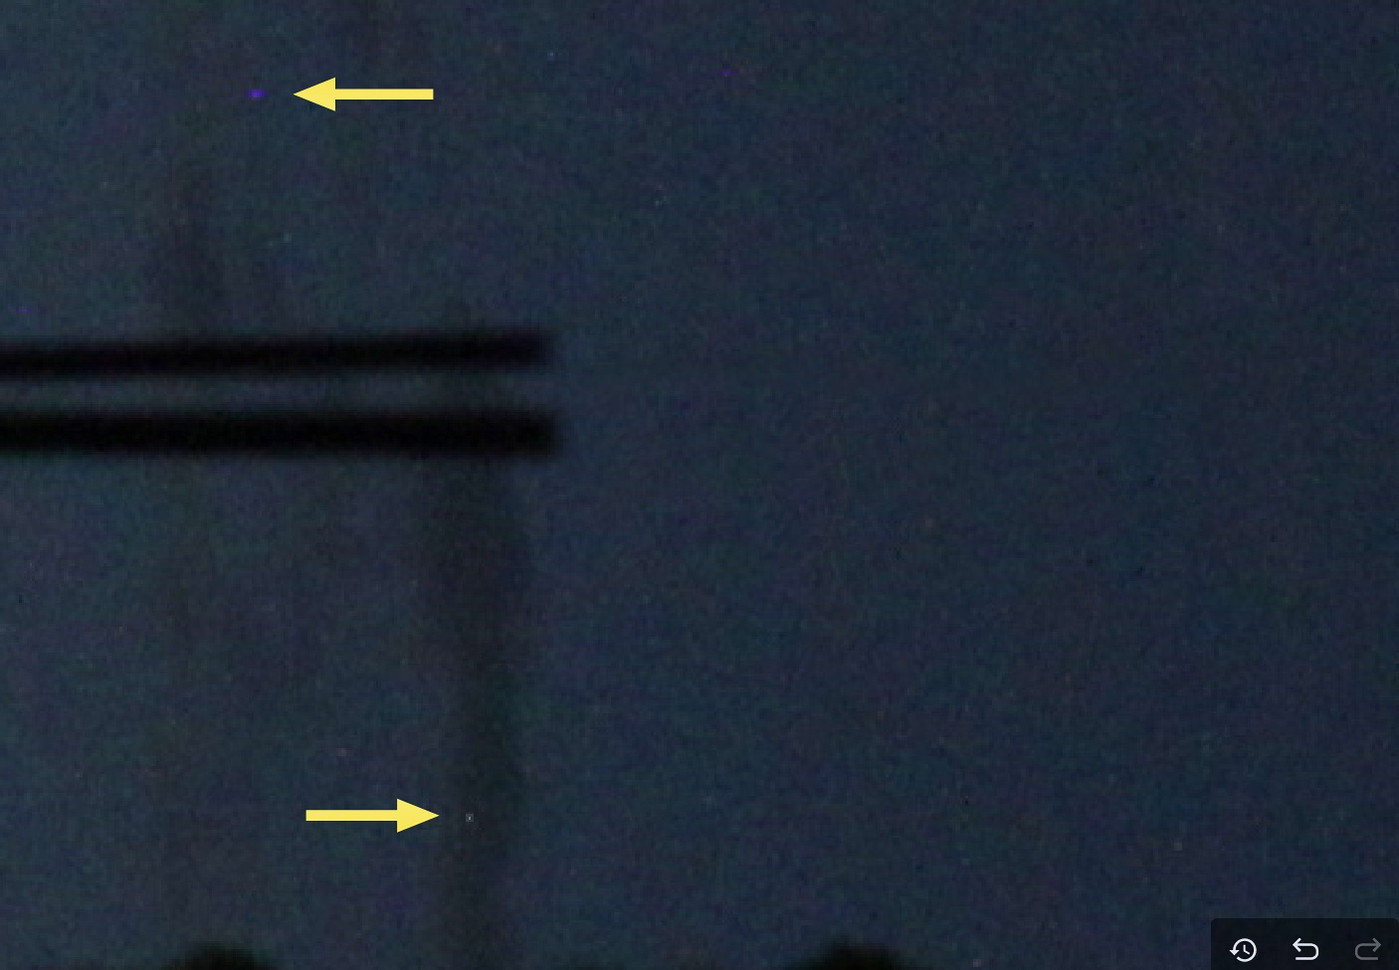
Hot pixels
Because of their small size, hot pixels are easy to fix. Choose a clone source very close to the spot, select a very small brush, and tap on the pixel.
An image can contain many hot pixels, making their removal a time-consuming task. If your camera supports it, enable its long-exposure noise reduction function. In Canon cameras, this is called Long exposure noise reduction.
(20 October 2026)
Other cloning examples
Although I didn't use Photo Editor for these examples, the tutorial above should give you enough experience to try something similar.
The Wedding
One of my students asked me to remove the purple auntie from the photo below. It was taken on her parents' wedding day, and she wanted to give them a restored version as a present for their 25th wedding anniversary.
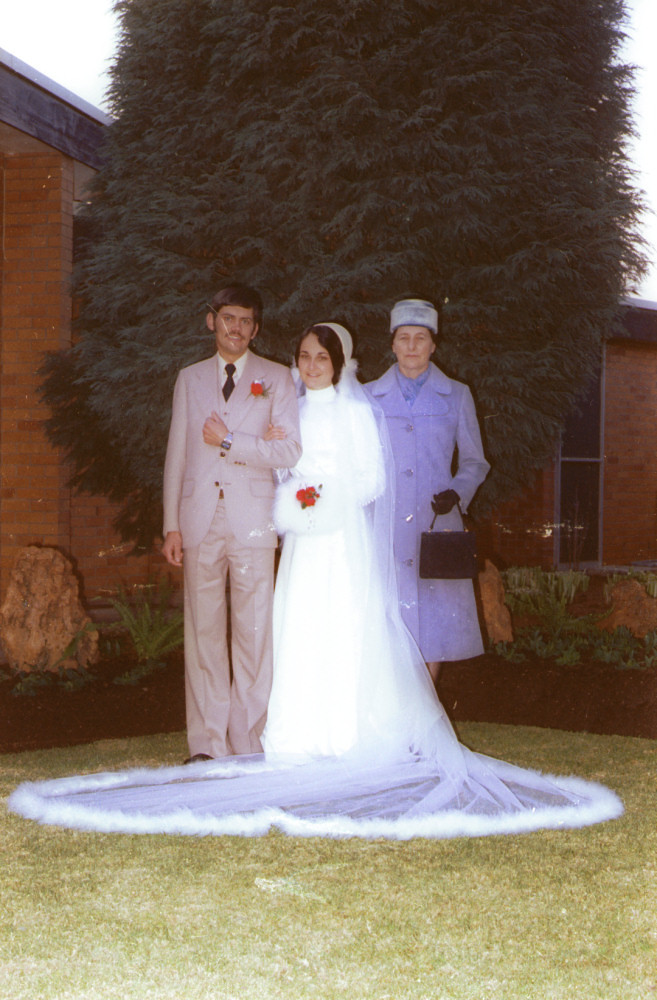
Before
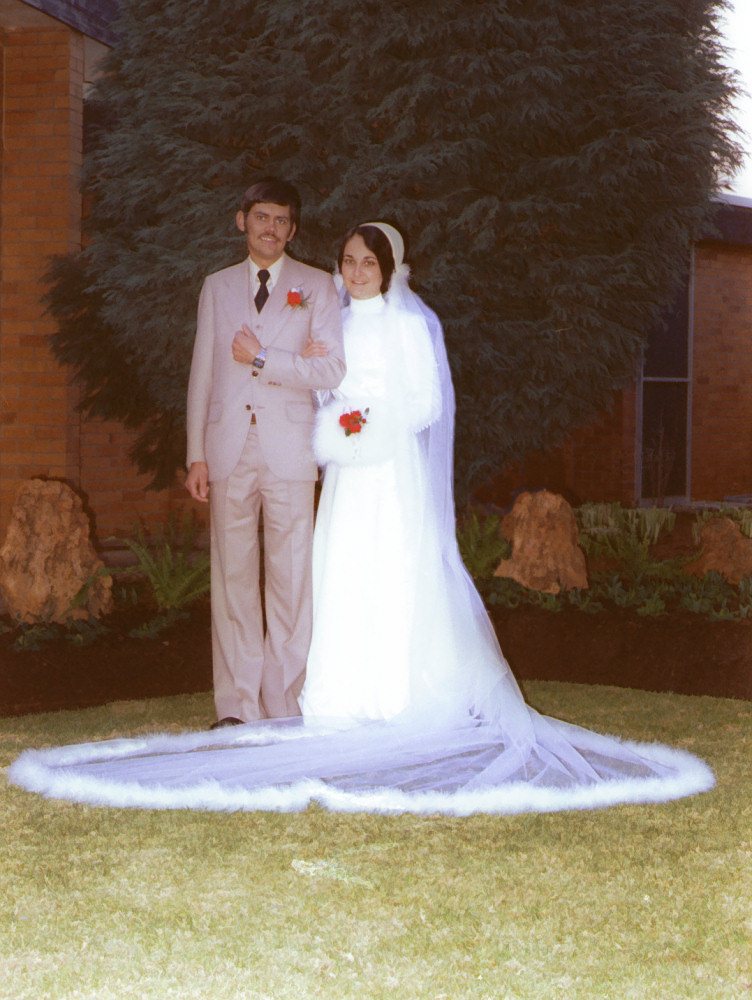
After
Look carefully and you can still see traces of the purple auntie through the veil. I left these in place because the train also has a purple cast where it lies on the grass. Rebuilding the rock involved considerably more than cloning; painting was also needed.
Fixing an AI diagram
For my page on Venus Flytraps I asked several AIs to draw a labelled diagram of a plant. I chose the one from Gemini as it looked the most realistic.
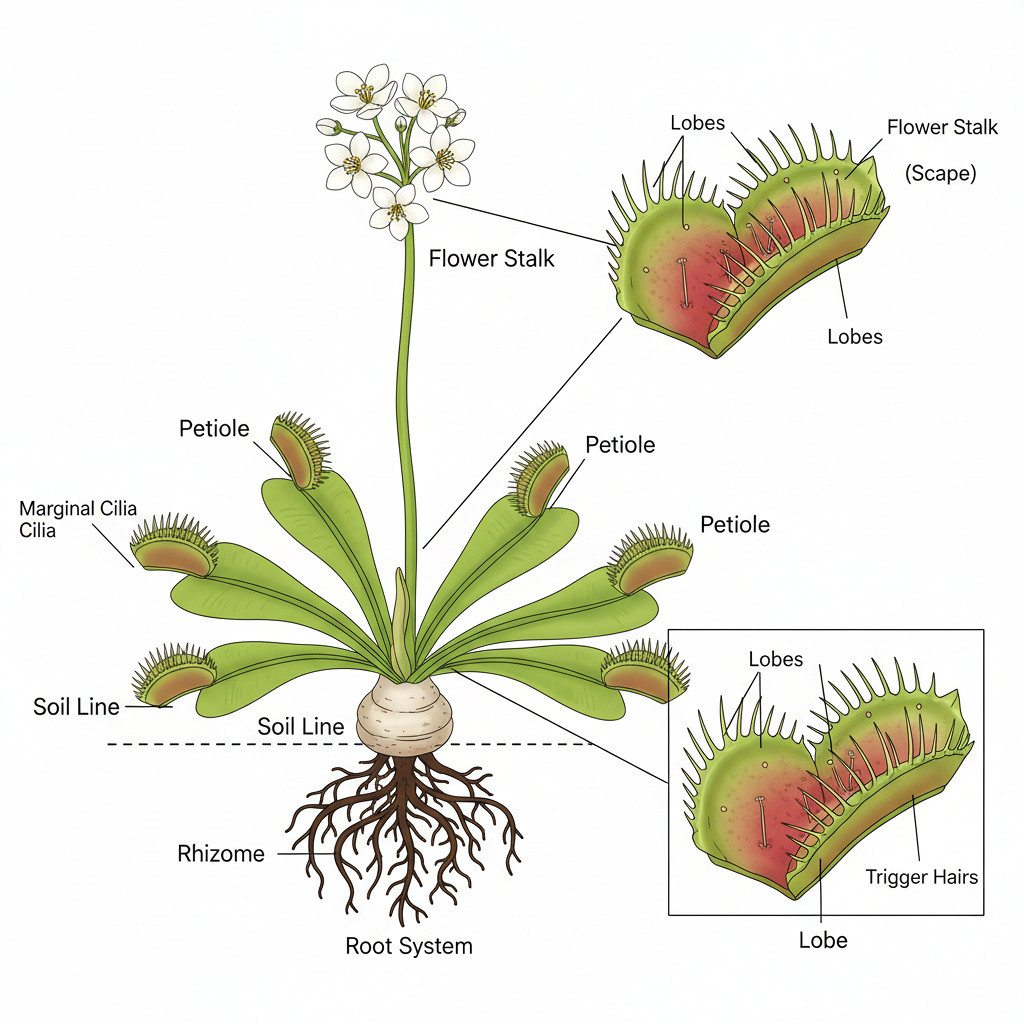
A labelled diagram of a Venus Flytrap plant from Gemini
Many features of the plant are mislabelled, the trap in the exploded view looks deformed and there was really no reason to have the exploded view duplicated. I set myself the task of fixing the deformed trap, relabelling the relevant features and removing the lower exploded view.
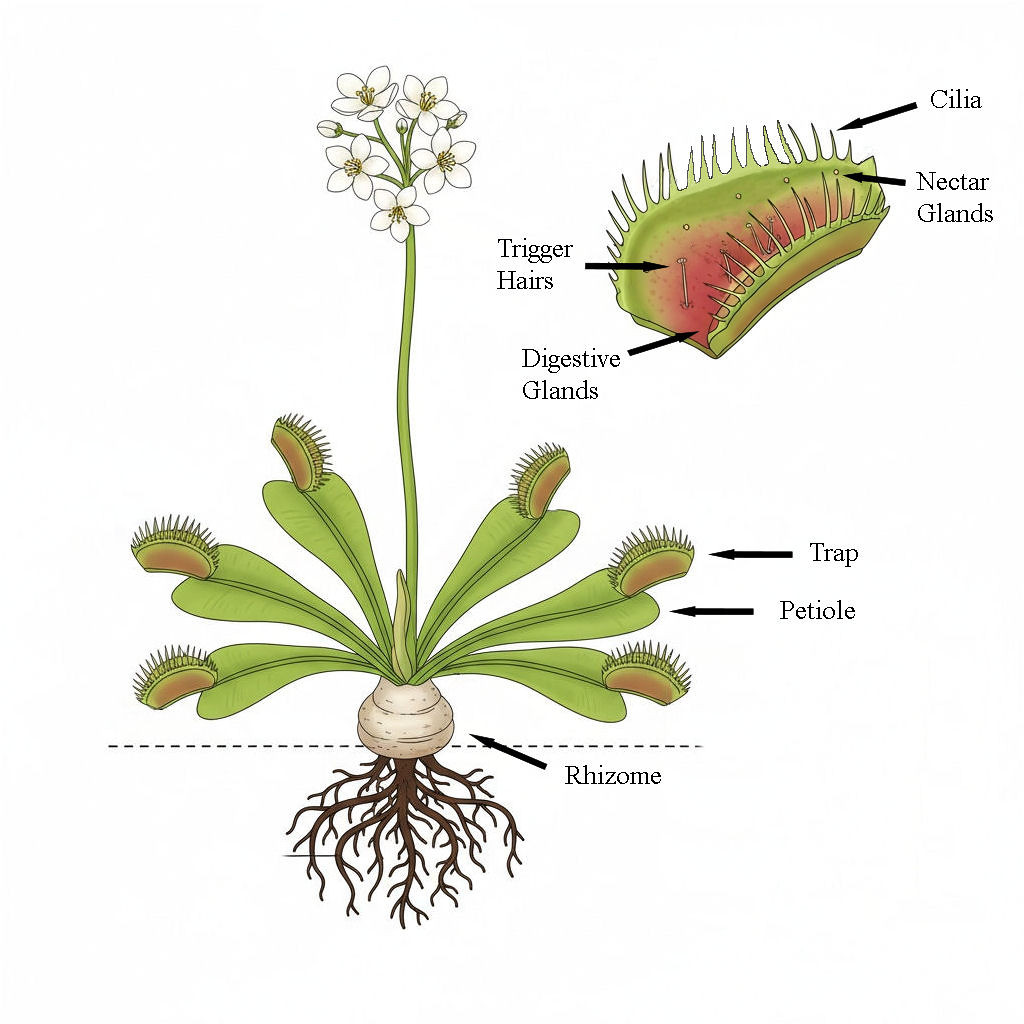
A repaired diagram
Fixing the trap required cloning areas of the trap and painting in new cilia in places. All the existing labels and lines had to be replaced to maintain a consistency with the font used — cloning was required to remove the existing lines and text. The lower exploded view was removed with cloning rather than an eraser tool to maintain the background colour.
Cloning can be a very satisfying way of fixing images, whether it's adding or removing an object from a photograph, or correcting an AI-generated diagram.
(21 October 2026)
Return to Photo Editor
